Every person has a list of things they want to do in their life. Releasing my own game is on my list, and I've now done it!
I would like to thank all the people who supported me during the development of the game with their understanding, suggestions and tests. My family, colleagues, but especially the following friends who have tested the game with me again and again: Ekty, Moztr, Shutdown
So it's not over yet, I'm determined to continue to support and improve my game in the future!
I can't believe it, after 7 intense years of development, the game will release in about 2 weeks on 2023-11-27!
When I started developing the game, the initial idea was having a project for 1 year. Only static turn-based tactical battles, staying mostly in a FTL-like view and micromanaging ship systems from there. But the vision for the game was quickly getting more and more ambitious, away from static battles to controlling ships in a dynamic 2D world while still keeping all of the micro management without overwhelming the player at the same time. By centering the game around a campaign with ship progression and RPG elements. By developing a game design that allows all different kinds of game modes. And of course also by providing a much better replayability by including a ship- and scene editor and even providing the possibility to implement own code in groovy programming language.
I worked on the project alone the entire time and only in my free time, alongside my full-time job in a technical management position, which in itself is very demanding both in terms of expertise and time. There were times when my agenda for the game definitely felt a bit too ambitious, and as is probably usual in such projects, there were a lot of ups and downs.
Now the development is finished. I'm still doing final tests and polishing some details, but the game is pretty stable already and the campaign plays exactly as I imagined.
I am aware that the game is rather niche, some elements, especially in the campaign, can be considered hardcore and therefore may not appeal to every player. But I hope that a community will form that has a lot of fun with the game and perhaps shares its own ships, scenes or even creates mods for the game.
I feel like an actor who has put a lot into a new play and now has doubts before the premiere.
Personally, I'm happy with the result and would definitely do it again despite all the effort!
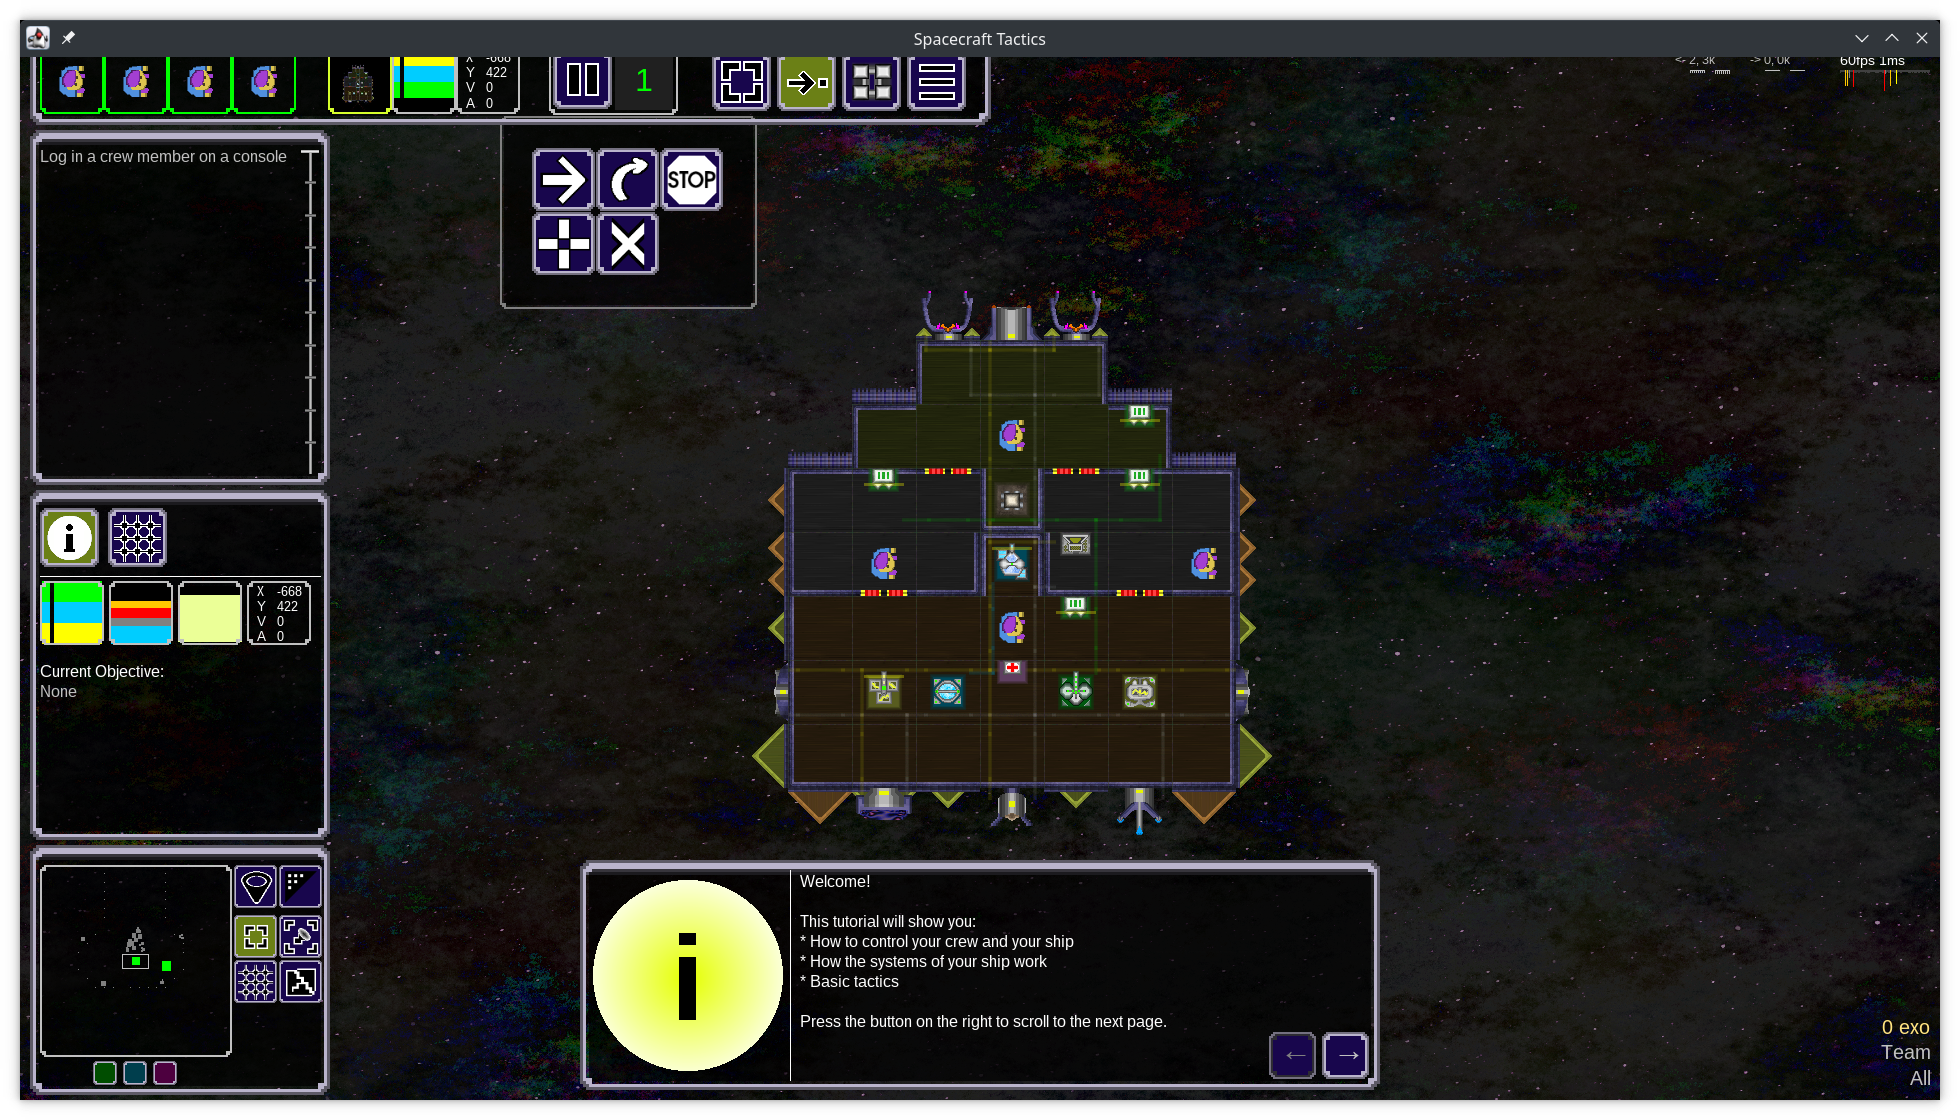
Spacecraft Tactics is a 2D turn-based tactical space game. Save the last rebel outpost in the campaign. Develop a strategy, execute it in tactical battles and micromanage your ship. Play various game modes single or multiplayer. Create your own ships, scenes or mods and share them.
Key Features
Progress through 5 chapters of the campaign, collect loot, craft items and upgrade your ship to overcome increasingly difficult challenges on 3 difficulty levels or in the integrated speedrun mode
Micromanage your crew and your ship while staying on top of tactical battles
Create and share your own ships and scenes in the built-in editors
Play single player or online co-op, PvE or PvP in the 5 included game modes
Designed to be modular from the ground up, Spacecraft Tactics supports community-created mods
Play the campaign
The last rebel outpost got spotted by imperial scouts. Relocate the outpost before the main fleet attacks!
Throughout the campaign you must collect loot, craft items and upgrade your ship to overcome increasingly difficult challenges
Adapt your strategy and loadout to different situations as you progress through the campaign
Play single player or online with a friend
Designed with multiple playthroughs in mind
Every playthrough is different
3 difficulty levels
Speedrun mode with predictable rng, special game design and integrated display of splits
Global highscores
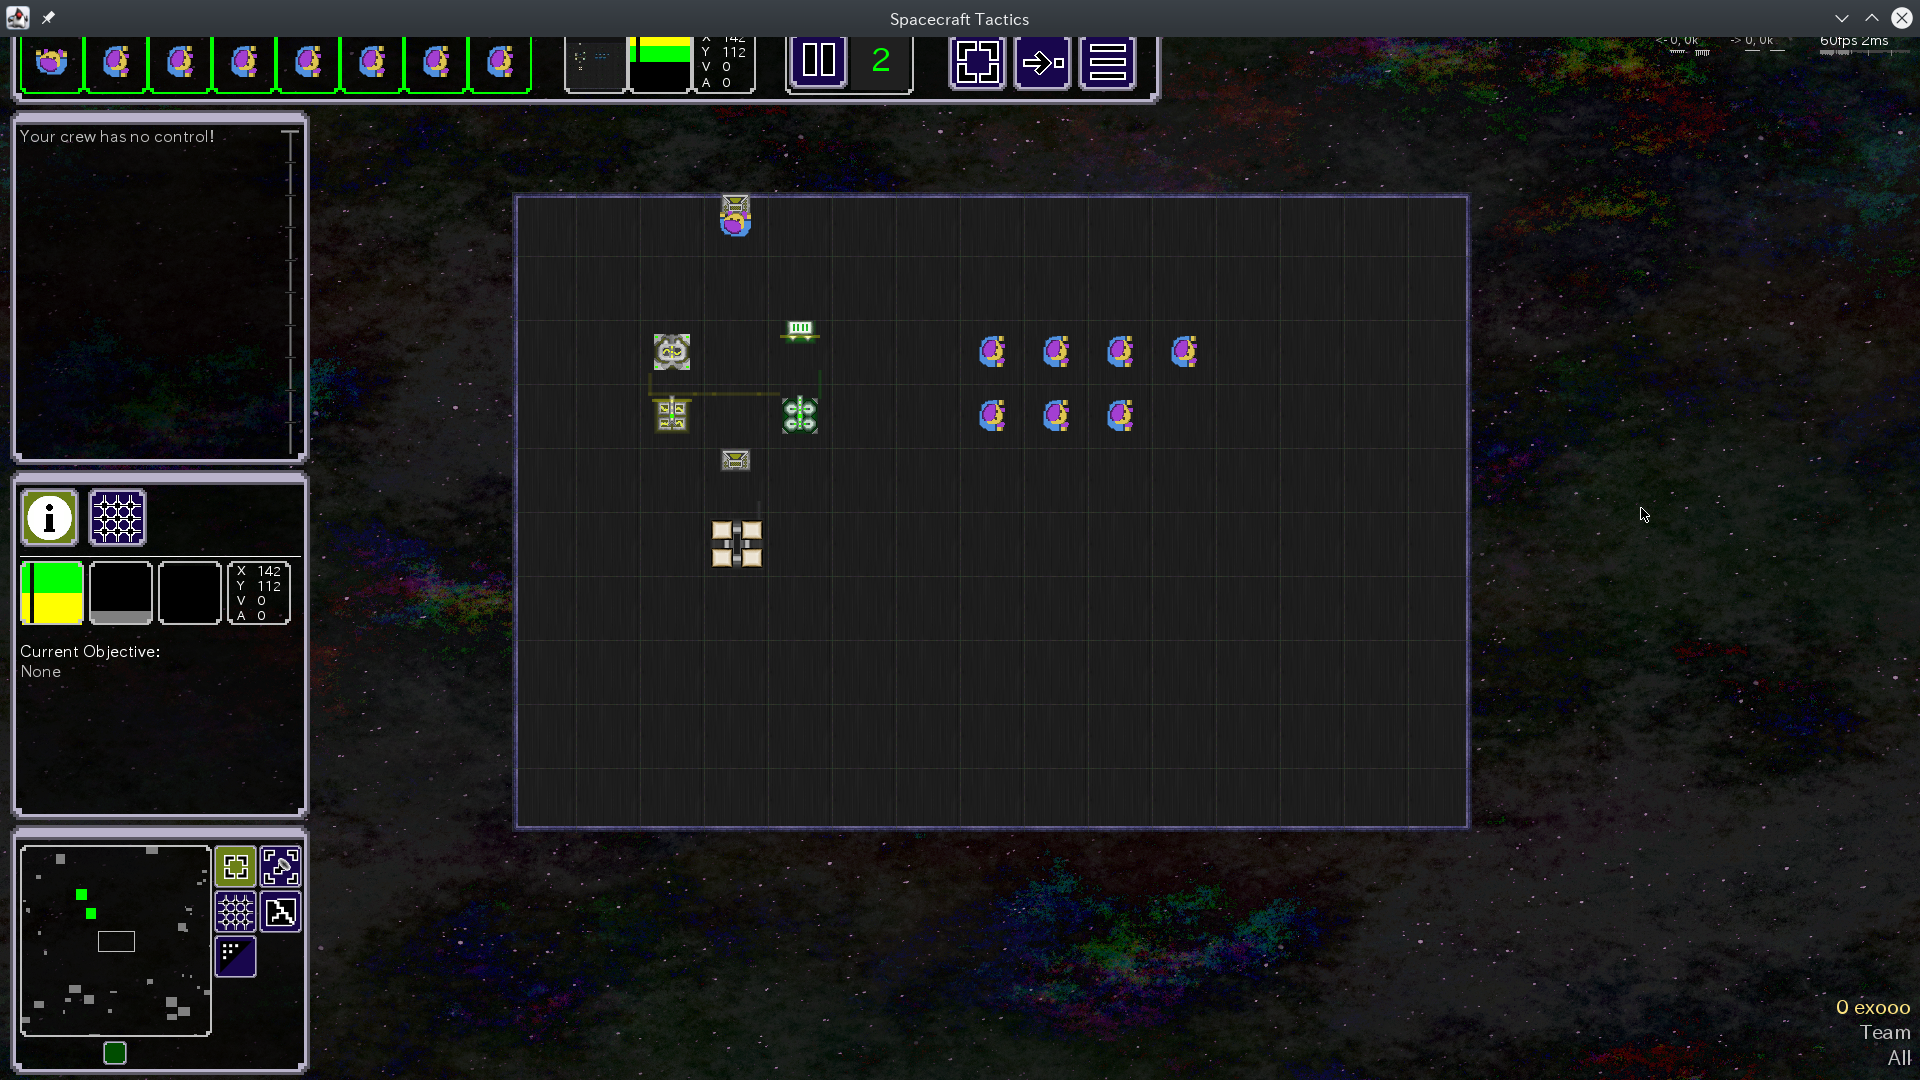
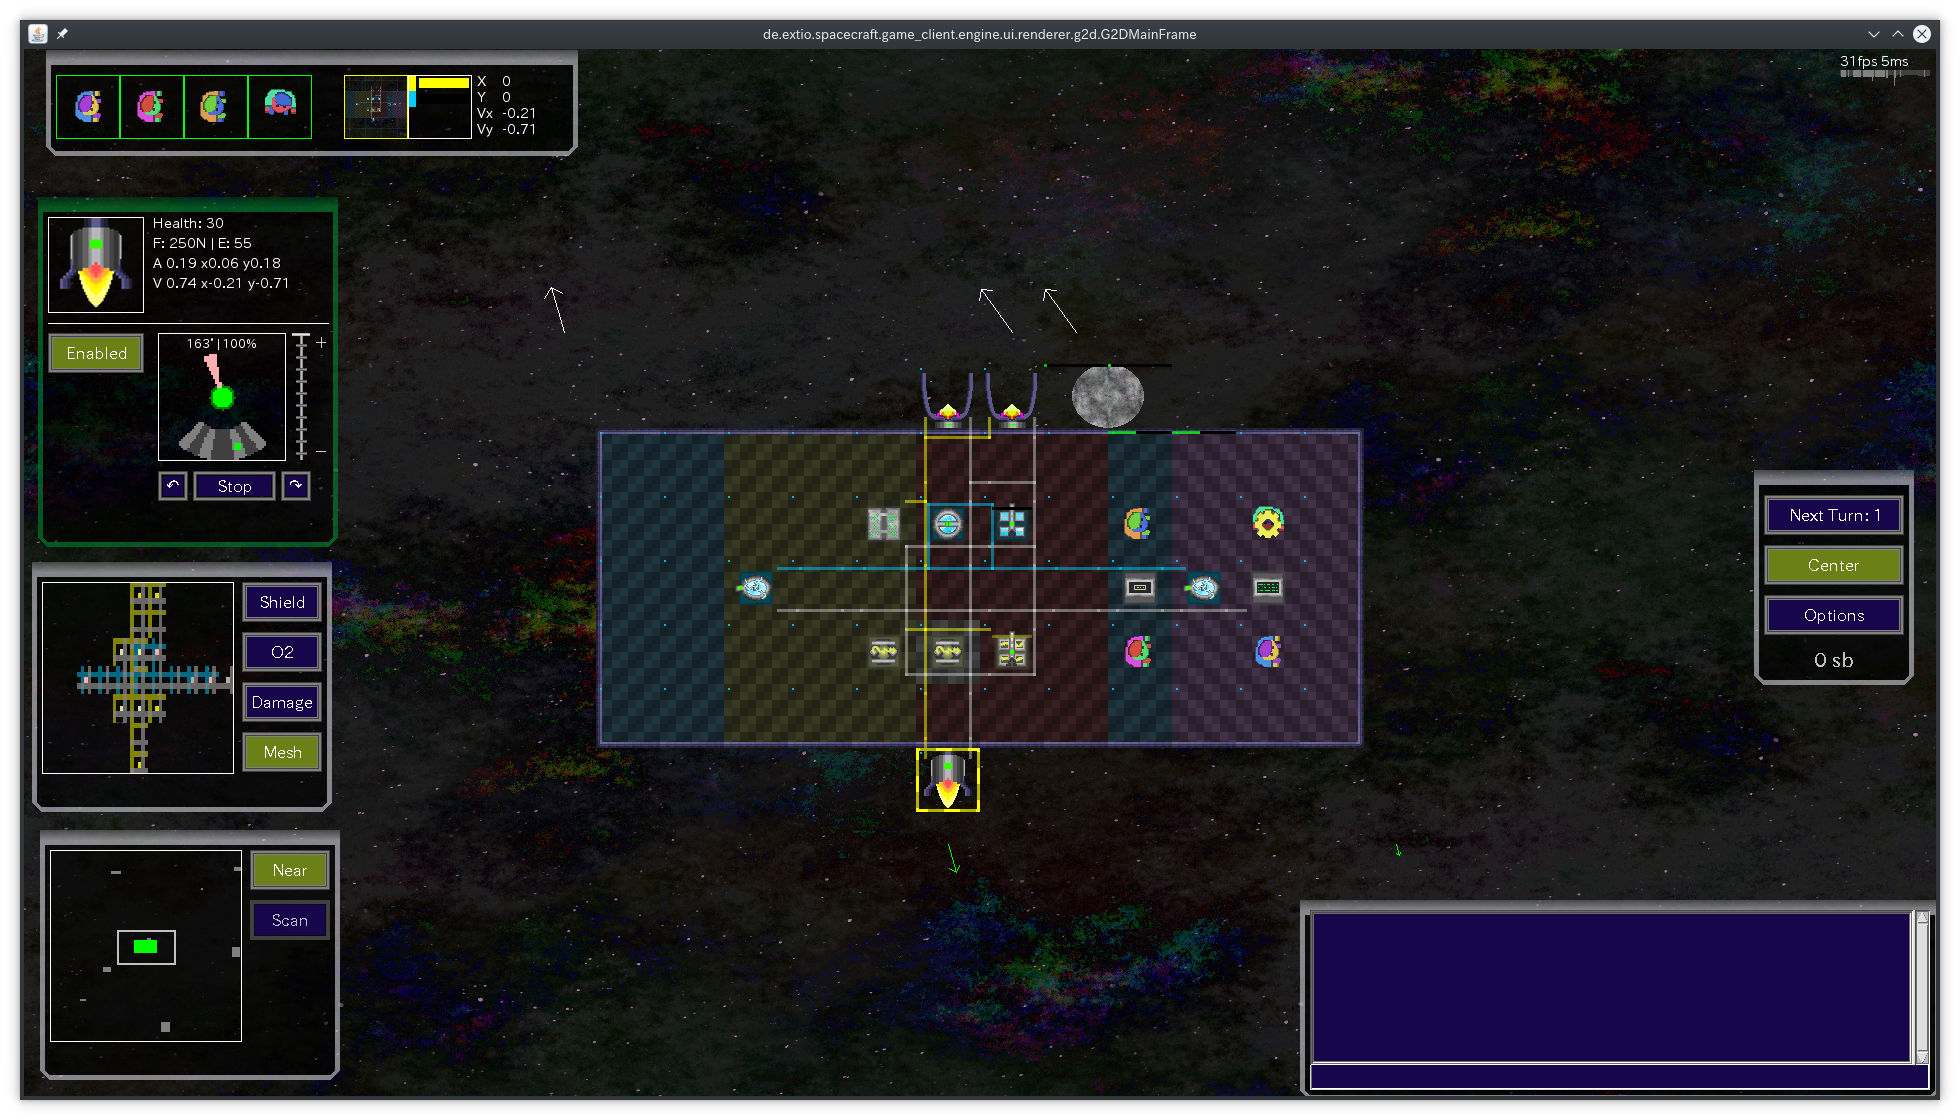
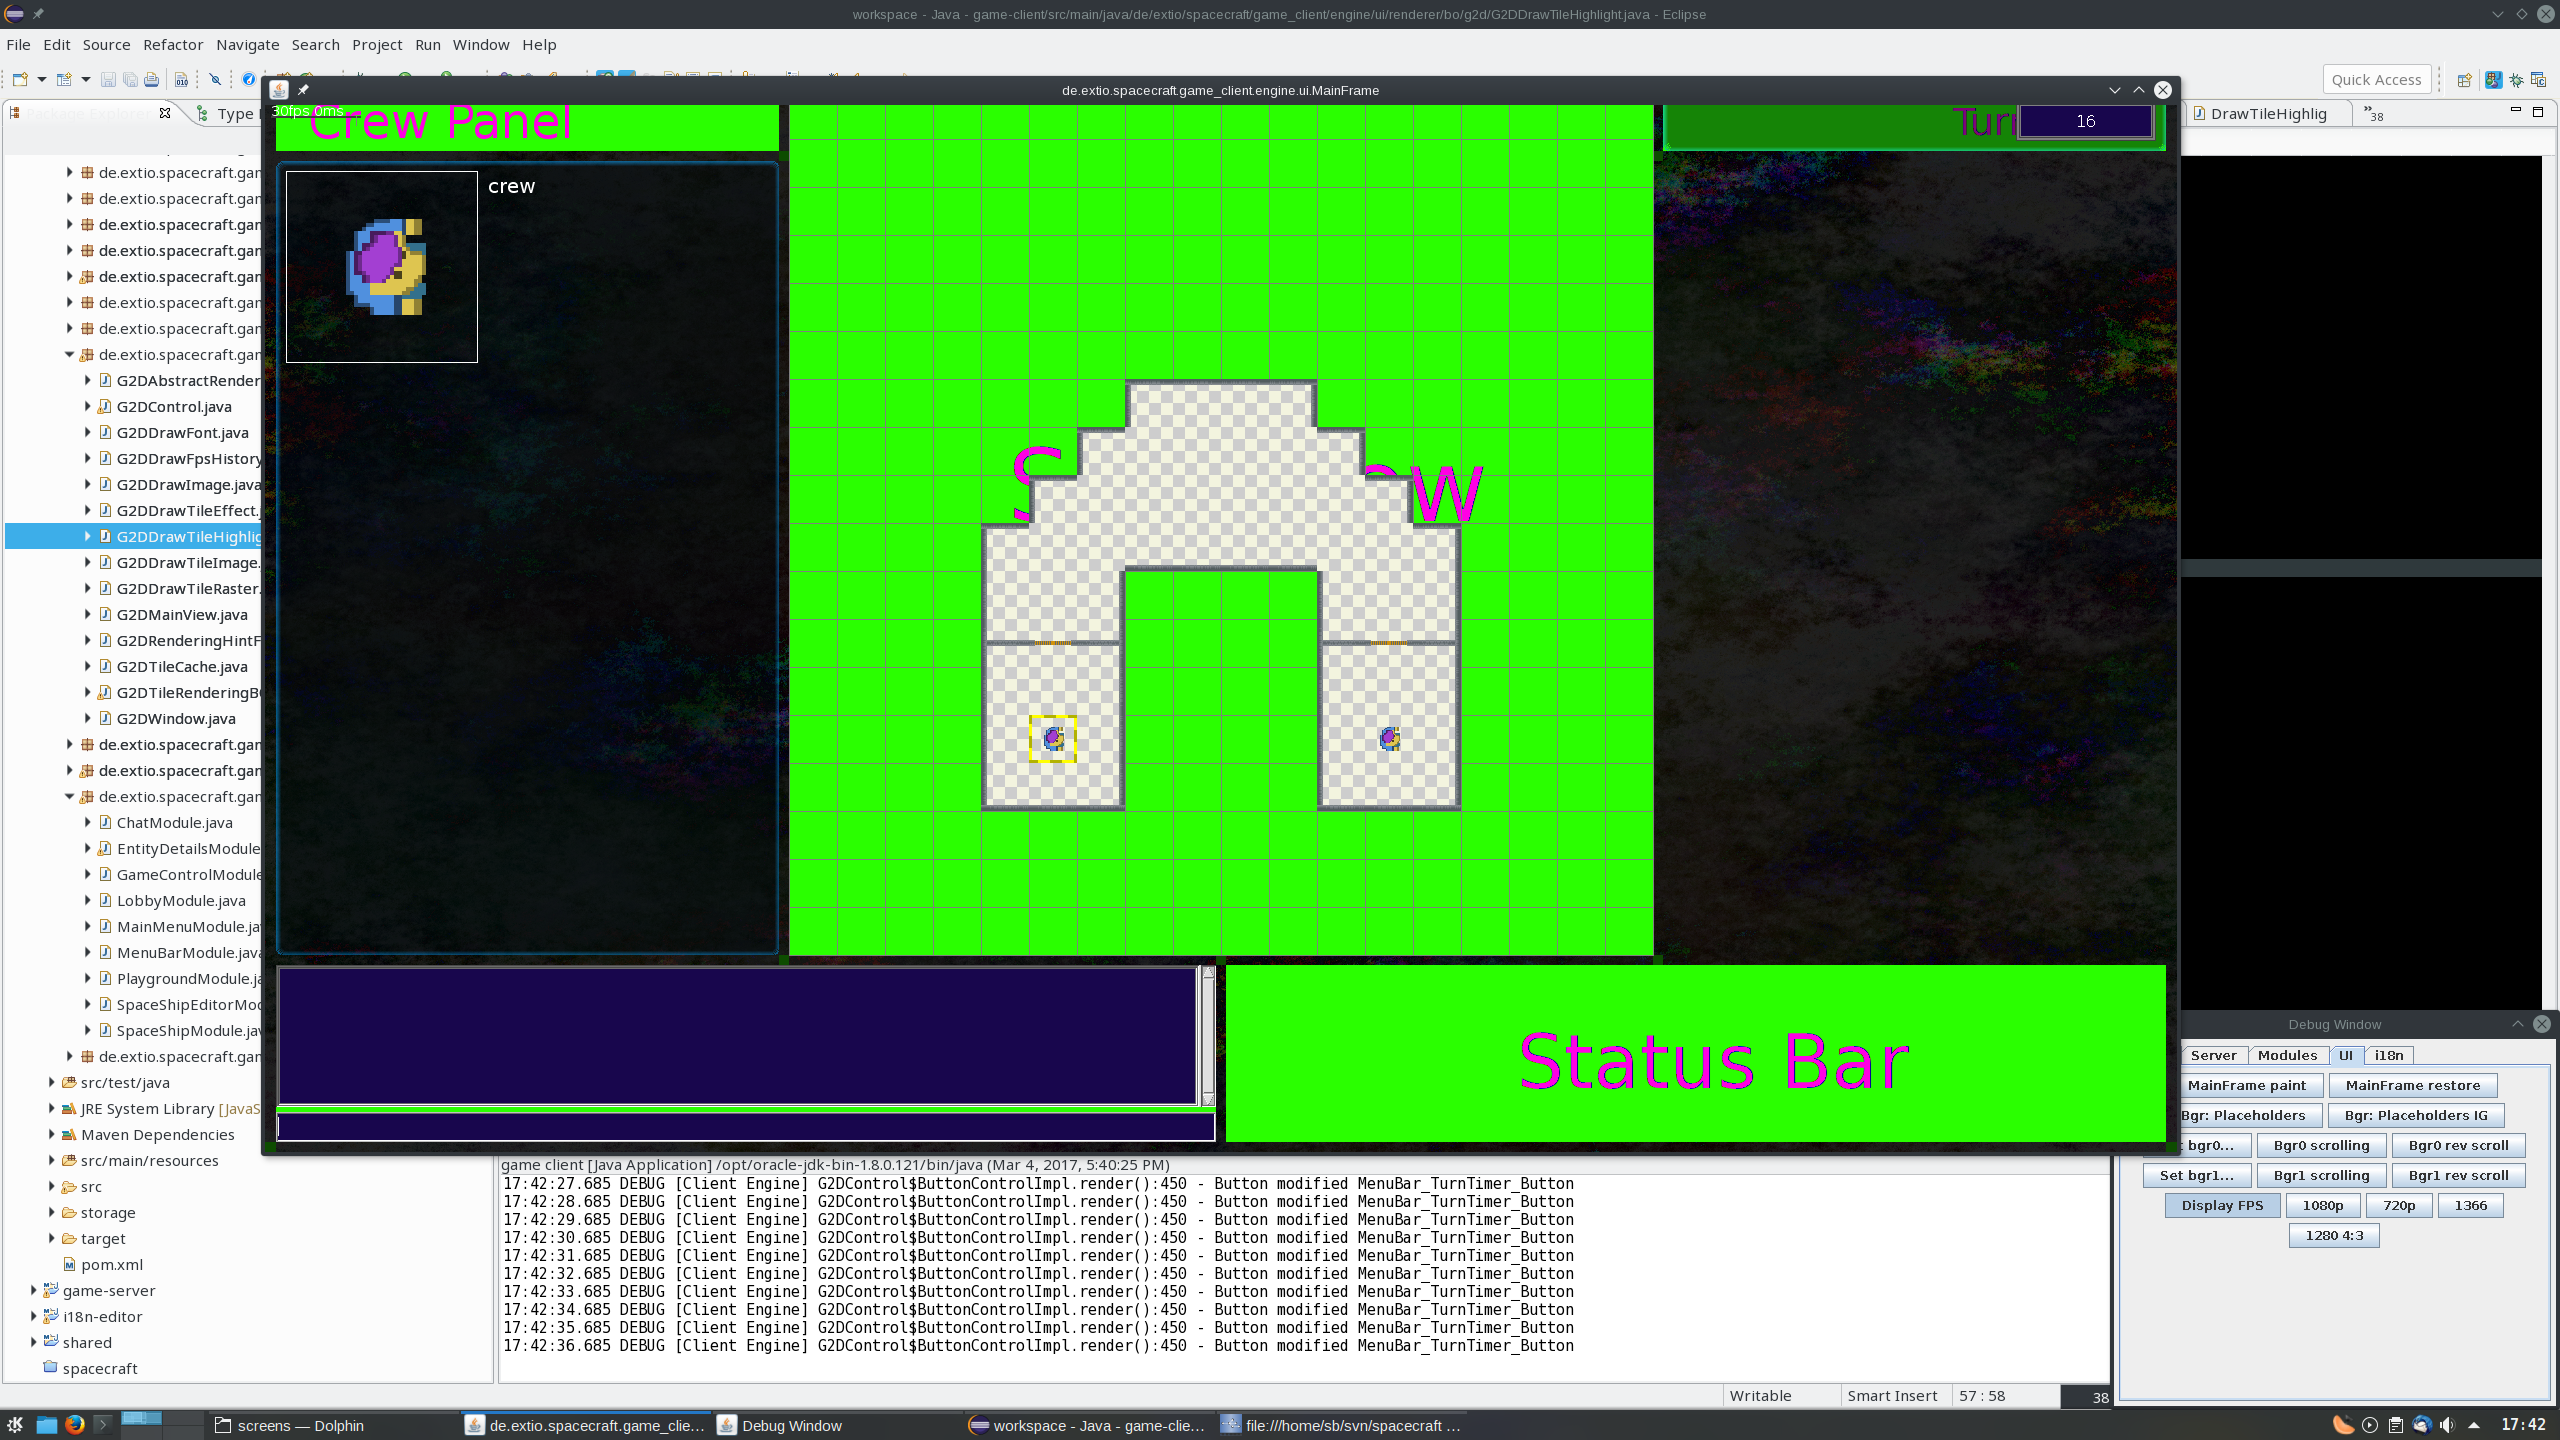
Micromanage your ship
Manage your crew
Control ship systems
Damage control
Heal and revive crew members
Manage inventories
Provide emergency power to systems
Automations
Distribute energy between systems
Systems are connected to and powered by grids:
Energy
Shield
O2
Network
Maintain fields
Shield (Shield emitters)
O2 (Air vents)
Healing (First aid stations)
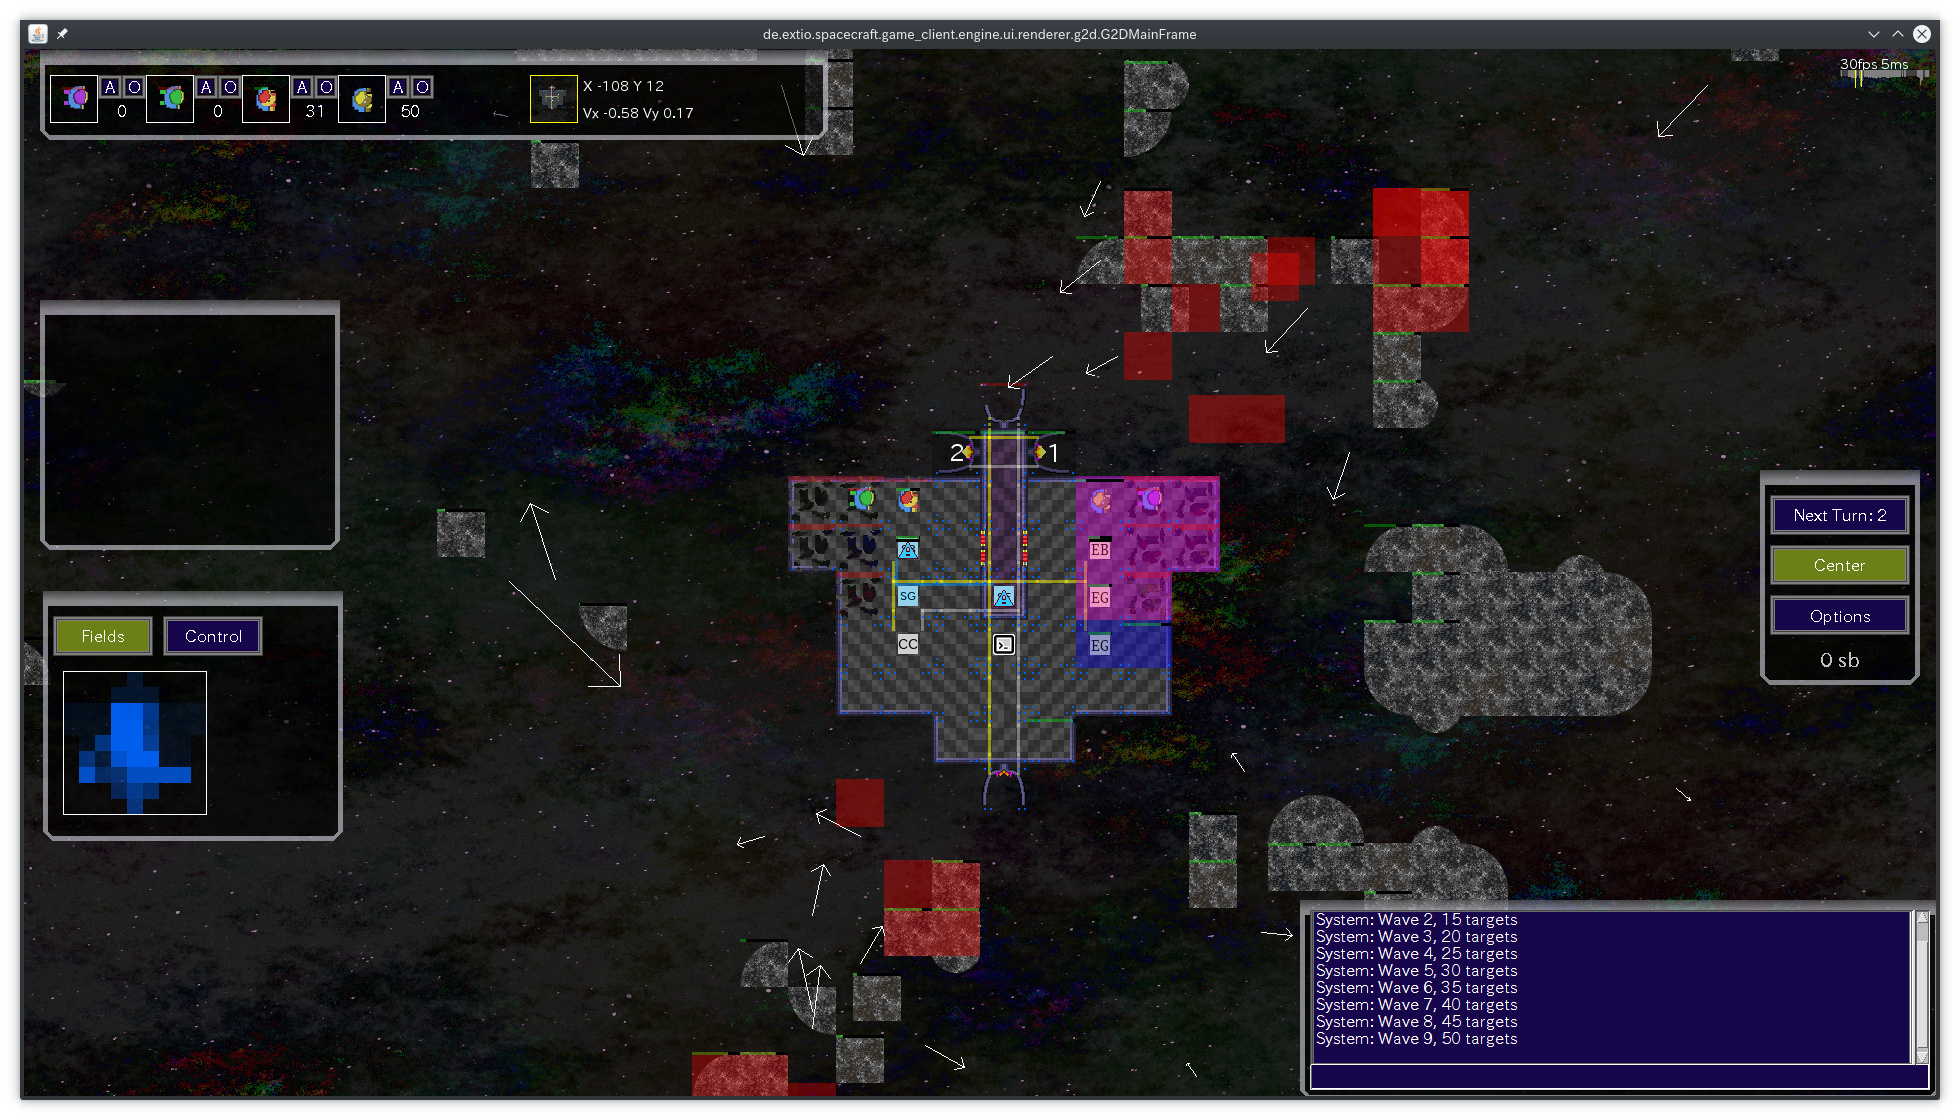
Tactical battles
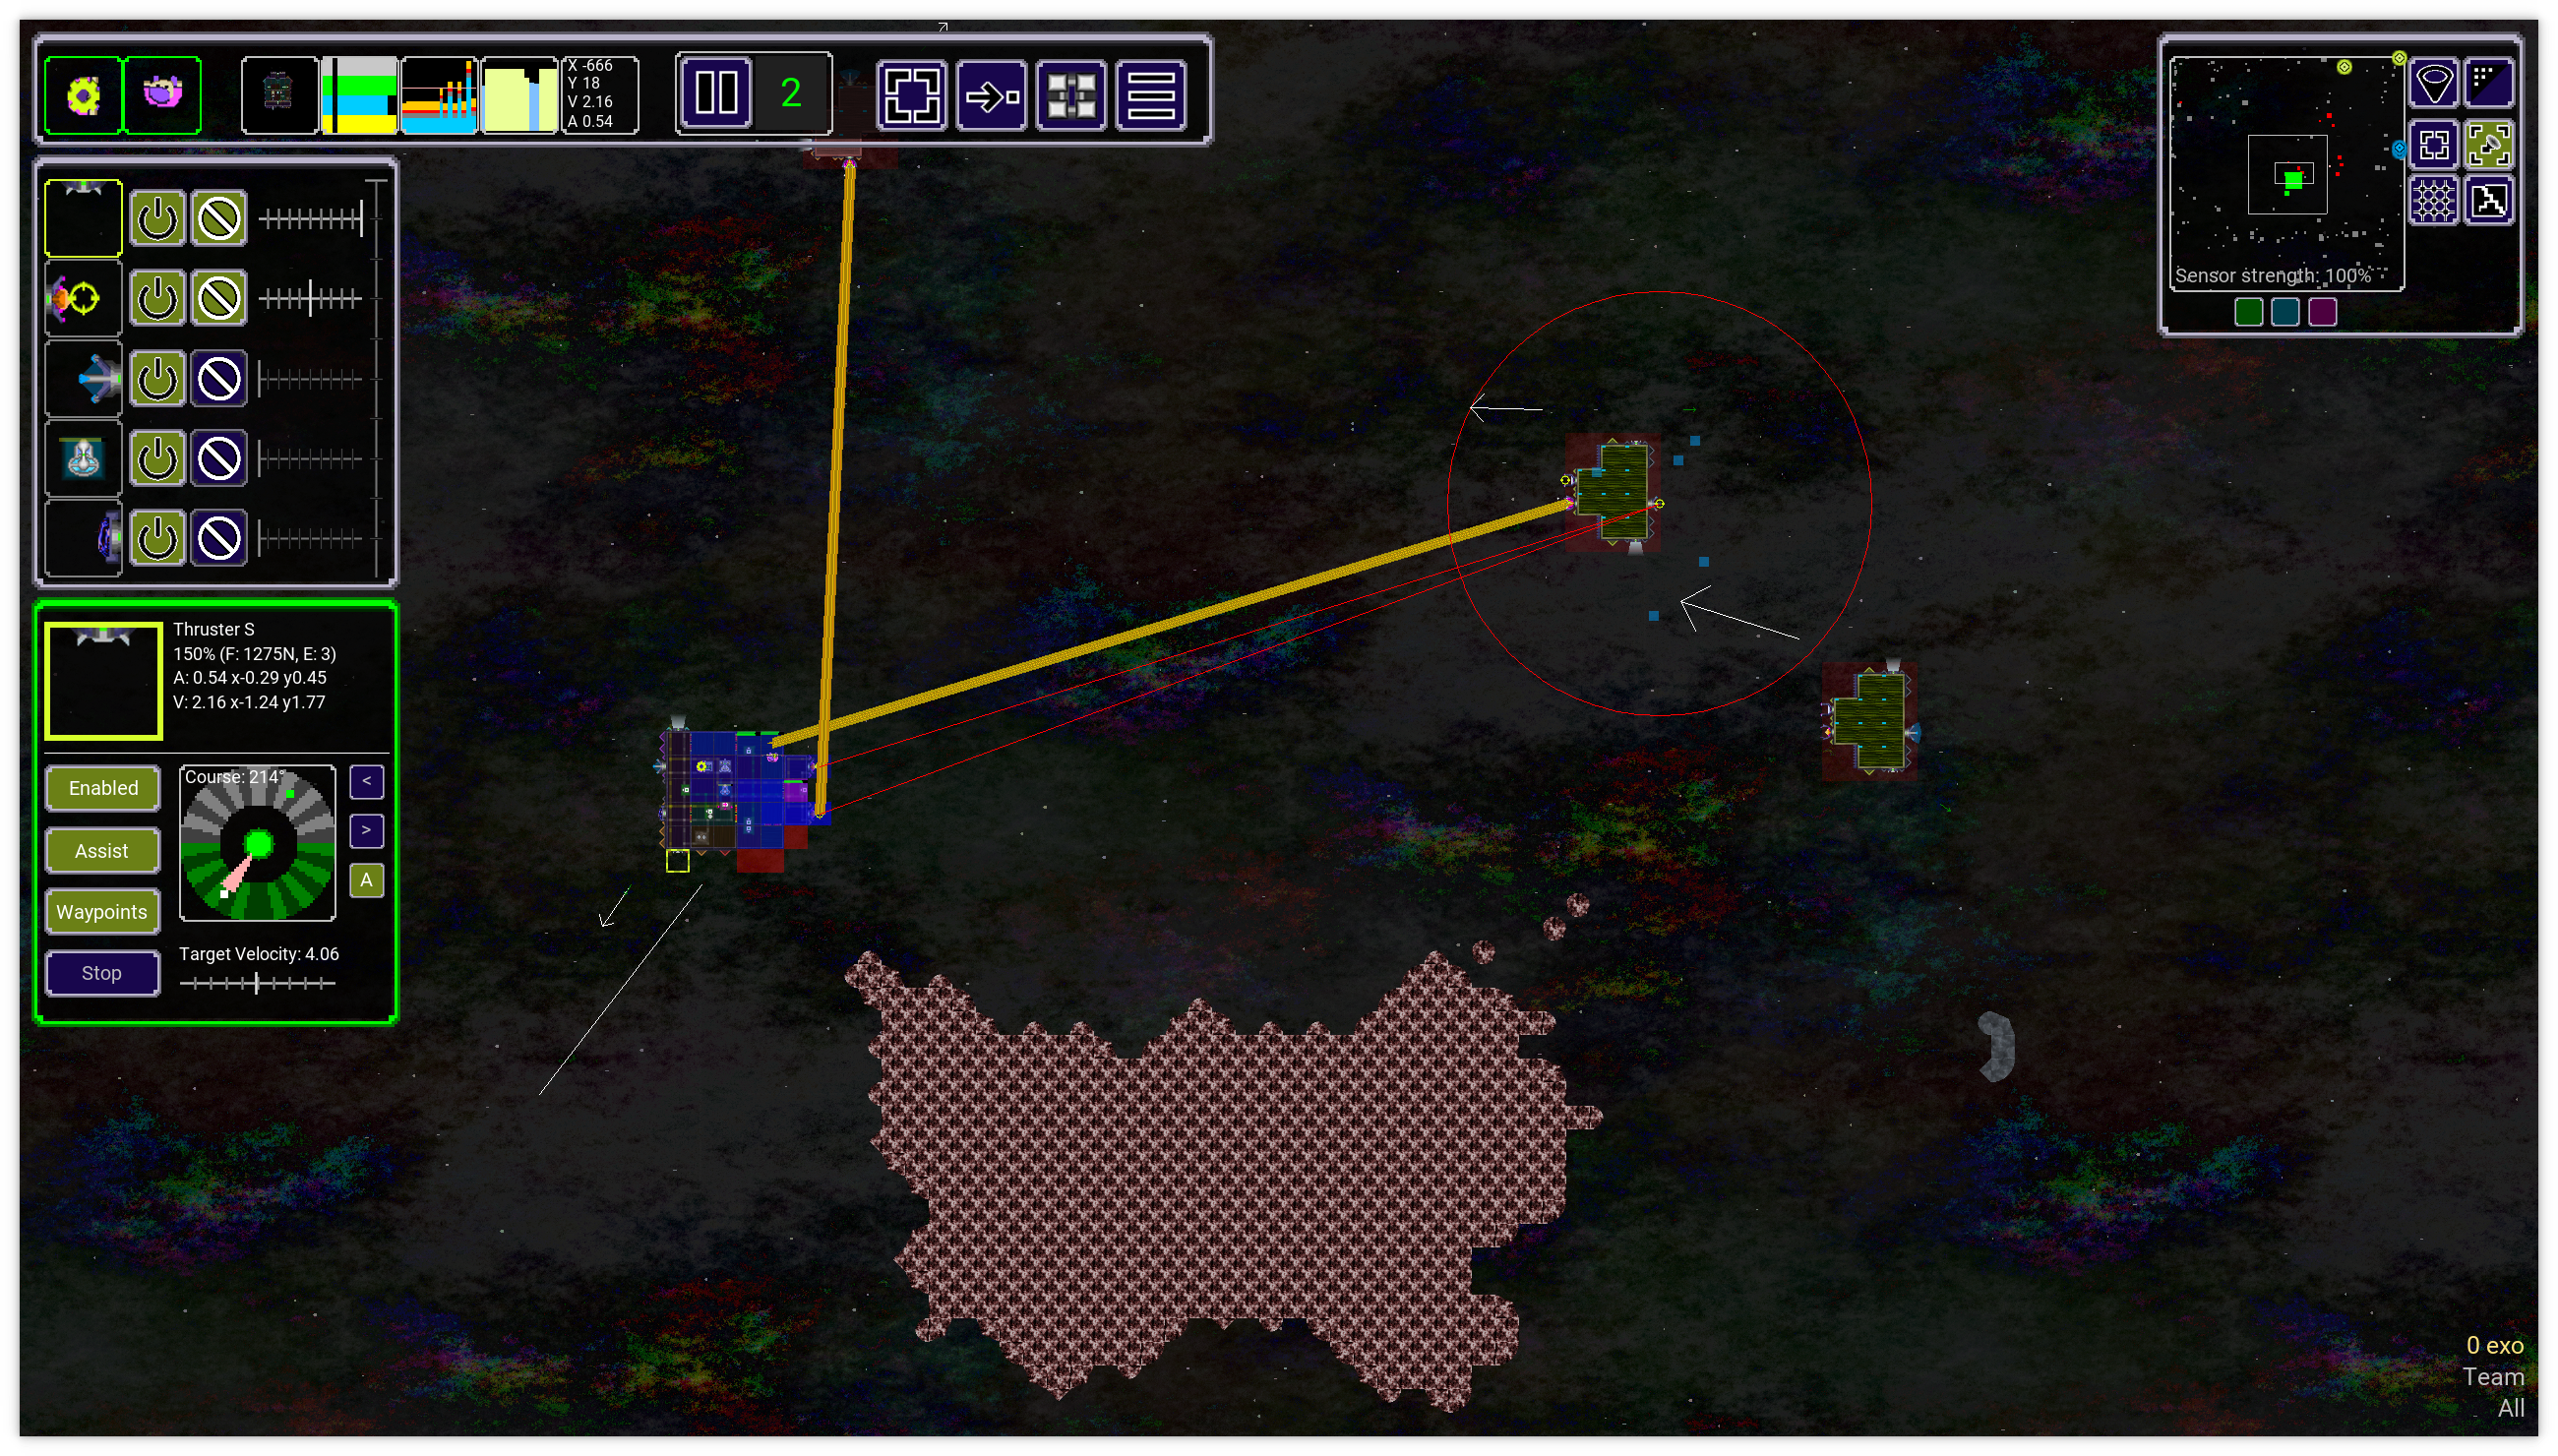
Manage your capacitor, shield buffer and EM emissions
Use the right loadout to suit your tactical situation
Position your ship and keep an eye on your opponents
Develop a strategy and execute it
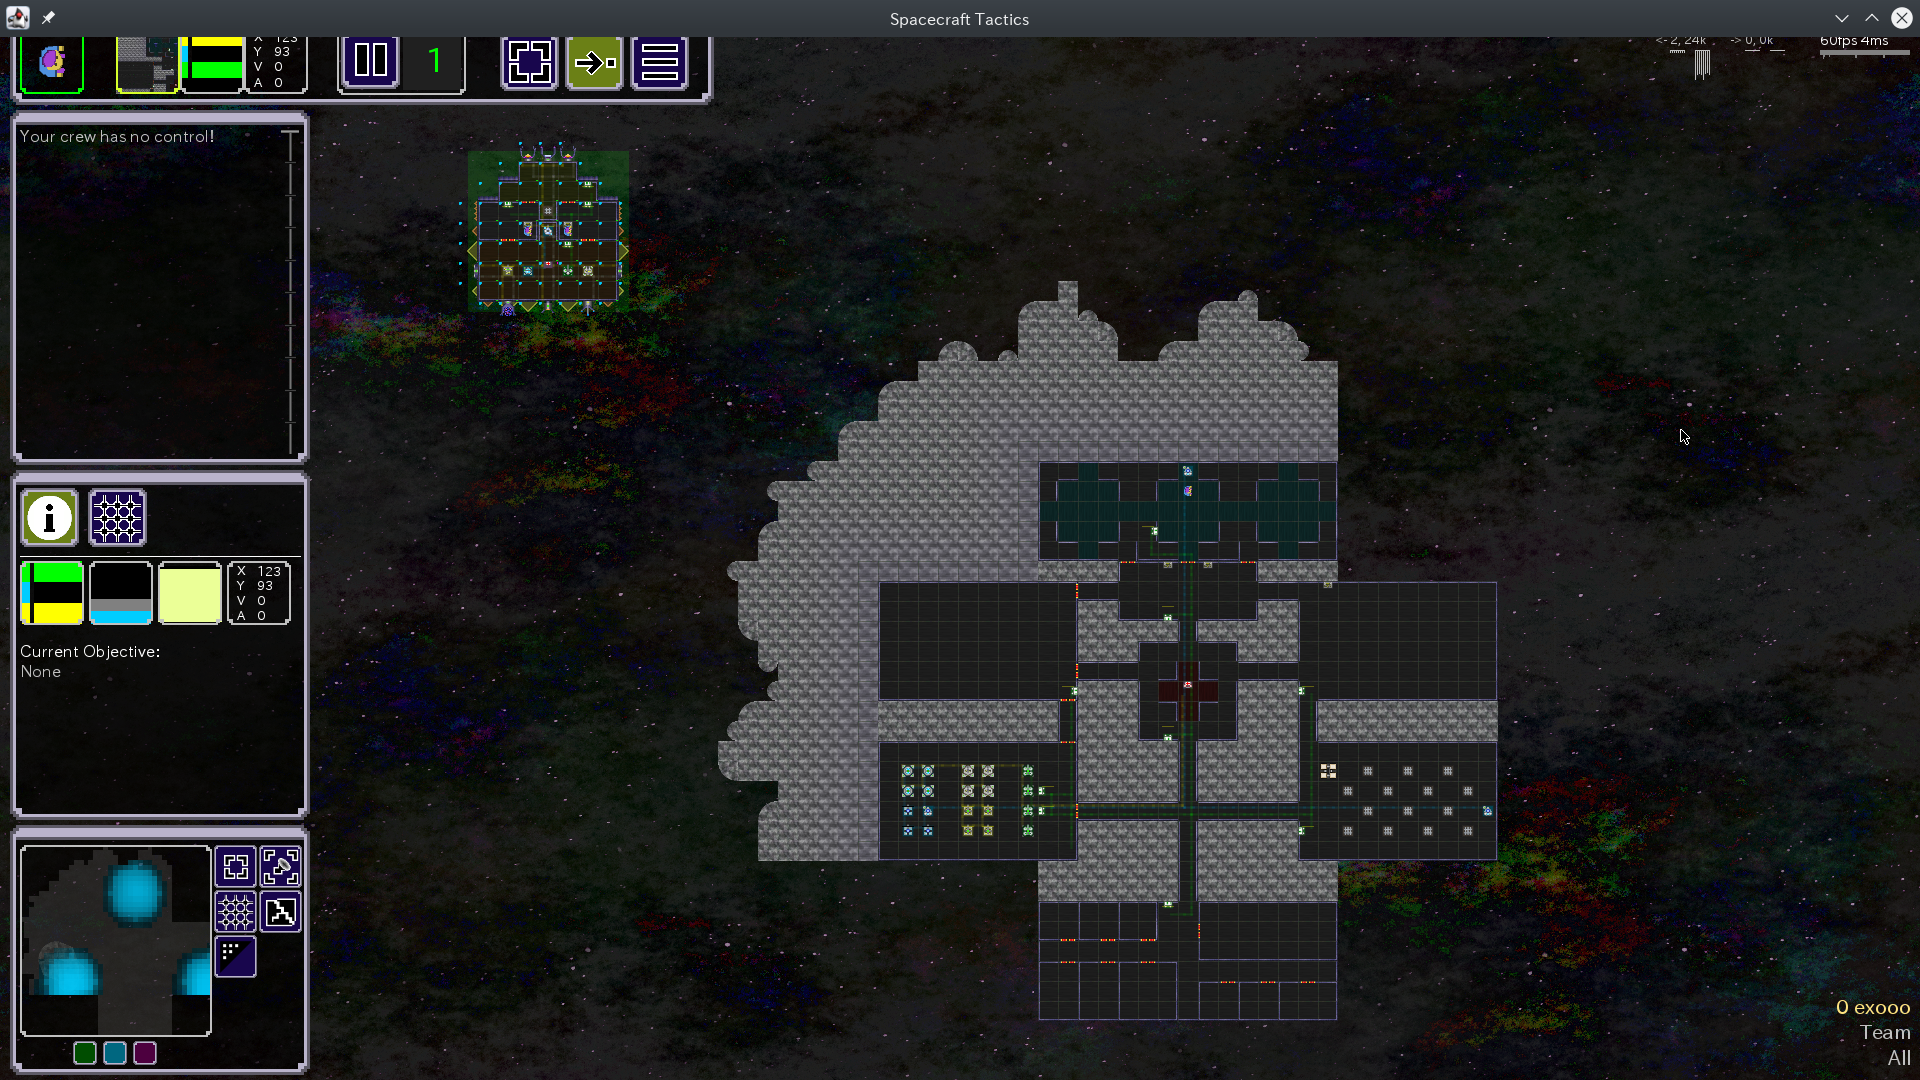
Editors
Create your own ships in the ship editor
Design new scenarios in the integrated scene editor
Play them in single player or online in custom game mode
Most game modes also allow to use custom ships and scenes
Share your ships and scenes with the integrated sharing functionality and in Steam Workshop (bundled as mods)
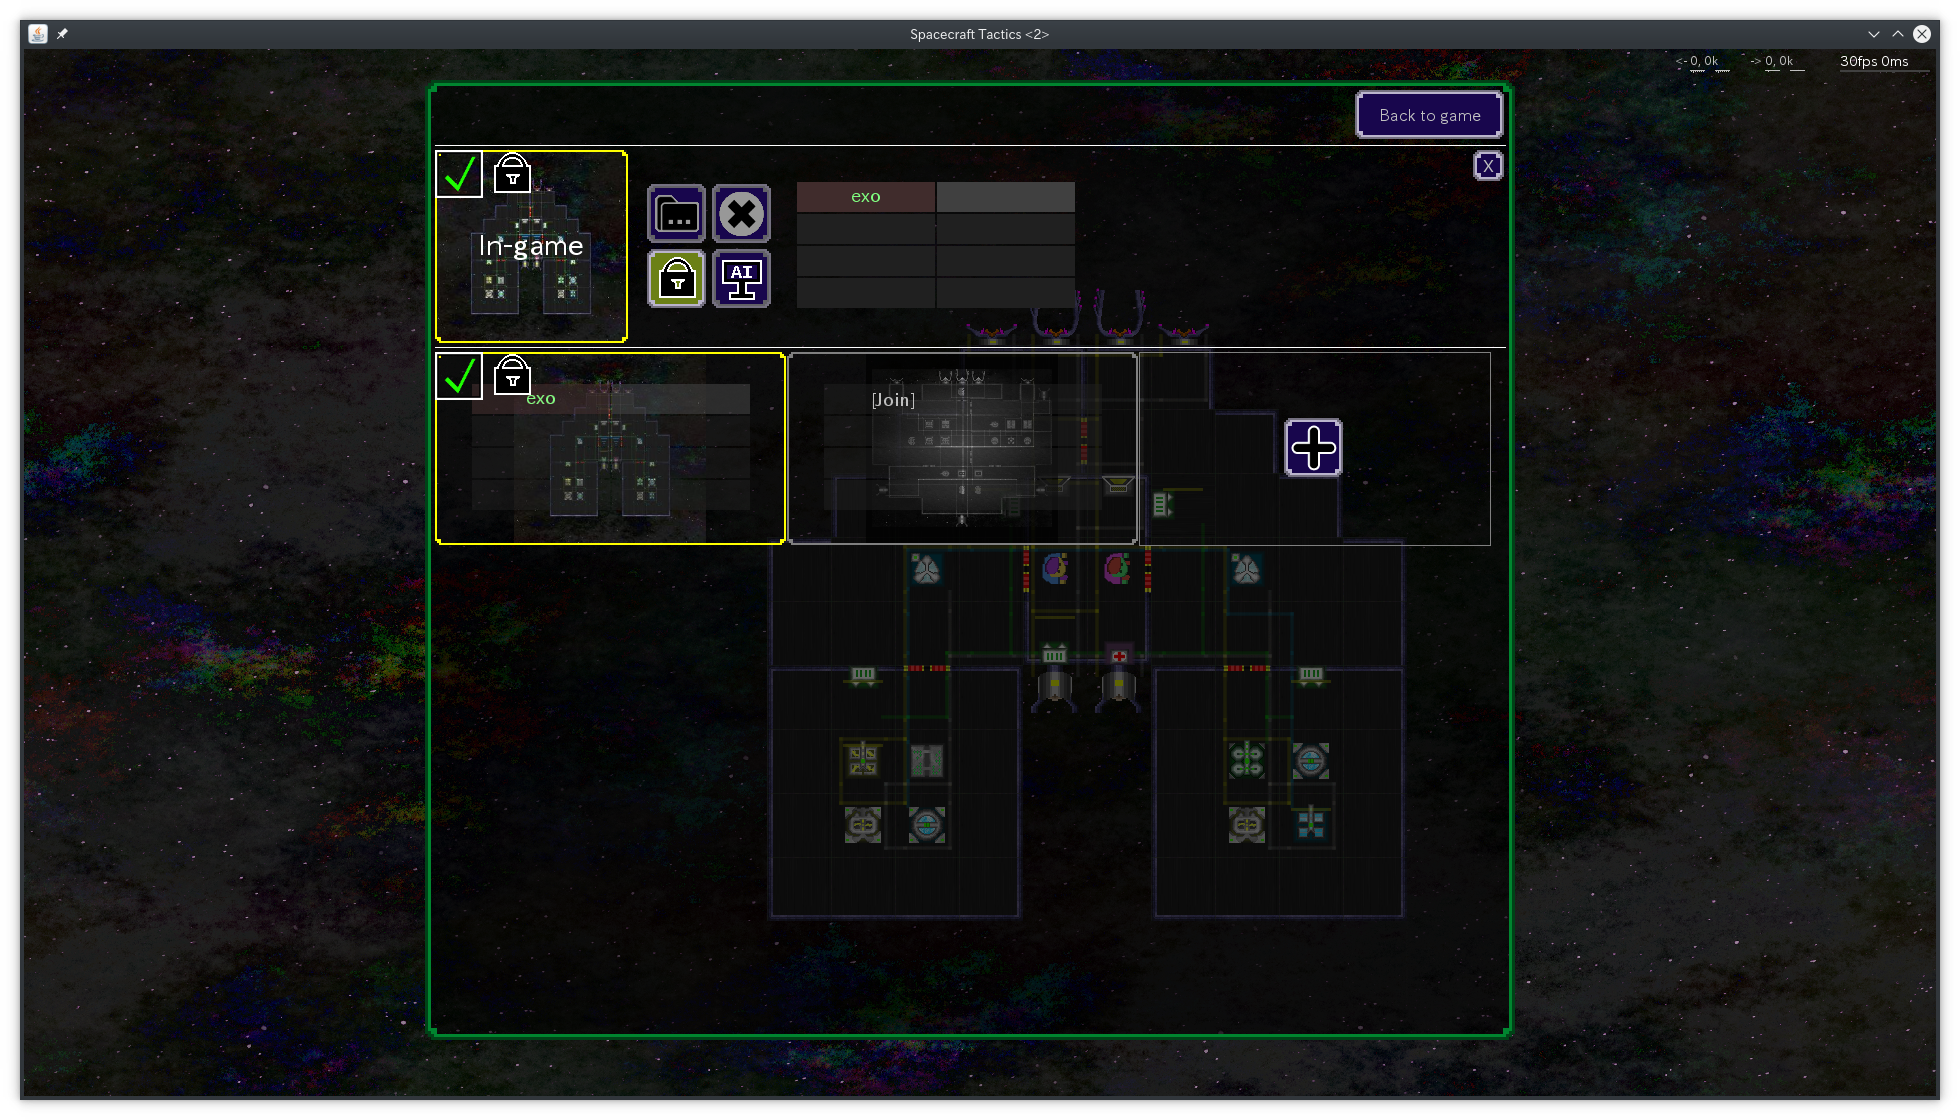
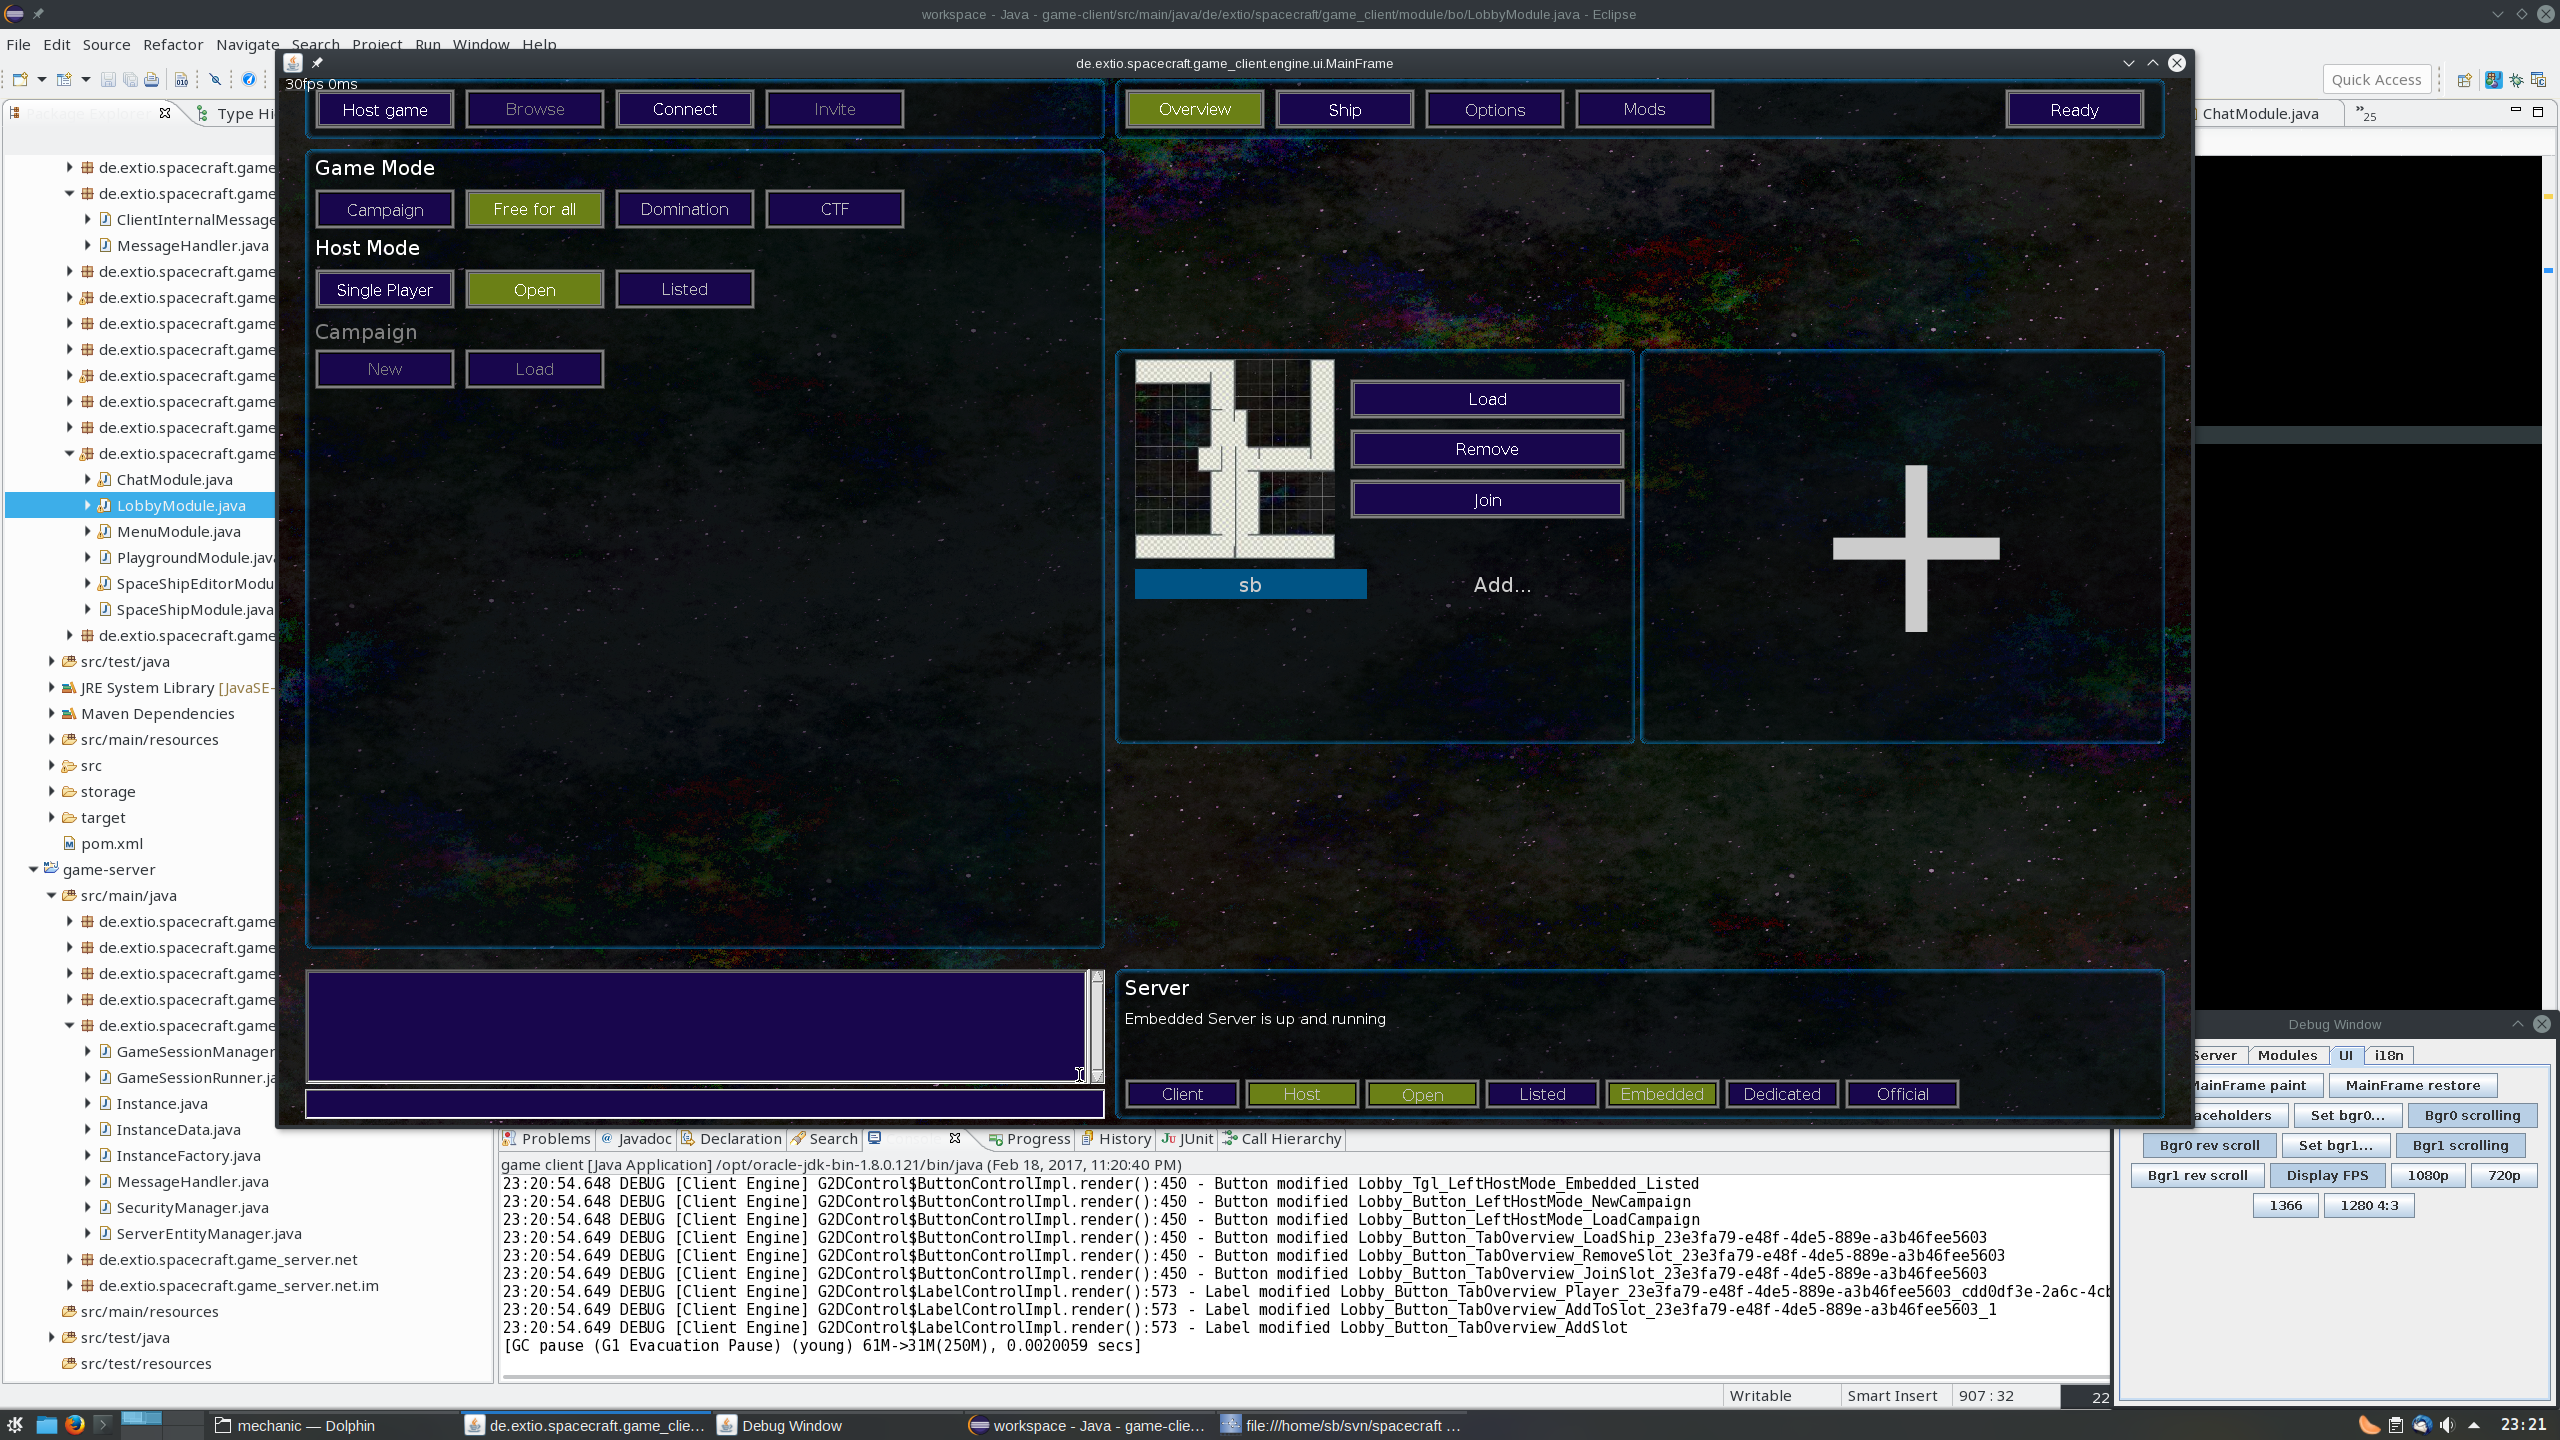
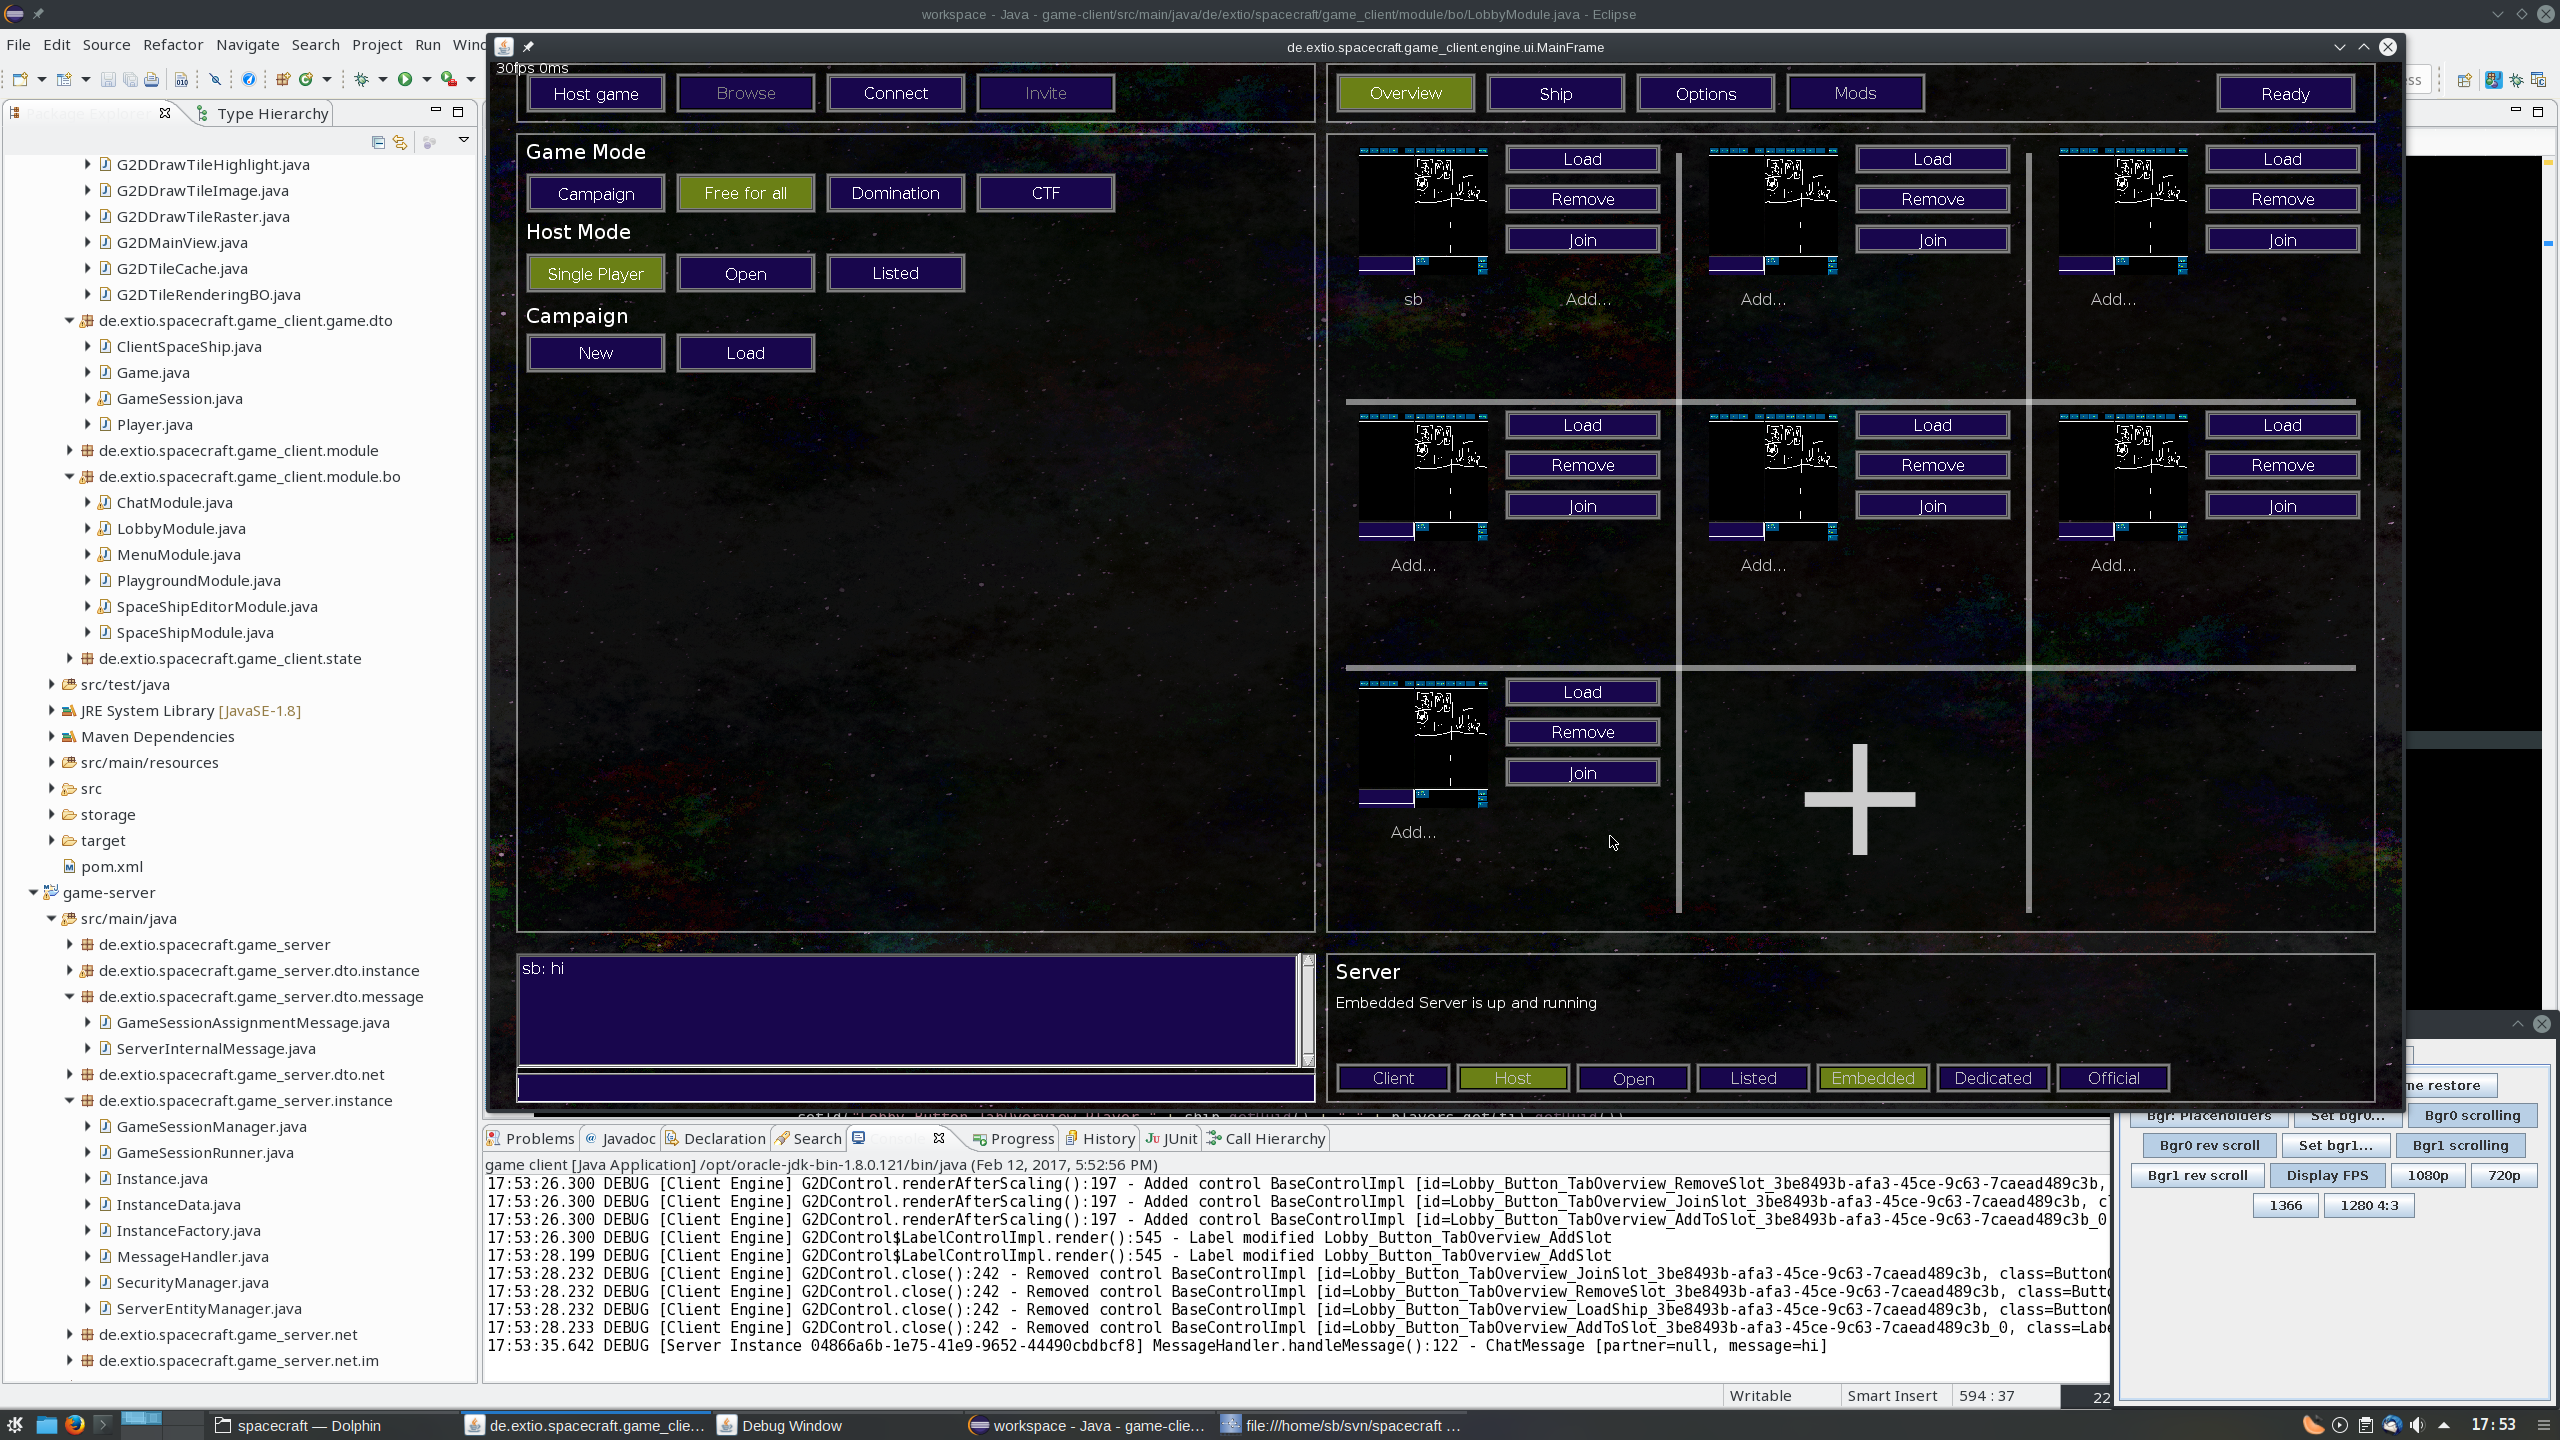
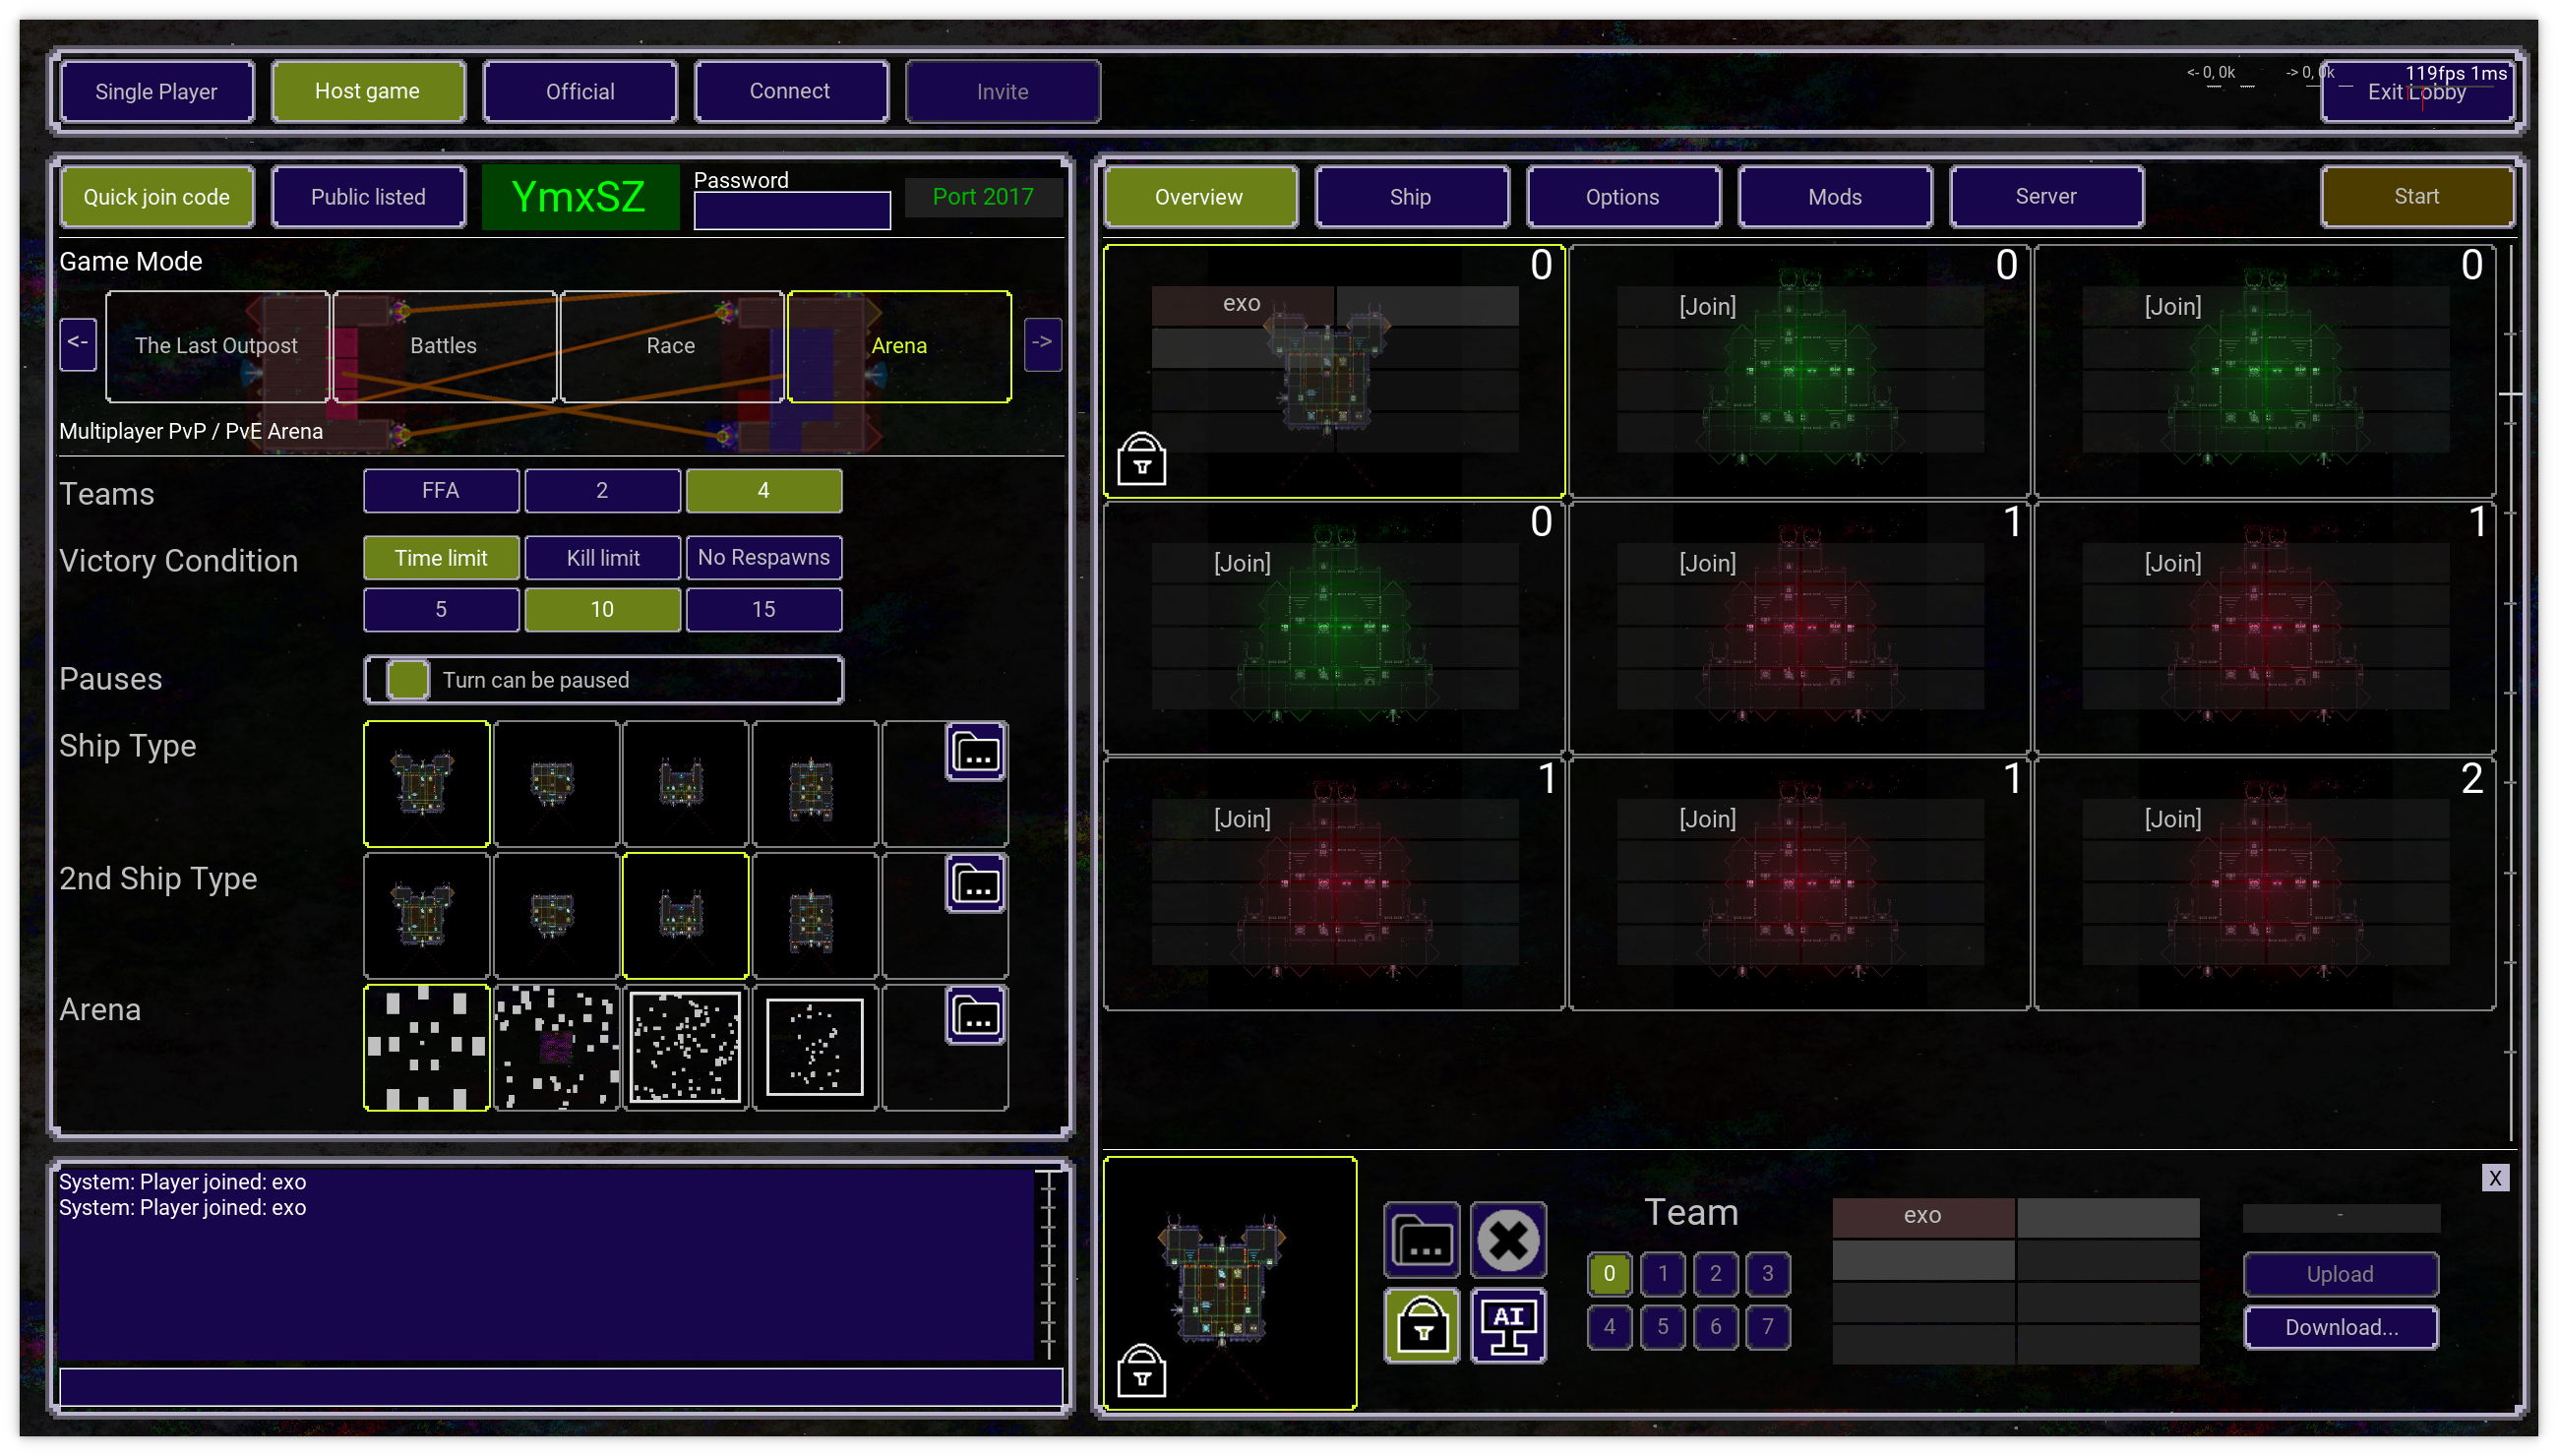
Game modes and match making
The following game modes are available for single-player and multiplayer games:
The Last Outpost: Save the last rebel outpost from the empire!
Battles: Multiplayer PvE mode with progression
Arena: Multiplayer PvP arena
Race: Test your skills maneuvering your ship and hunt for highscores
Custom Game: Sandbox mode, play your own scenes or test your ship in a procedural generated environment
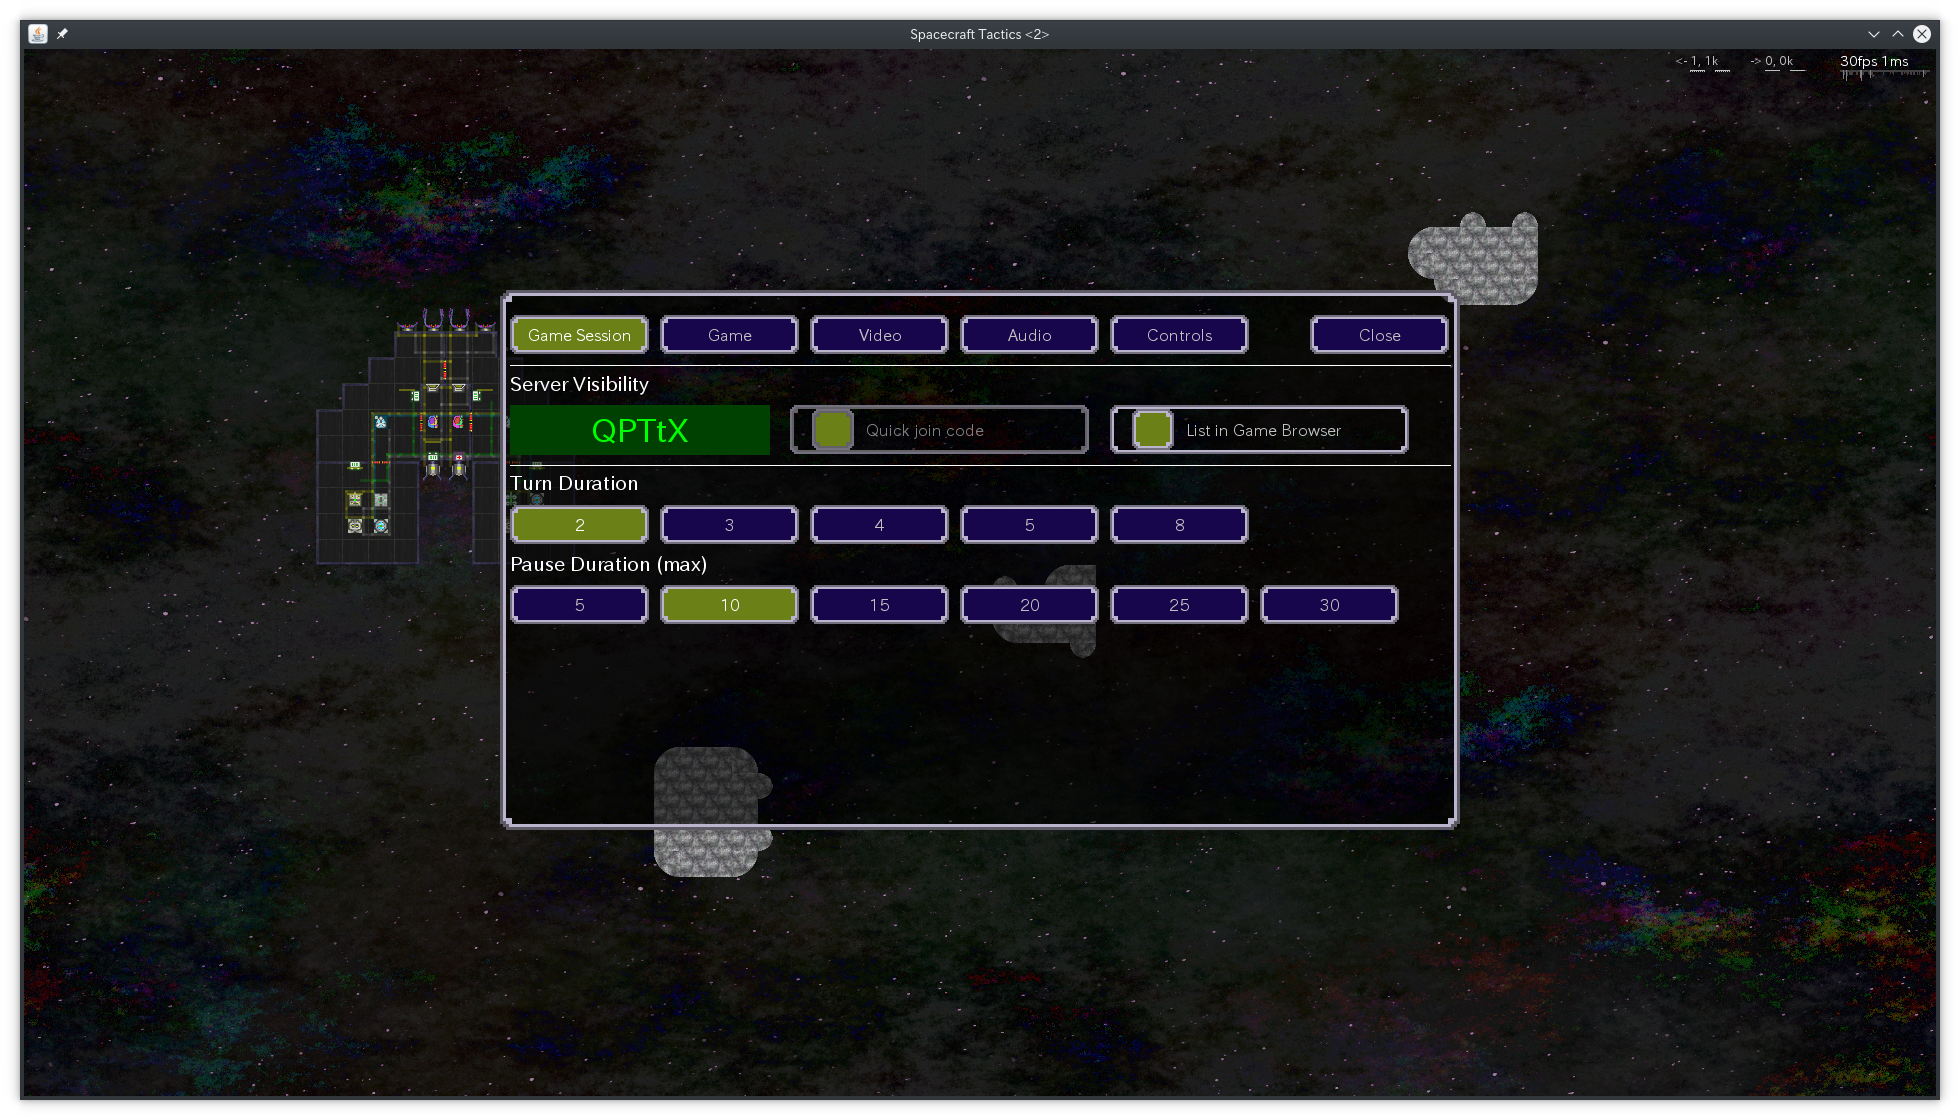
Play on our server (for official highscores) or host your own game server
Game server is embedded in the game (best for LAN sessions or custom games if you are able to forward a port in your router)
There is also a dedicated game server included
Use Steam game invites, find online games in the game browser or receive a quick-join code
Modding
Spacecraft Tactics has been designed from the ground up to be modular and support mods created by the community
Change the balancing of the game or introduce new gameplay elements with the integrated entity editor
Bundle your own ships and scenes and distribute it as a mod
Customize the presentation by creating your own tilesets, sounds / music or even texts / translations
Develop your own mods in Groovy programming language, ranging from simple scripts for your scenes up to full conversions
Mods can be shared in Steam Workshop
The Developer
Spacecraft Tactics is a one man project, developed completely in my spare time over the last 7 years
I'm passionate about PC gaming and computers / tech in general
In my professional live I'm working as a Tech Lead and Software Architect. In these roles I'm responsible for the integration platform of a leading transportation management platform, handling millions of transactions every day.
I put a lot into this game and hope you will like it!
Spacecraft Tactics is designed from ground up to be modular for easy creation of mods. In fact, most of the game core modules and also all game modes (e.g. the campaign) are implemented as mods to make sure that the mod interface is providing everything that is needed.
There are several types of mods possible:
Create new entities (weapons, engines, ...) or change the balancing of existing ones with the shipped entity editor
Change how the game looks with new tileset graphics
Create and bundle new ships and scenes (levels / stages) with the integrated ship- an scene editors
Implement completely new game modes with groovy code, ranging from scripted scenes up to total conversions
Mods can be published in Steam Workshop.
How to video
There is a video available on youtube that describes how to create and publish mods including groovy programming. It demonstrates that based on the AI Battles game mode, which can be also downloaded from Steam workshop.
There is a detailed technical presentation available how the game works under the hoods. It is recommended to watch at least some relevant sections of it for a general understanding about the game's internals.
It is available as a video on youtube, link see "Technical Presentation" at External Links
Locate the installation folder of Spacecraft Tactics. If you are using Steam, the default steam library folder in Windows is C:\Program Files (x86)\Steam\steamapps\common\
Copy the whole sub-folder ./sdk/mod-template to a new location outside of the game installation directoy. This will be your working copy where you can edit and set up everything. I also recommend to use a VCS for this folder, e.g. git or svn. But this is of course fully optional.
Proceed now with the next sections to create your contents.
All other files and folders in the template can be either deleted or stay as they default to nothing.
Publishing
Preparations
First copy your mod to the game installation folder:
Stop the game (if running)
Copy sub-folder ./mod from your working copy with all of it's contents to the sub-folder ./mods/ in the game installation directory
Rename folder name mod (your folder, not the parent mods folder) to the name of your mod
If you need some examples, the game is shipped with 2 official mods that are already in the mods folder: last-outpost and mp-official. Just check there how it is set up.
Start the game (changes are only detected when the game starts)
Open the Mod Manager at main menu section "Mods". Your new mod should appear there in the list.
Check if your mod is enabled
If your mod does not appear in the list, check for the correct folder structure, file permissions and for syntax errors in mod.xml. In case of most errors the error reporter window should pop up and provide more information about the issue.
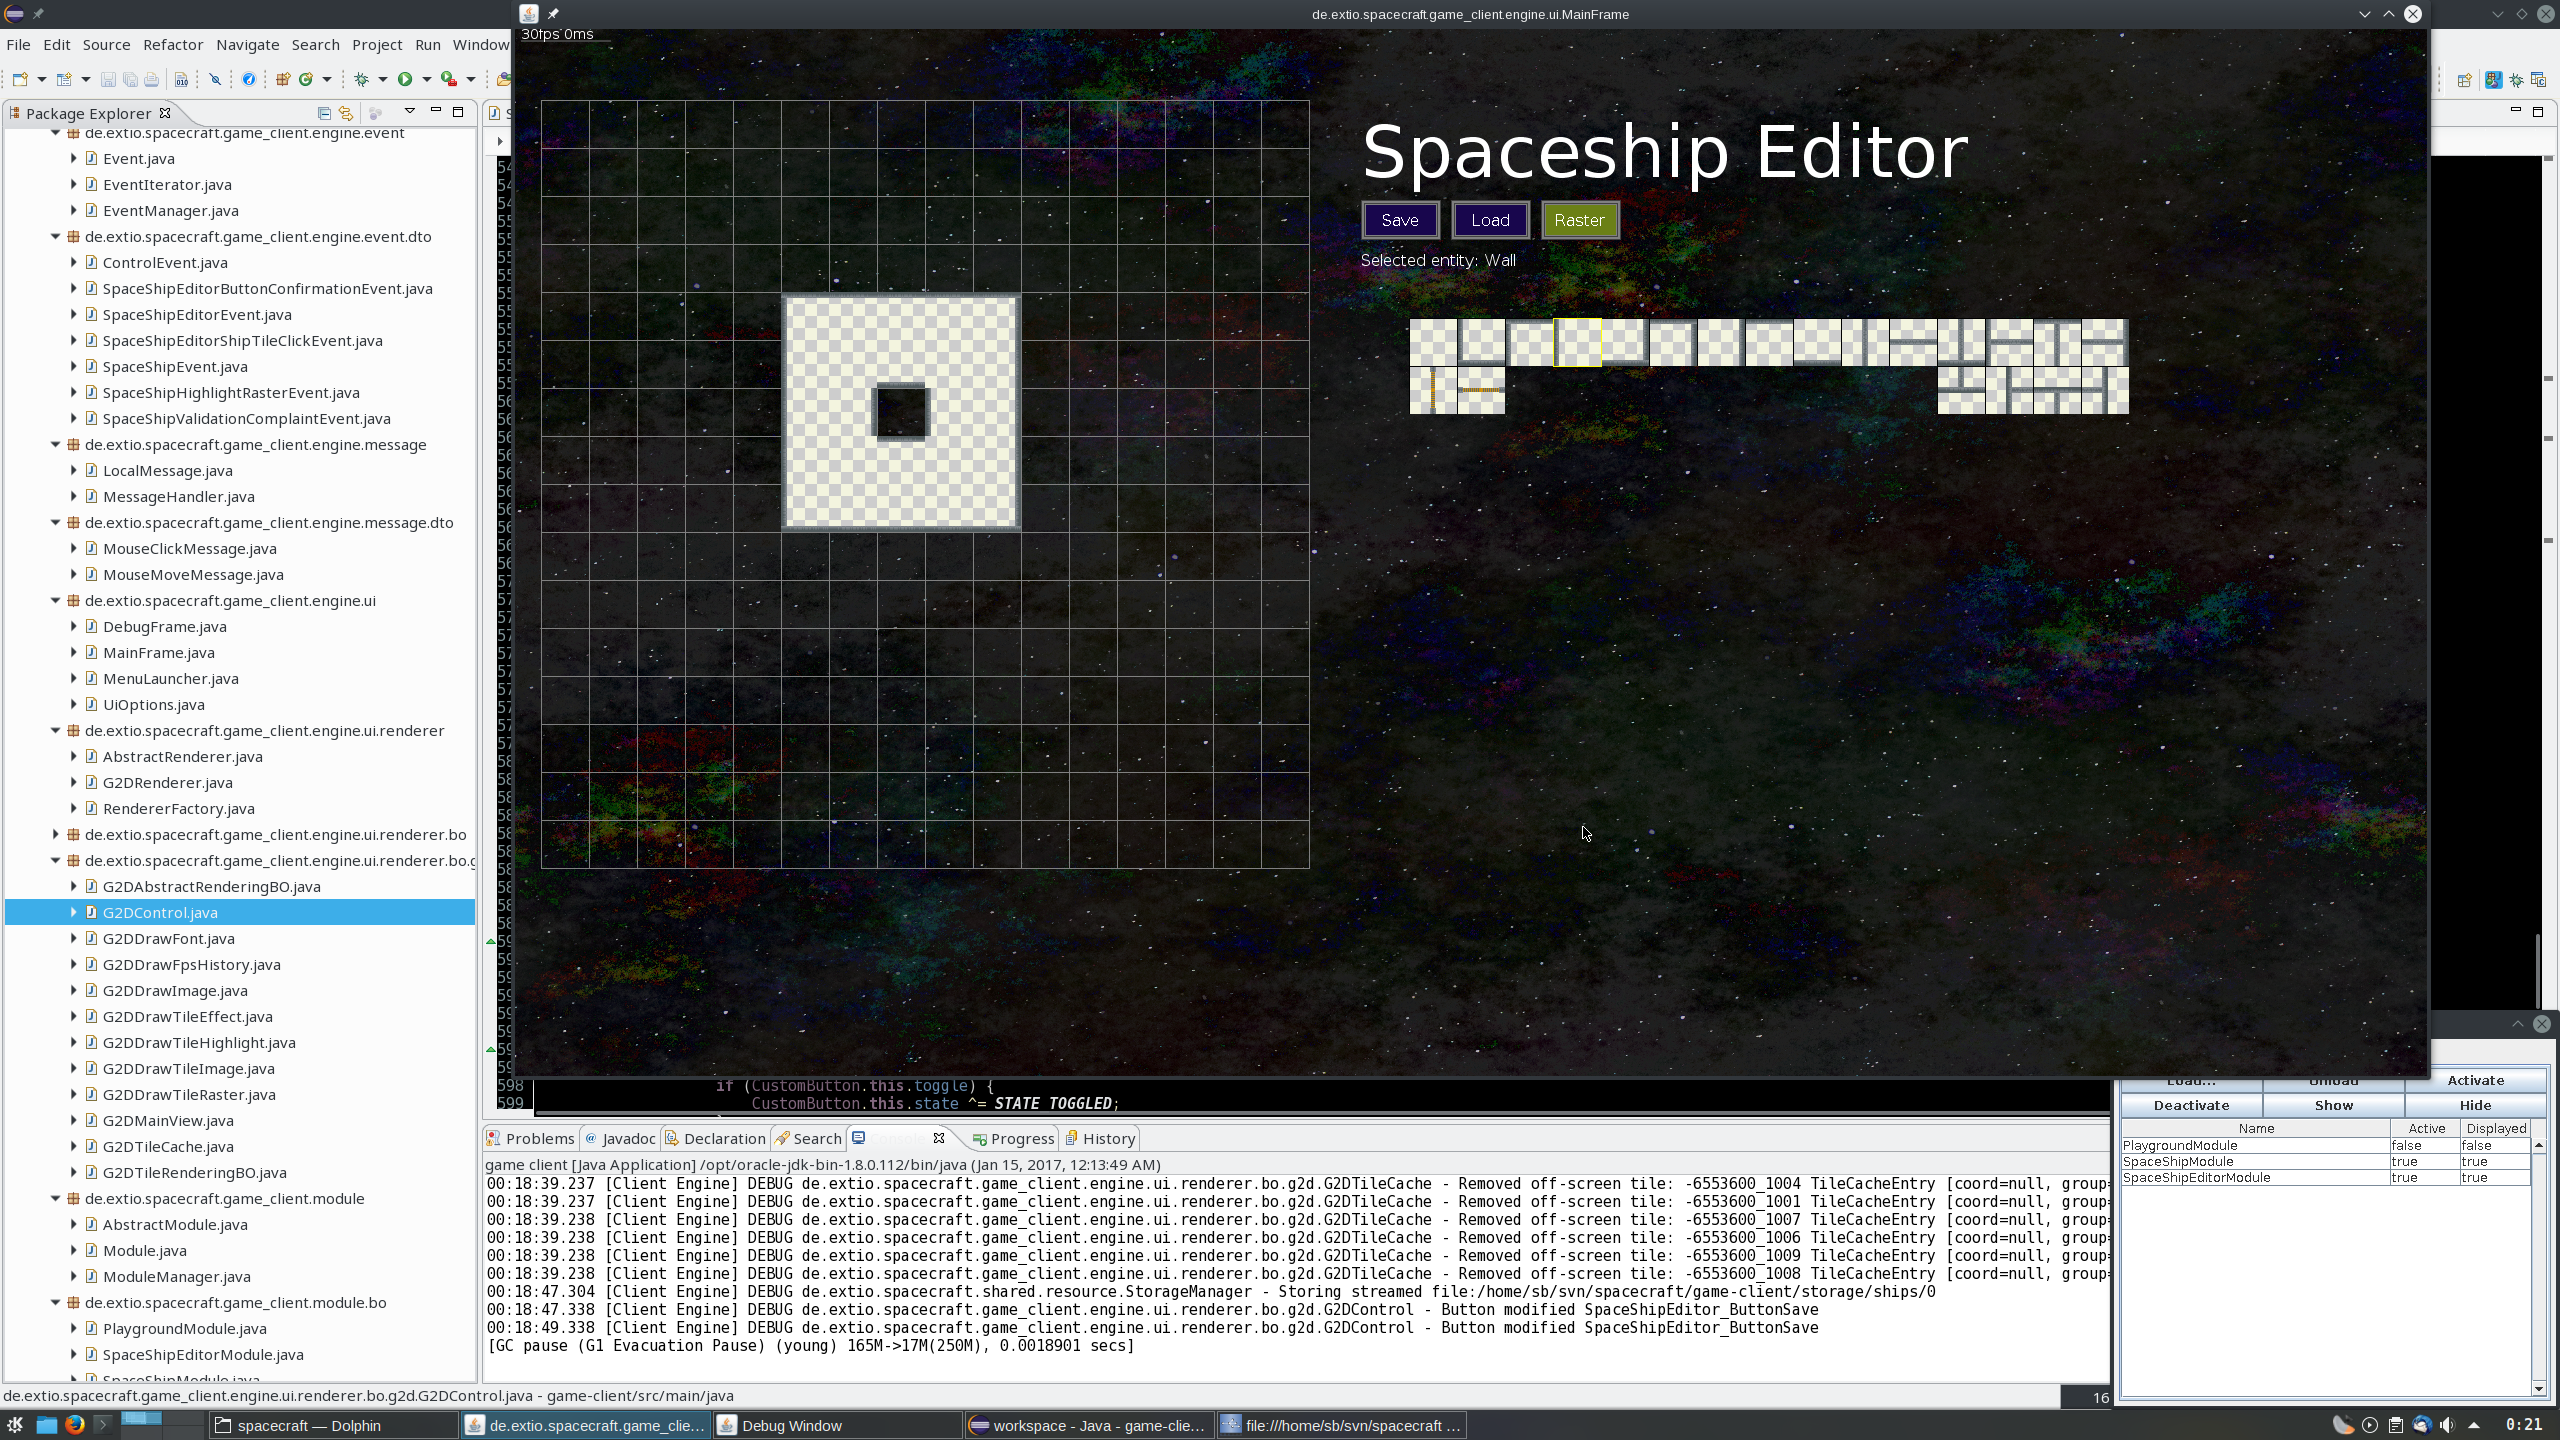
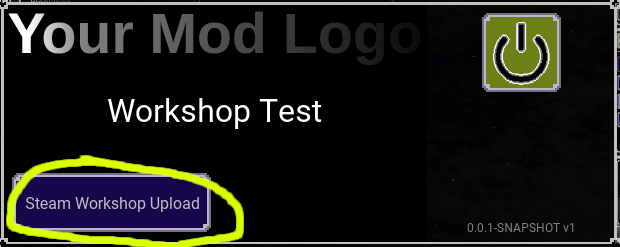
Steam Workshop
All custom mods have a button "Steam Workshop Upload" in their entry in Mod Manager (main menu section "Mods")
See screenshot
The button is only active if you are running the Steam version of the game and started it with the Steam launcher.
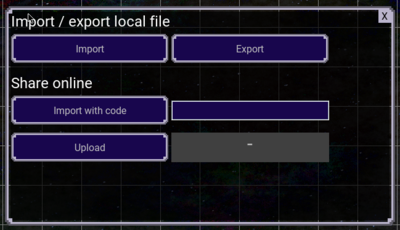
You can upload your mod in the next dialog:
You can do initial uploads as well as updates. In case of an update there is already a Workshop ID displayed.
You will receive an error message if you try to update mods that you do not own.
You must enter a description before you can proceed. This description will be displayed in Steam Workshop.
Optionally you can enter a change note.
Folder structure and explanations
pom.xmlRequired for developing groovy scripts. See Groovy
./mod/ Root folder of your mod. This folder can be copied when publishing.
./gfx/ All images must be in .png (Portable Network Graphics) format
./backgrounds/ Place background pictures here (e.g. stars or nebulas)
./tilesets/ Add tilesets here
./ui/ UI elements (e.g. images for buttons) can be placed here
./sound/ All audio files must be in .ogg (Ogg Vorbis) format
./effects/ Sound effects
./music/ Music
./storage/
./scenes/ Scenes from scene editor. Files placed in this folder cannot be selected by players when playing the game (e.g. when starting a custom game), so this folder is for shipped scenes that are loaded by your own mechanisms, e.g. groovy code.
./scenes_player/ Scenes from scene editor. Can be selected by players, this is the right folder to ship scenes that can be started in custom game mode.
./ships/ Ships from ship editor. Add "Player Ships" here (object type SpaceShip)
Players can select these ships in lobby if it is not in a sub-folder. If you don't want to have a ship selectable, place it in a sub-folder. For example ./mod/storage/ships/my-mod-name/
./ships_ai/ Ships from ship editor. Add "AI Ships" here (object type SpaceCraft)
./stations/ Ships from ship editor. Add "Stations" here (object type SpaceStation)
./src/ This folder contains all groovy source packages
achievements.xml Definition of achievements
actions.xml Defined actions of entities in the game client
mod.xml Main definition and configuration of the mod. This file is mandatory to edit.
shipClasses.xmlDefinition of ship classes
Overriding
Overriding existing files and definitions with your mod is an important concept.
Files with the same name in the same relative folder override files from other mods.
Similarly, using the same identifiers in the various definitions (entities.xml, shipClasses.xml, i18n.xml, ...) override definitions from previously loaded mods, including game core.
Game Core is always loaded first. The order of loading of all other mods is determined by the loadingPriority element in mod.xml. Mods with higher values are loaded after mods with lower values and therefore can override all mods loaded before. All shipped official mods have priority 100.
Example 1: You want to create a tileset mod that overrides the existing tilesets from game core.
Just place a file with the same filename in the same relative folder as in the original mod. For example ./gfx/tilesets/official_0.png.
This example works for all gfx and sounds.
Example 2: You want to customize entities and default ship classes.
Just copy the definition from game core to your shipClasses.xml and apply your changes.
Note, when connecting to a game server in multiplayer all entity definitions and ship classes of that server are transferred to and used by the client.
Note 2, Entity Editor app provides a functionality for convenience to override entities. See the respective section below.
This example works for achievements, actions, entities, i18n and ship classes.
mod.xml setup
mod.xml is the main definition and configuration file of your mod.
The template copied from mod-template contains all possible elements but only all essential configuration options are active, all optional elements are commented out.
You must configure all elements that are highlighted in red color, everything else is optional and only needs to be configured if your mod makes use of it.
de.extio.spacecraft.shared.model.managers.ModDefinitionXML root element
name Technical name of your mod. This is not displayed to the user. It is recommended to use lower case letters and separate words with hyphen character '-'
version Version of your mod, only for documentation purpose. I recommend to release with version 1.0.0
compatibility Technical compatible version of your mod. Increment it if you introduce breaking changes that players with previous versions cannot play with other players using the latest version. The game server will check compatibility when a player joins and return an error message if necessary.
loadingPriority The order of loading of all mods is determined by the loadingPriority element in mod.xml. Mods with higher values are loaded after mods with lower values and therefore can override all mods loaded before. Shipped official mods have priority 100.
description Name of the mod that is displayed to the user. This is a localization id, you need to create a localization entry with i18n editor.
descriptionFallback Fallback text displayed as name of your mod if localization id could not be found. It is recommended to use English language.
logo Logo of your mod, displayed in mods manager view and mods list in lobby. Place the logo in ./gfx/ui/ folder. If the filename is logo.png, the value for this element would be gfx/ui/logo.png
server true if your mod is relevant for the game server, otherwise false. A mod is usually relevant for the game server if it contains entity-, shipclass- , achievements- or game mode (gameModeDefs) definitions or implements groovy code.
client true if your mod is relevant for the game client, otherwise false. A mod is usually relevant for the game client if it contains images, sounds, scenes, ships / stations, actions, entities, achievements, ship classes, i18n or implements groovy code.
mandatory Set to true if you are hosting a multiplayer game and all other game clients must also have this mod activated that everything works as expected. This is usually only the case if your mod contains groovy code.
entitiesIncremental Set this to true to only override existing entities with your entities definition. When set to false, all entities defined previously (also by game core) will be discarded, even if your mod does not define own entities. Setting it to false is only useful for total conversion mods.
shipClassesIncremental Set this to true to only override existing ship classes with your own definition. When set to false, all ship classes defined previously (also by game core) will be discarded, even if your mod does not define own classes. Setting it to false is only useful for total conversion mods.
groovyPackageLoadOrder Defines the order of loading of your groovy packages containing source code
string Package source code folder name relative to groovy base directory ./mod/storage/src. E.g. groovy package de.extio.spacecraft.mod.mymodname.something would result in de/extio/spacecraft/mod/mymodname/something if you place your groovy source code file in that directory (which is recommended)
gameModeDefs Defines game modes. Custom game modes require groovy scripting. Game modes are for example "Custom Game", "The Last Outpost", "Race", ...
de.extio.spacecraft.shared.model.game.GameModeDef
name Technical name in plain text, please use English language
nameLocalized Localization id of the name, displayed to the user
description Localization id of a short description of the game mode. It is displayed in the lobby
visible Defines whether the game mode can be selected by the user in lobby
multiplayer Whether the game mode is relevant for multiplayer games. If false it is only displayed in lobby for single player sessions
quickMatchMaxPlayers Maximum number of players that are assigned by the metaserver to the game session when using quick match making or quick join.
startImmediately If true, game session host (host player) does not need to have an active ship or even a ship slot joined before the game can start.
logo Logo of your game mode, displayed in lobby. Place the logo in ./gfx/ui/ folder. If the filename is mode.png, the value for this element would be gfx/ui/mode.png
highscore If this mod submits highscores, enable this section to have it displayed in highscores view in main menu.
enabled True if highscores are submitted
gameRunModes List of modes highscores are submitted for. Such modes can be for example EASY, HARD or "Track xy", "Track yz", ... . This mode must be provided when submitting highscores to the server
string Single highscore mode
clientModules Starts these modules on client side if the game mode is activated / Stops if deactivated
string Fully qualified class name, e.g. de.extio.spacecraft.mod.package.ClassName
serverModules Starts these modules on server side if the game mode is activated / Stops if deactivated
string Fully qualified class name, e.g. de.extio.spacecraft.mod.package.ClassName
shipSlots Defines ship slots. Every ship a player can join must be assigned to a ship slot. Ship slots can also be displayed in lobby.
defaultActive Whether to activate a ship slot by default or not. Only active ship slots can have a ship assigned and are displayed in lobby. Inactive ship slots can be activated in lobby with the Plus button if openable.
openable Whether a user can open (activate) this ship slot. Slots can always be opened programmatically.
closable Whether a user can close (deactivate) this ship slot. Slots can always be closed programmatically.
autoLock Whether the ship slot is locked (no other user can join) automatically if a user joins the slot. The user can unlock the slot in the lobby.
shipClassName Limit loading ships for this ship slot to a certain ship class. The ship does not need to use exactly this ship class, but the ship will be validated to be compatible to this class.
shipPreload Preload this ship when creating the ship slot. Relative path from mod storage folder, e.g. ships/race/race_1.xml
shipPreloadCustomType By default the preloaded ship is converted to SpaceShip java class, which is the default java class for ships that players can join. You can provide a fully qualified class name here to convert the ship to instead. It must derive from SpaceShip.
shipSpawnAt Spawn the ship at a defined SpacecraftSpawnPointEntity, which can be placed to the initial scene in scene editor. Leave it empty to use the standard spawn mechanism (== spawn at any SpacecraftSpawnPointEntity or a random position if none is loaded)
shipSpawnExternalPosition Set to true to omit the standard spawn mechanism. Ships must be positioned programmatically
shipLoadable Whether players are able to load their own ship in lobby at this ship slot
aiDefault Defines the default of the AI toggle in lobby. Ships with AI toggle enabled that have no player joined are controlled by AI
aiToggle Whether players can toggle AI mode on this ship slot
joinable Whether players can join this ship in lobby. If false, players can still be moved to this ship programmatically.
joinInitially Players will join this ship immediately when joining the game. Otherwise they need to join a ship manually in lobby. Multiple ships can have set this true, it will cycle to the next ship if ship is full.
team Default team for this ship.
fixedTeam Fixed team for this ship, players will not be able to change the team in lobby.
menuLaunchEntries Thisoptional section is used to register your mod at the menu launcher. If you define a custom game mode and want players to be able to switch to your game mode in lobby, this section is not required. Menu launcher is only needed to provide embedded views to other mods or to add entries in the main menu.
Balancing / Entity mods
Steps
Create a working copy and do the basic setup and configuration, see Copy Files and mod.xml. Also the concept of Overriding is important to understand.
Open the Entity Editor. It can be found in the installation directory of the game. Start with spacecraft-tactics-entity-editor.exe (Windows) or spacecraft-tactics-entity-editor.sh (Linux).
Save your entities file in your working copy at location ./mod/entities.xml
This file is already present in the template you have copied your working copy from, you can either just overwrite it or load it and start from there
After you have created everything in entity editor, follow the steps at Publishing.
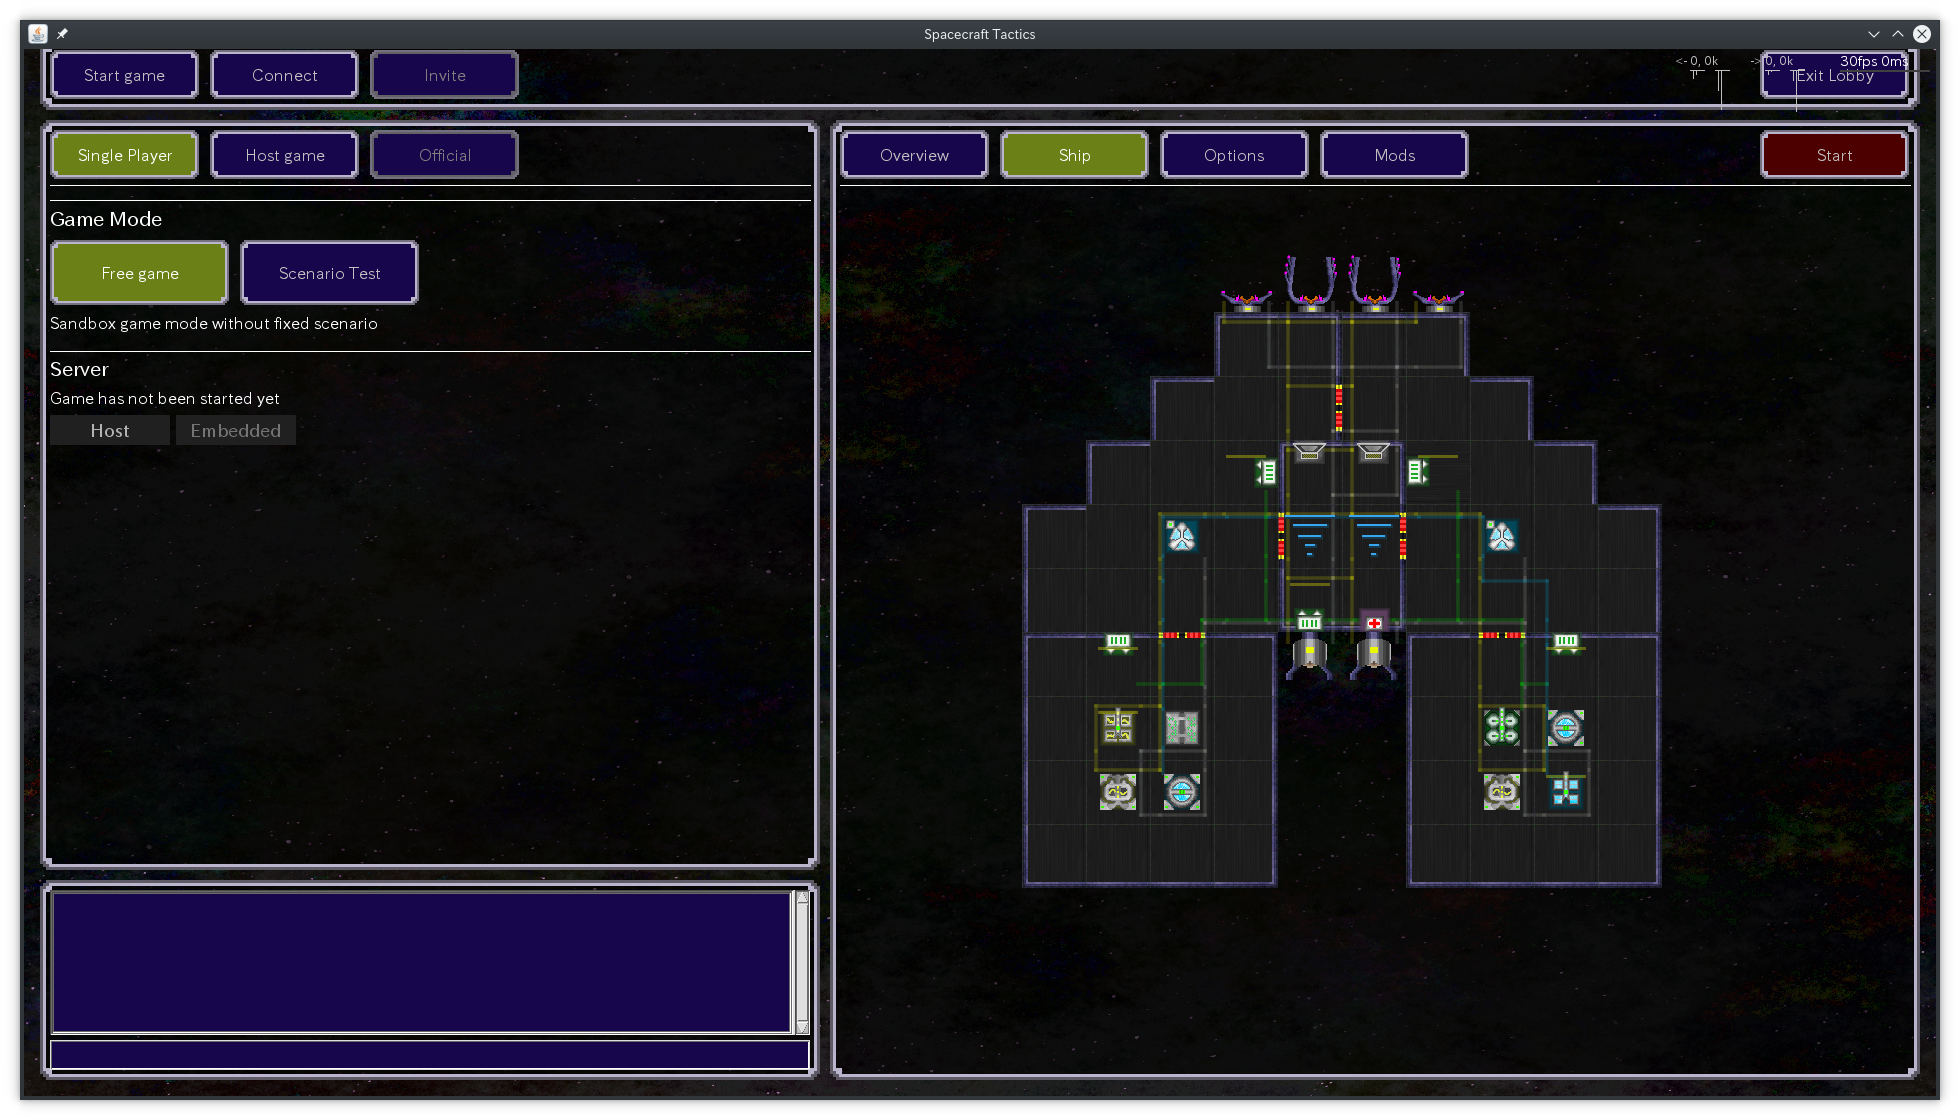
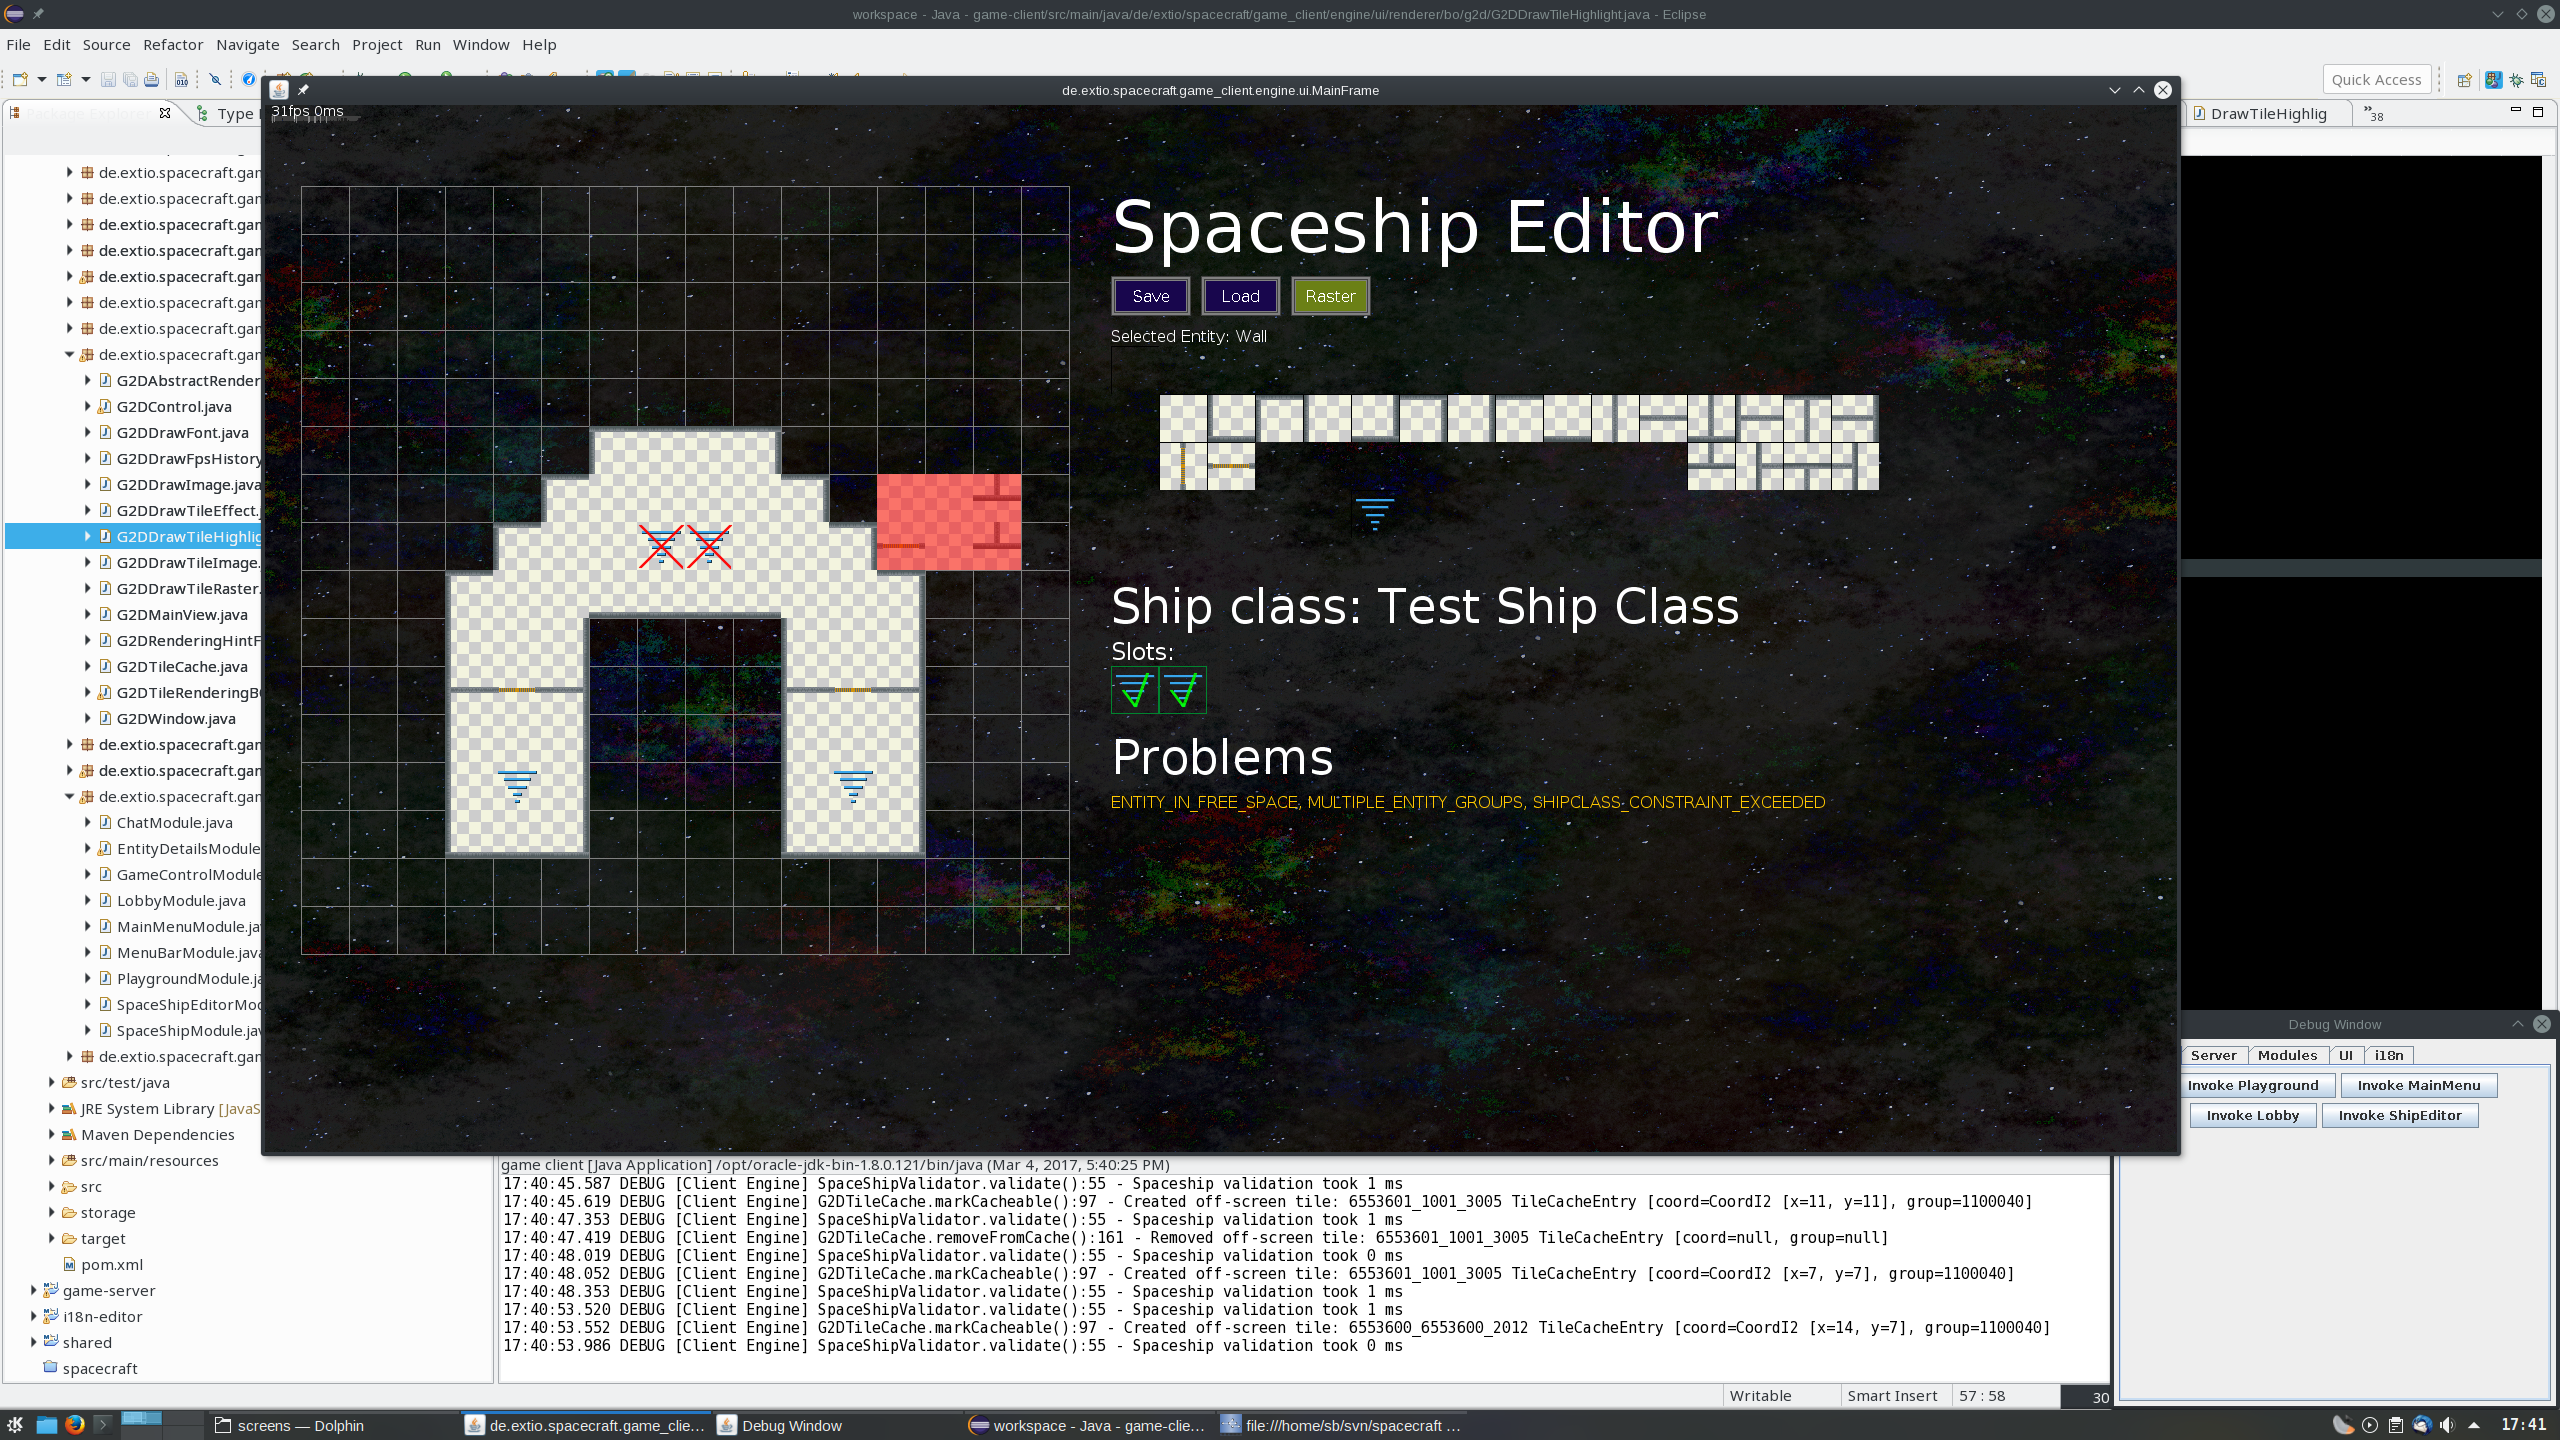
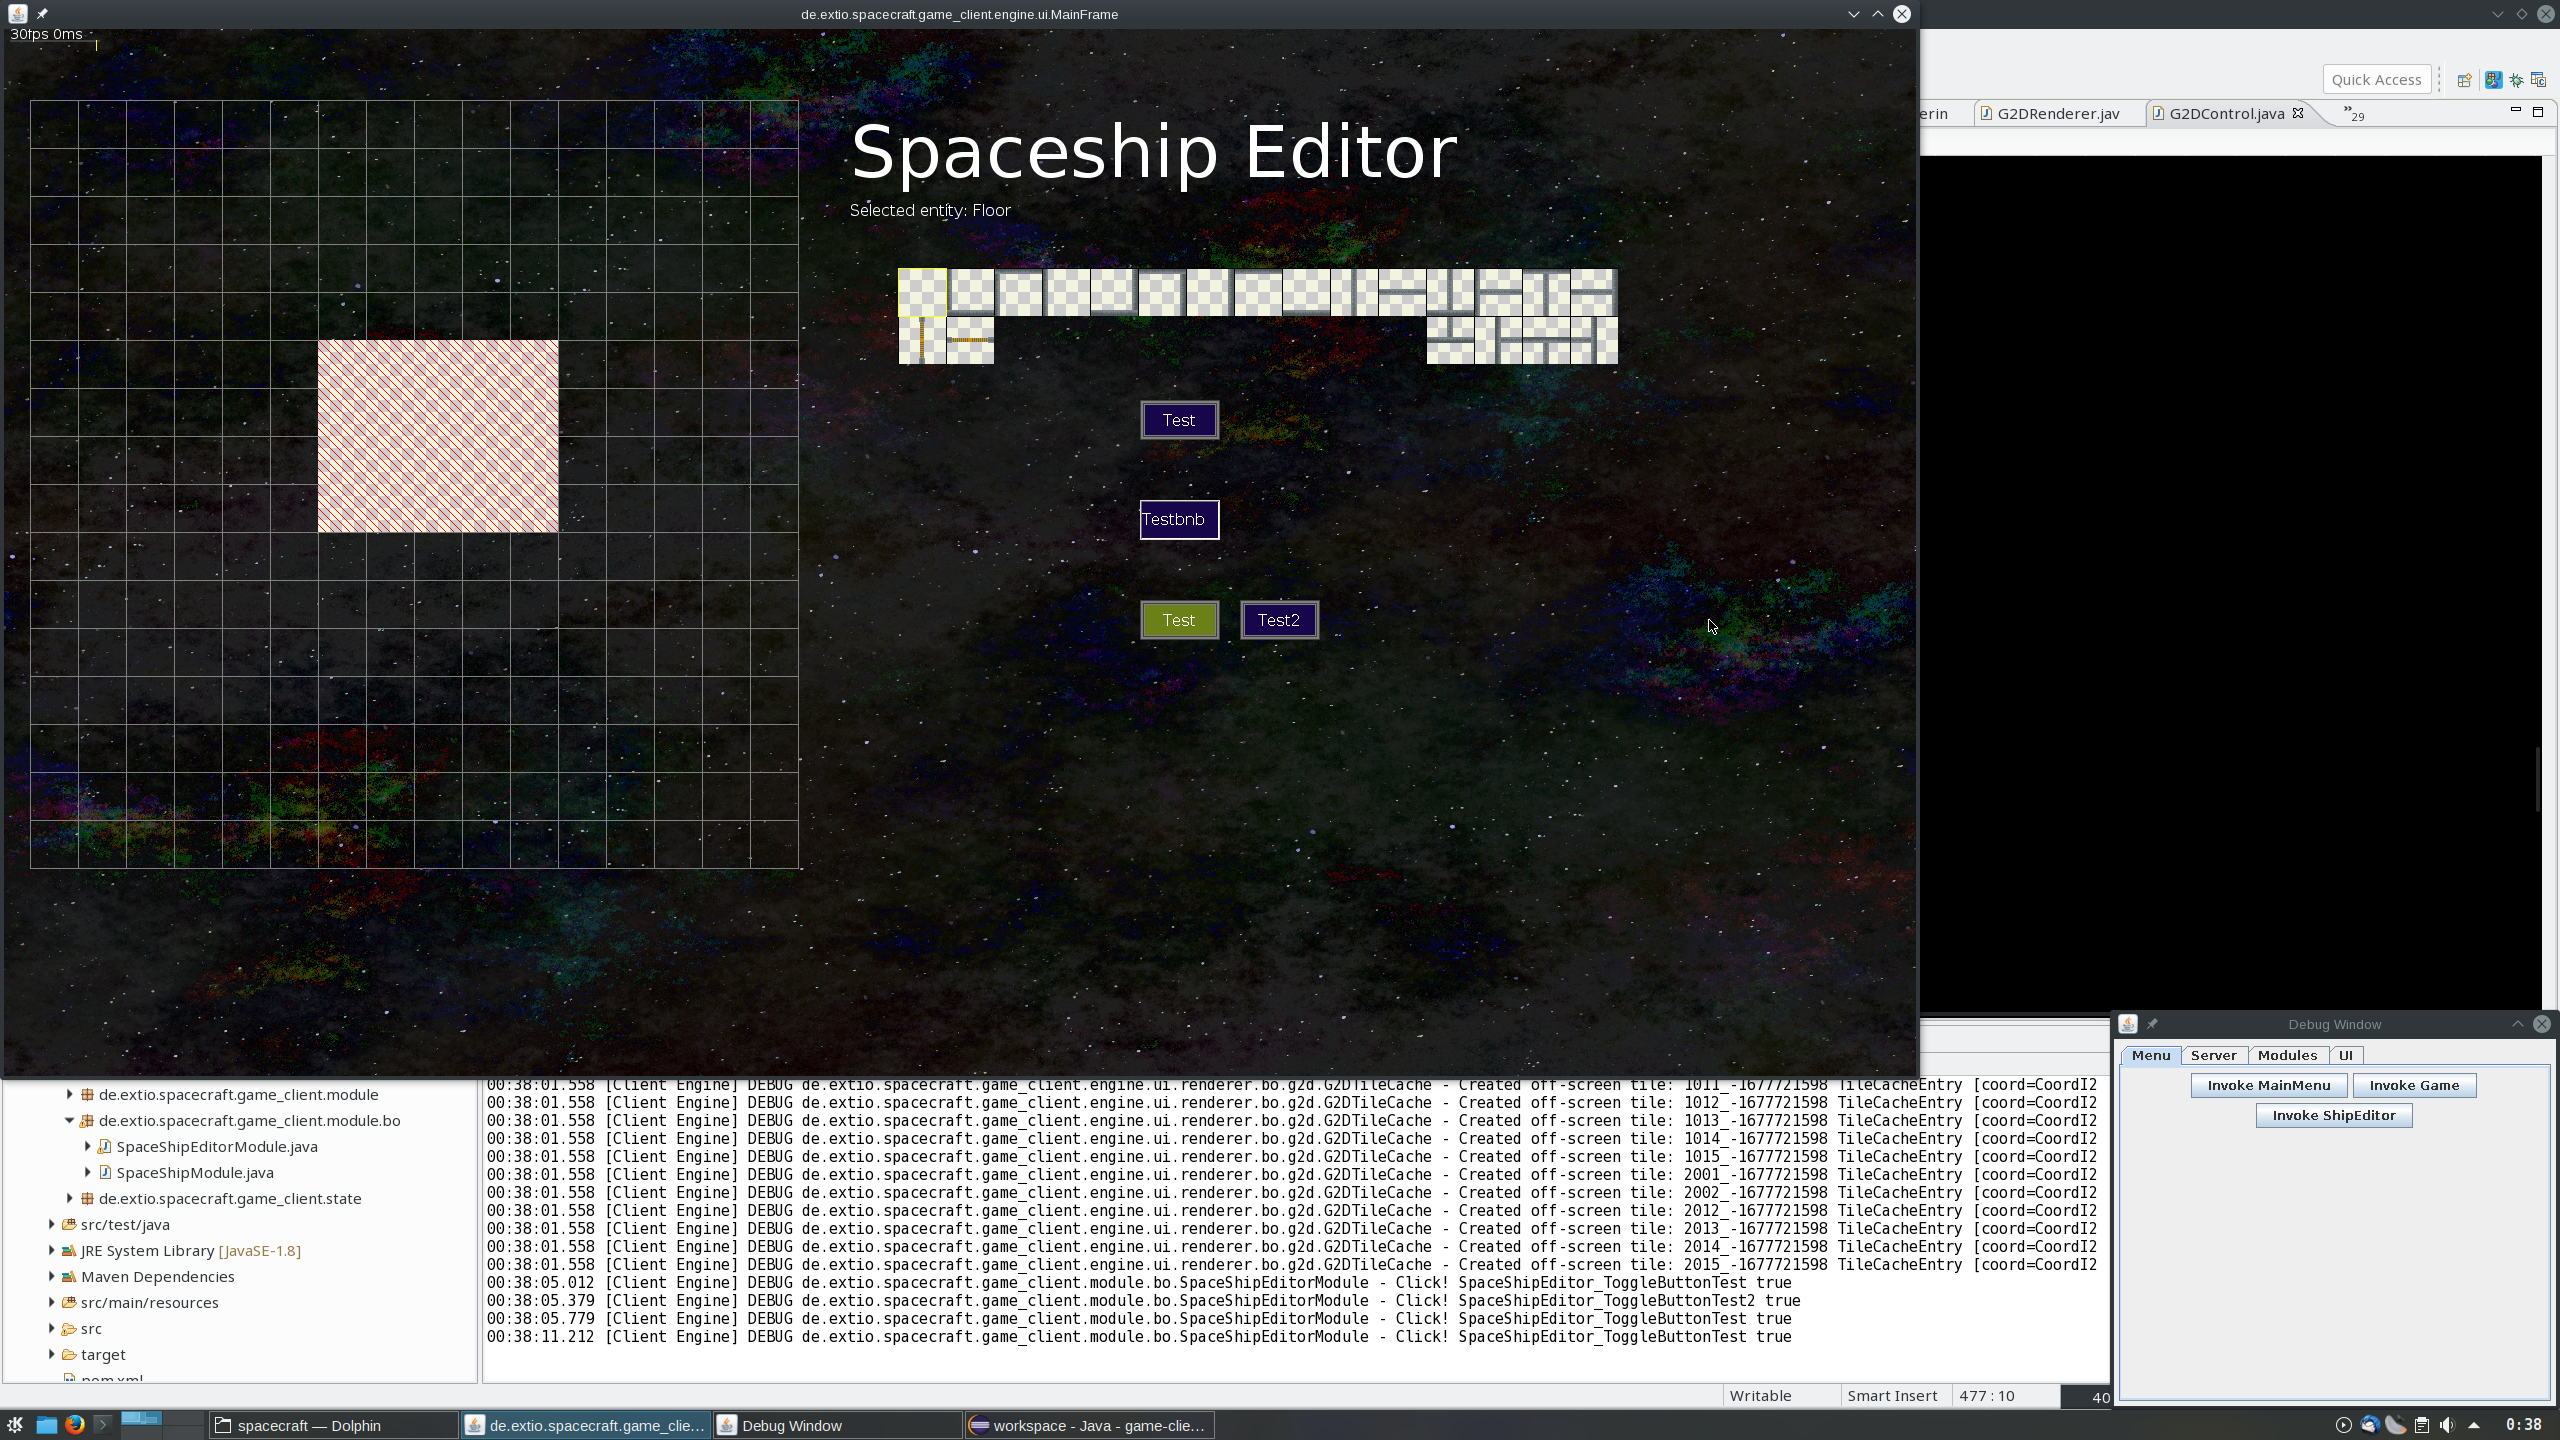
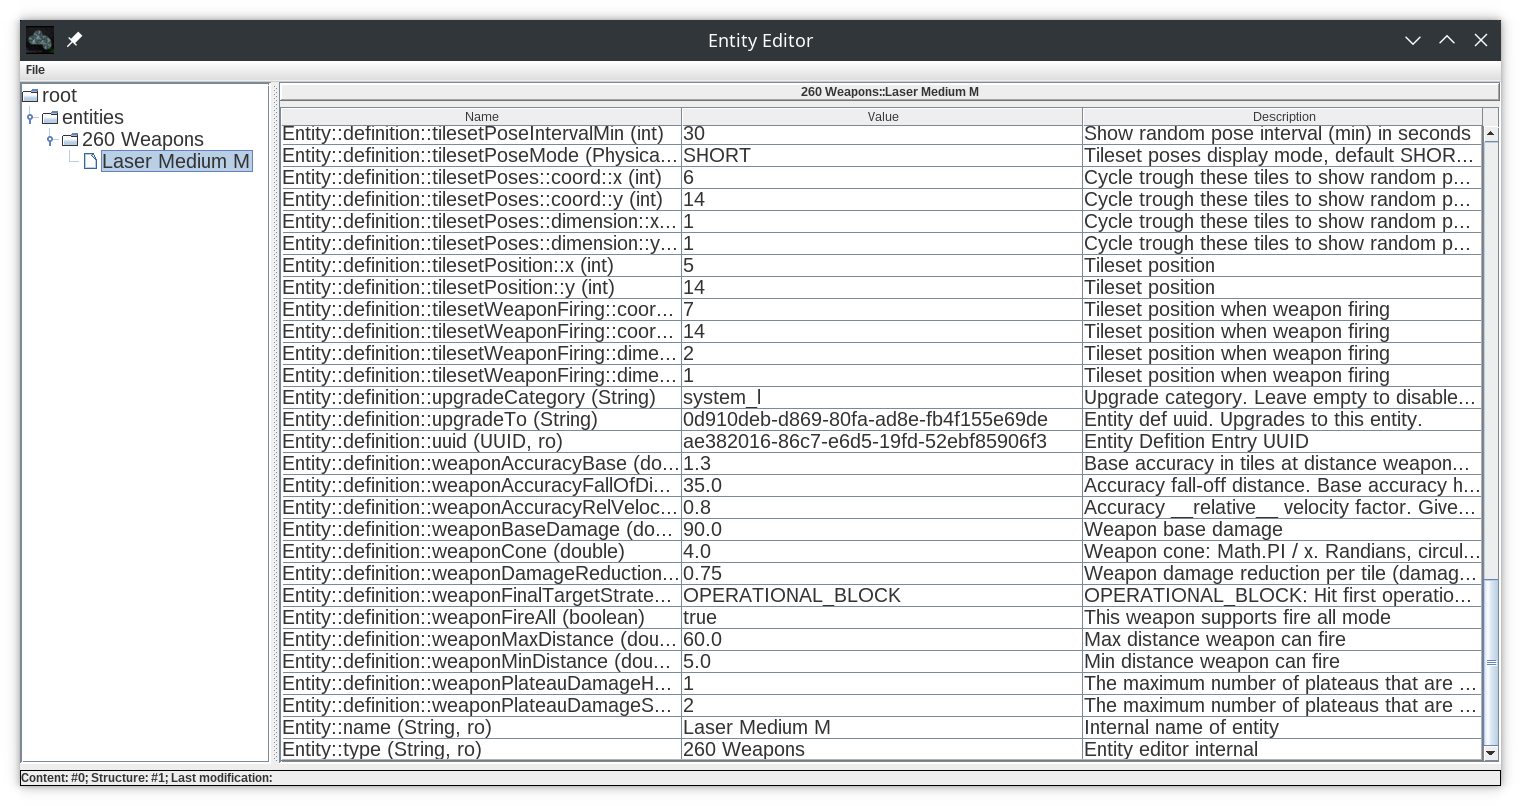
Entity Editor
This is a screenshot of the main window:
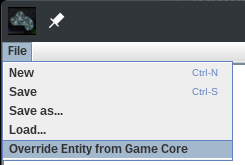
This is the File menu. You can create a new definition, load an entity definition or save it to disk. There is also an override function, this will be explained a bit later in this chapter.
The entities node in the list is the only node that is shown when you create a new file.
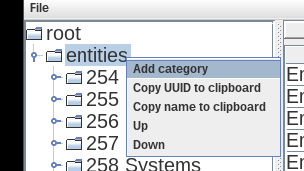
First you need to create a category. Right click on "entities" and select the menu entry "Add category"
Category names can optionally contain a localization id from i18n editor as prefix. This localization will then be shown in ship editor, otherwise just the unlocalized name. Example: "loc-123 Cool entities" - "loc-123" is the localization id.
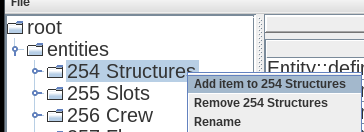
Next you can create an entity in that category. Right click on the category name and select "Add item to ..."
First you need to enter the name of your new entity. This is only a technical name that is not shown to the user.
Then you need to select the type of the entity. For groovy modders, the list shows all AbstractEntityDef classes that have been registered by Mod Manager.
Last you need to select the corresponding live entity type. It is important that the types of entity definition and live entity (the actual implementation) fit. If in doubt, select the entry with similar name.
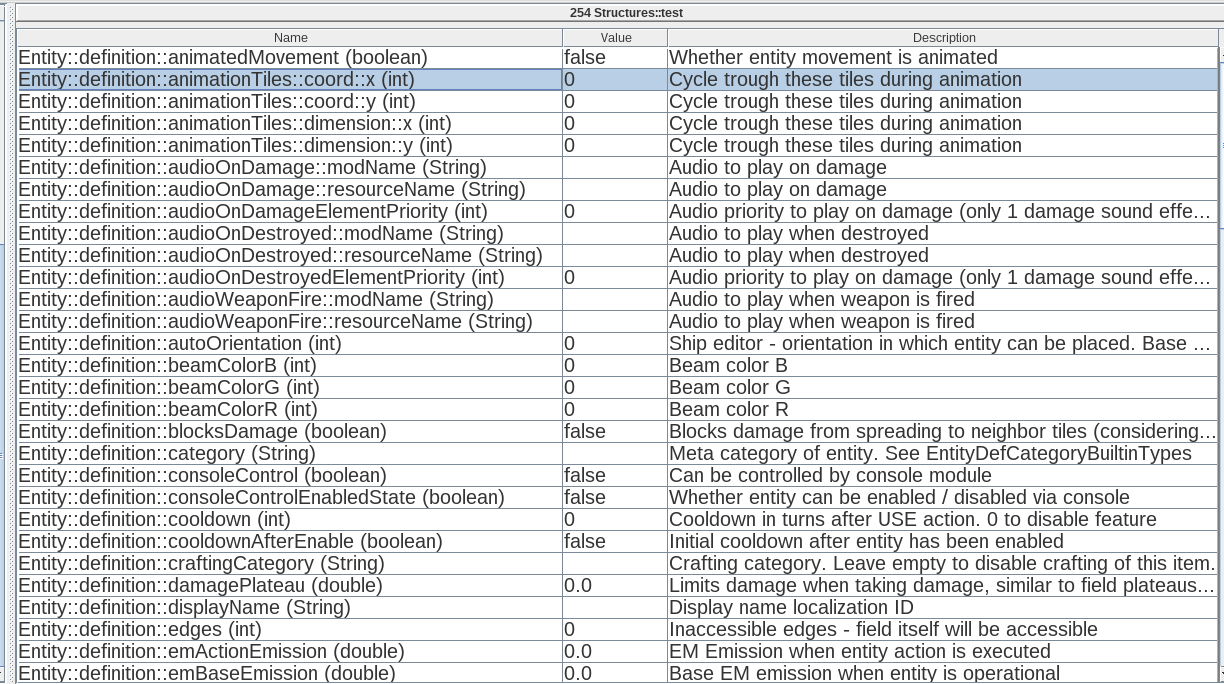
5. The last step is to configure all of the properties of your entity. Just enter it in the "Value" column in-place. Depending on the type of entity this can be overwhelming at the beginning. But every property has a explanation in "Description" column. There is also an override funtionality that takes over all properties from an existing entity, so you only need to do some specific changes. This is described more in detail below. It is also recommended to load the entity definitions from mods/last-outpost or bin/game-core and check how the entities are configured there. This will definitely help.
Overriding entities from game core
To override a entity from game core, your defined entity must have the same UUID (universal unique identifier). There is a functionality available for convenience to take over all properties from the existing entity.
Select "Override Entity from Game Core" in "File" menu
Select the entity you want to override
The category, entity name, UUID and all properties have been taken over. You can now edit the entity.
Graphics / Sounds
Steps
Create a working copy and do the basic setup and configuration, see Copy Files and mod.xml. Also the concept of Overriding is important to understand.
Place your images and sound files in the respective folders. See Folder structure
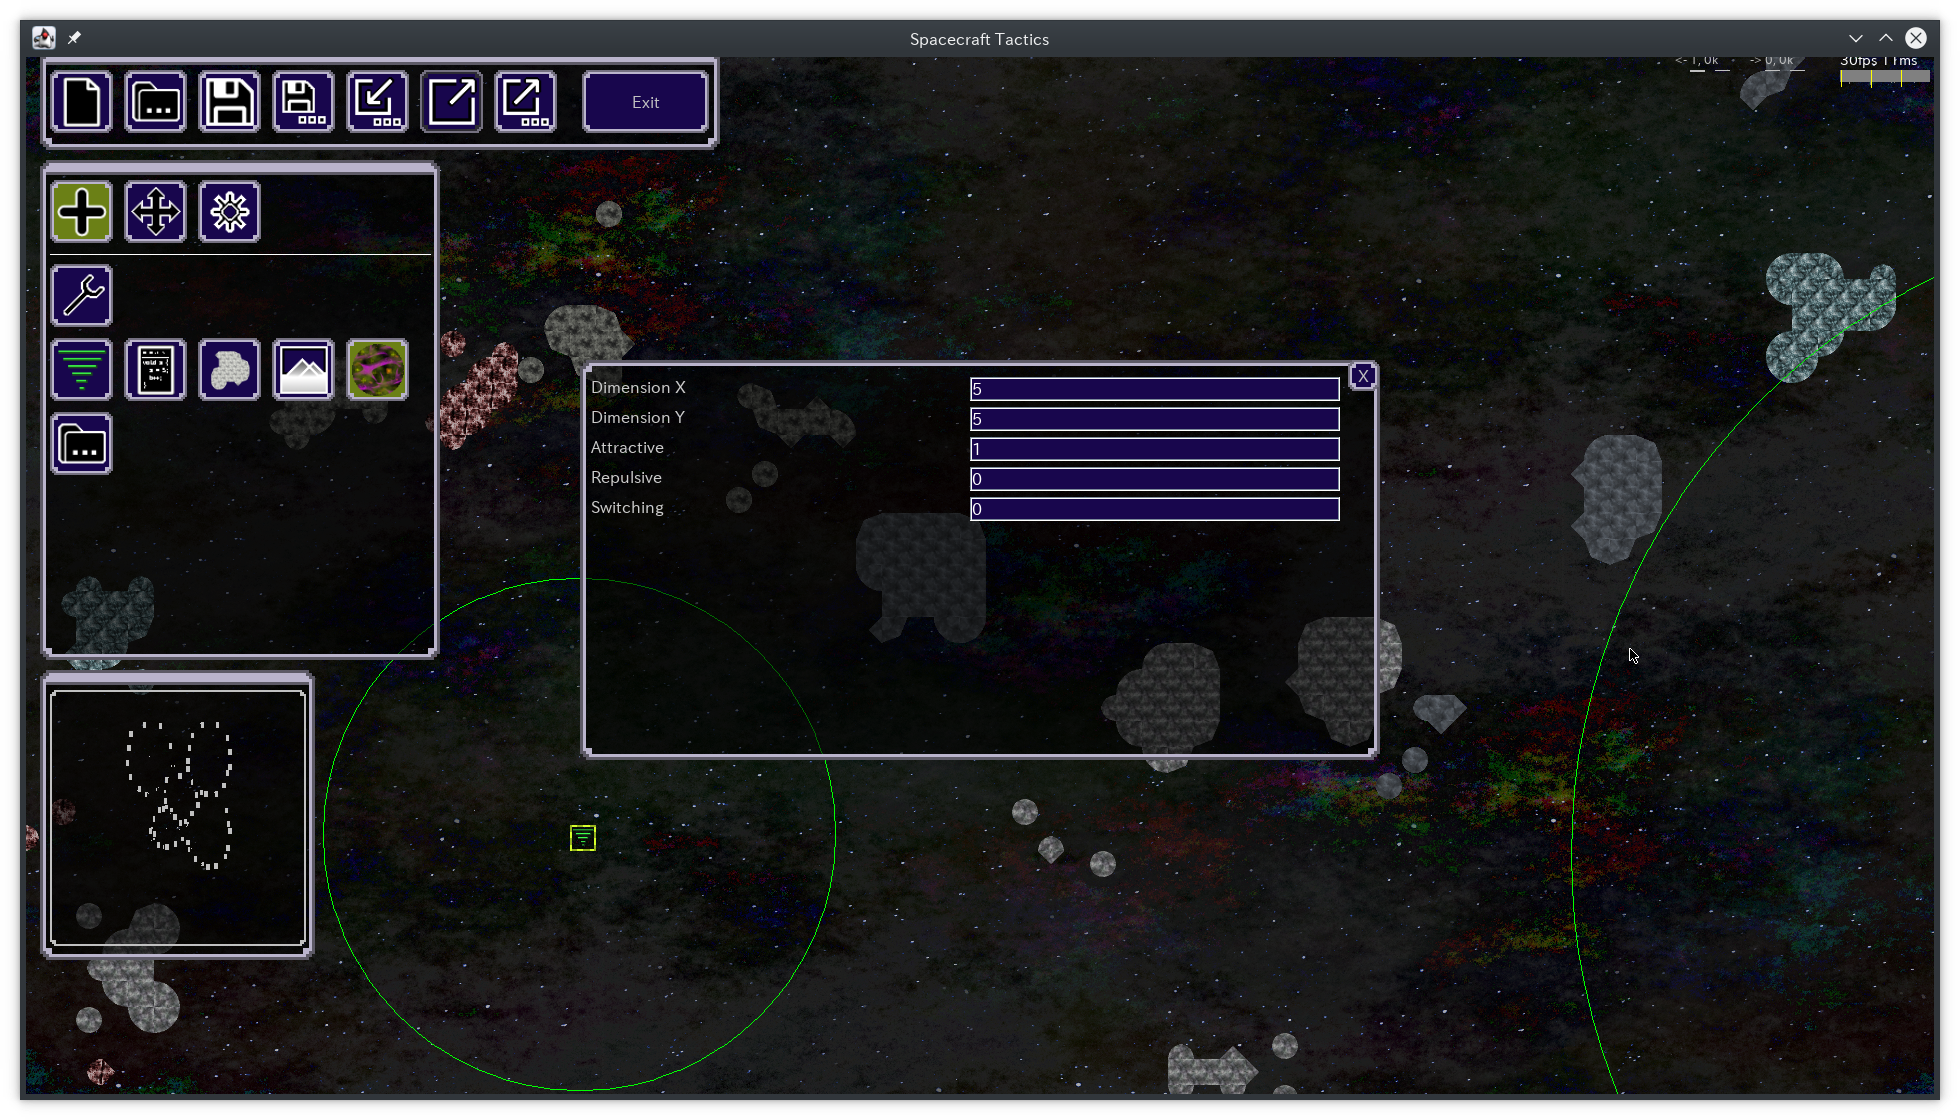
Images
Should be in .png (Portable Network Graphics) format.
Tilesets are orientated in a grid
The dimension of a tile is 64 x 64 pixels.
Examples, top left corner each
Tile position x0 y0 -> x0 y0
Tile position x1 y0 -> x64 y0
Tile position x2 y0 -> x128 y0
Tile position x3 y3 -> x196 y196
Sounds
Must be in .ogg (Ogg Vorbis) format
After you have created everything in entity editor, follow the steps at Publishing.
Scenes / Ships
You can bundle scenes (also known as stages, levels, scenarios) and ships with your mod. These scenes and ships can then either be selected by players when starting custom game mode or they can be hidden and loaded programmatically as part of your game mode (requires groovy scripting).
Create a working copy and do the basic setup and configuration, see Copy Files and mod.xml. Also the concept of Overriding is important to understand.
Place your scenes and ship files in the respective folders. See Folder structure
See the respective sub-sections to learn how to export files from scenes- or ship editor to the file system
After you have created everything in entity editor, follow the steps at Publishing.
Scenes
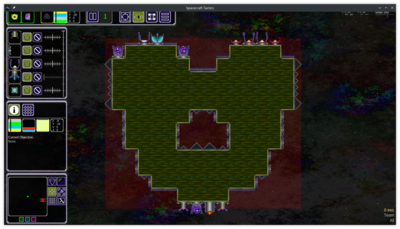
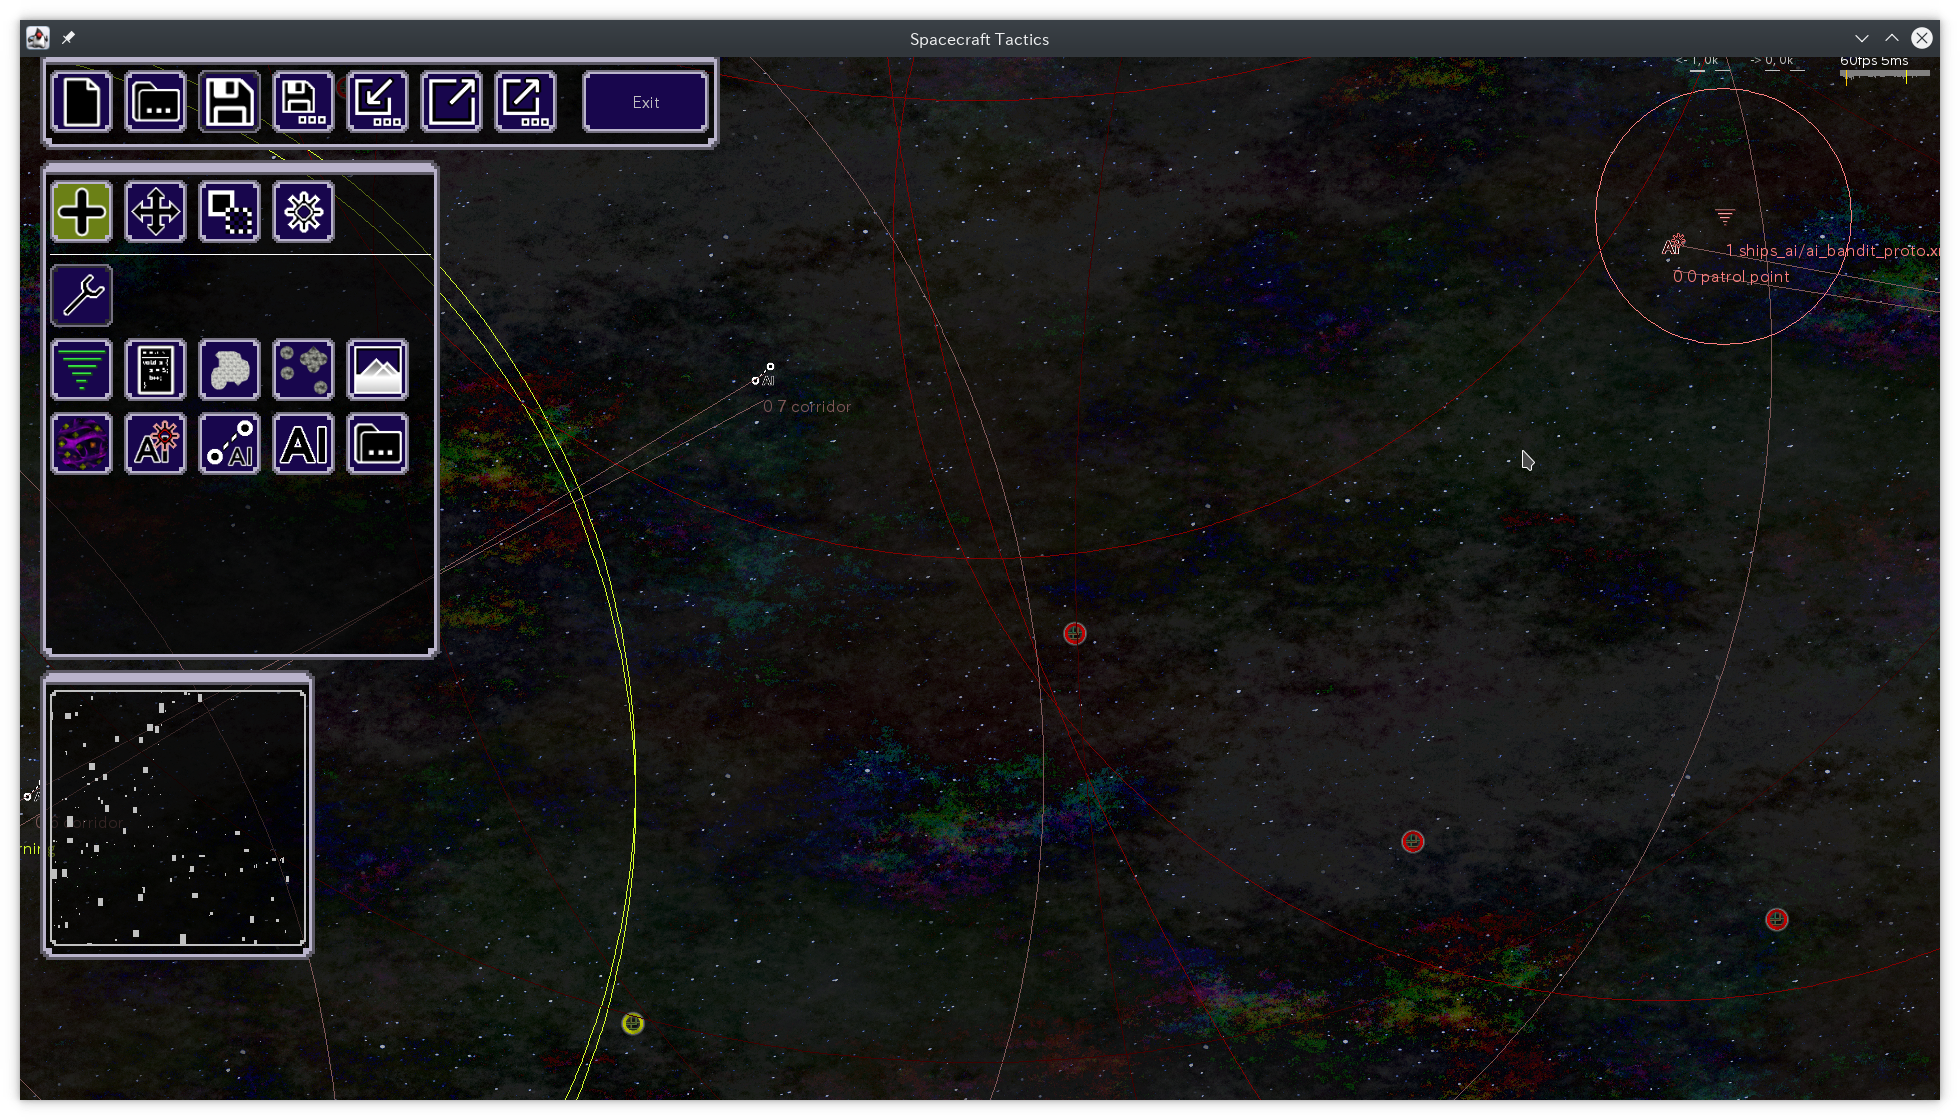
Start the scene editor from main menu "Editors" -> "Scene Editor"
Compose your scene by placing various elements from the menu on the left
Depending on your scenario, you may want to place spawn points for players, AI spawn points, asteroids or scripting entities.
It is recommended to import and check some of the shipped scenes to get an understanding how it is done
Import / Export scenes from / to file system
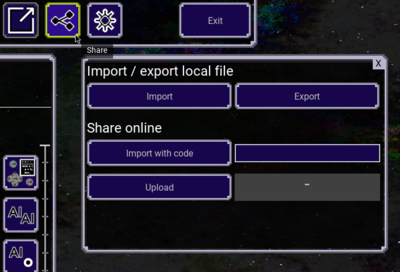
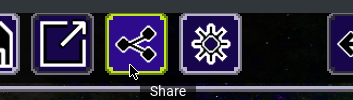
Open the share dialog
Import: Load a scene from file system
Export: Save a scene to file system
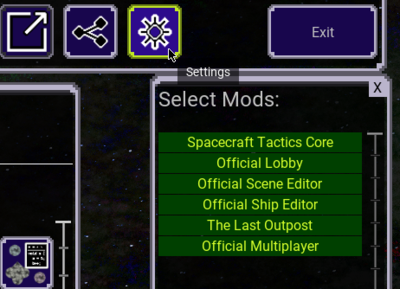
For groovy modders, it may be required to select your mod before you are able to see your factories. It is also recommended to deselect mods you don't want to use (this is especially true for custom mods to reduce dependencies of your scene - this makes sharing easier)
Your mod must be locally published before starting the game client
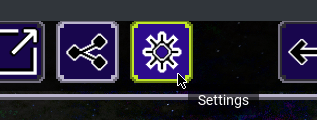
Click on settings
Select / Deselect mods
Ships
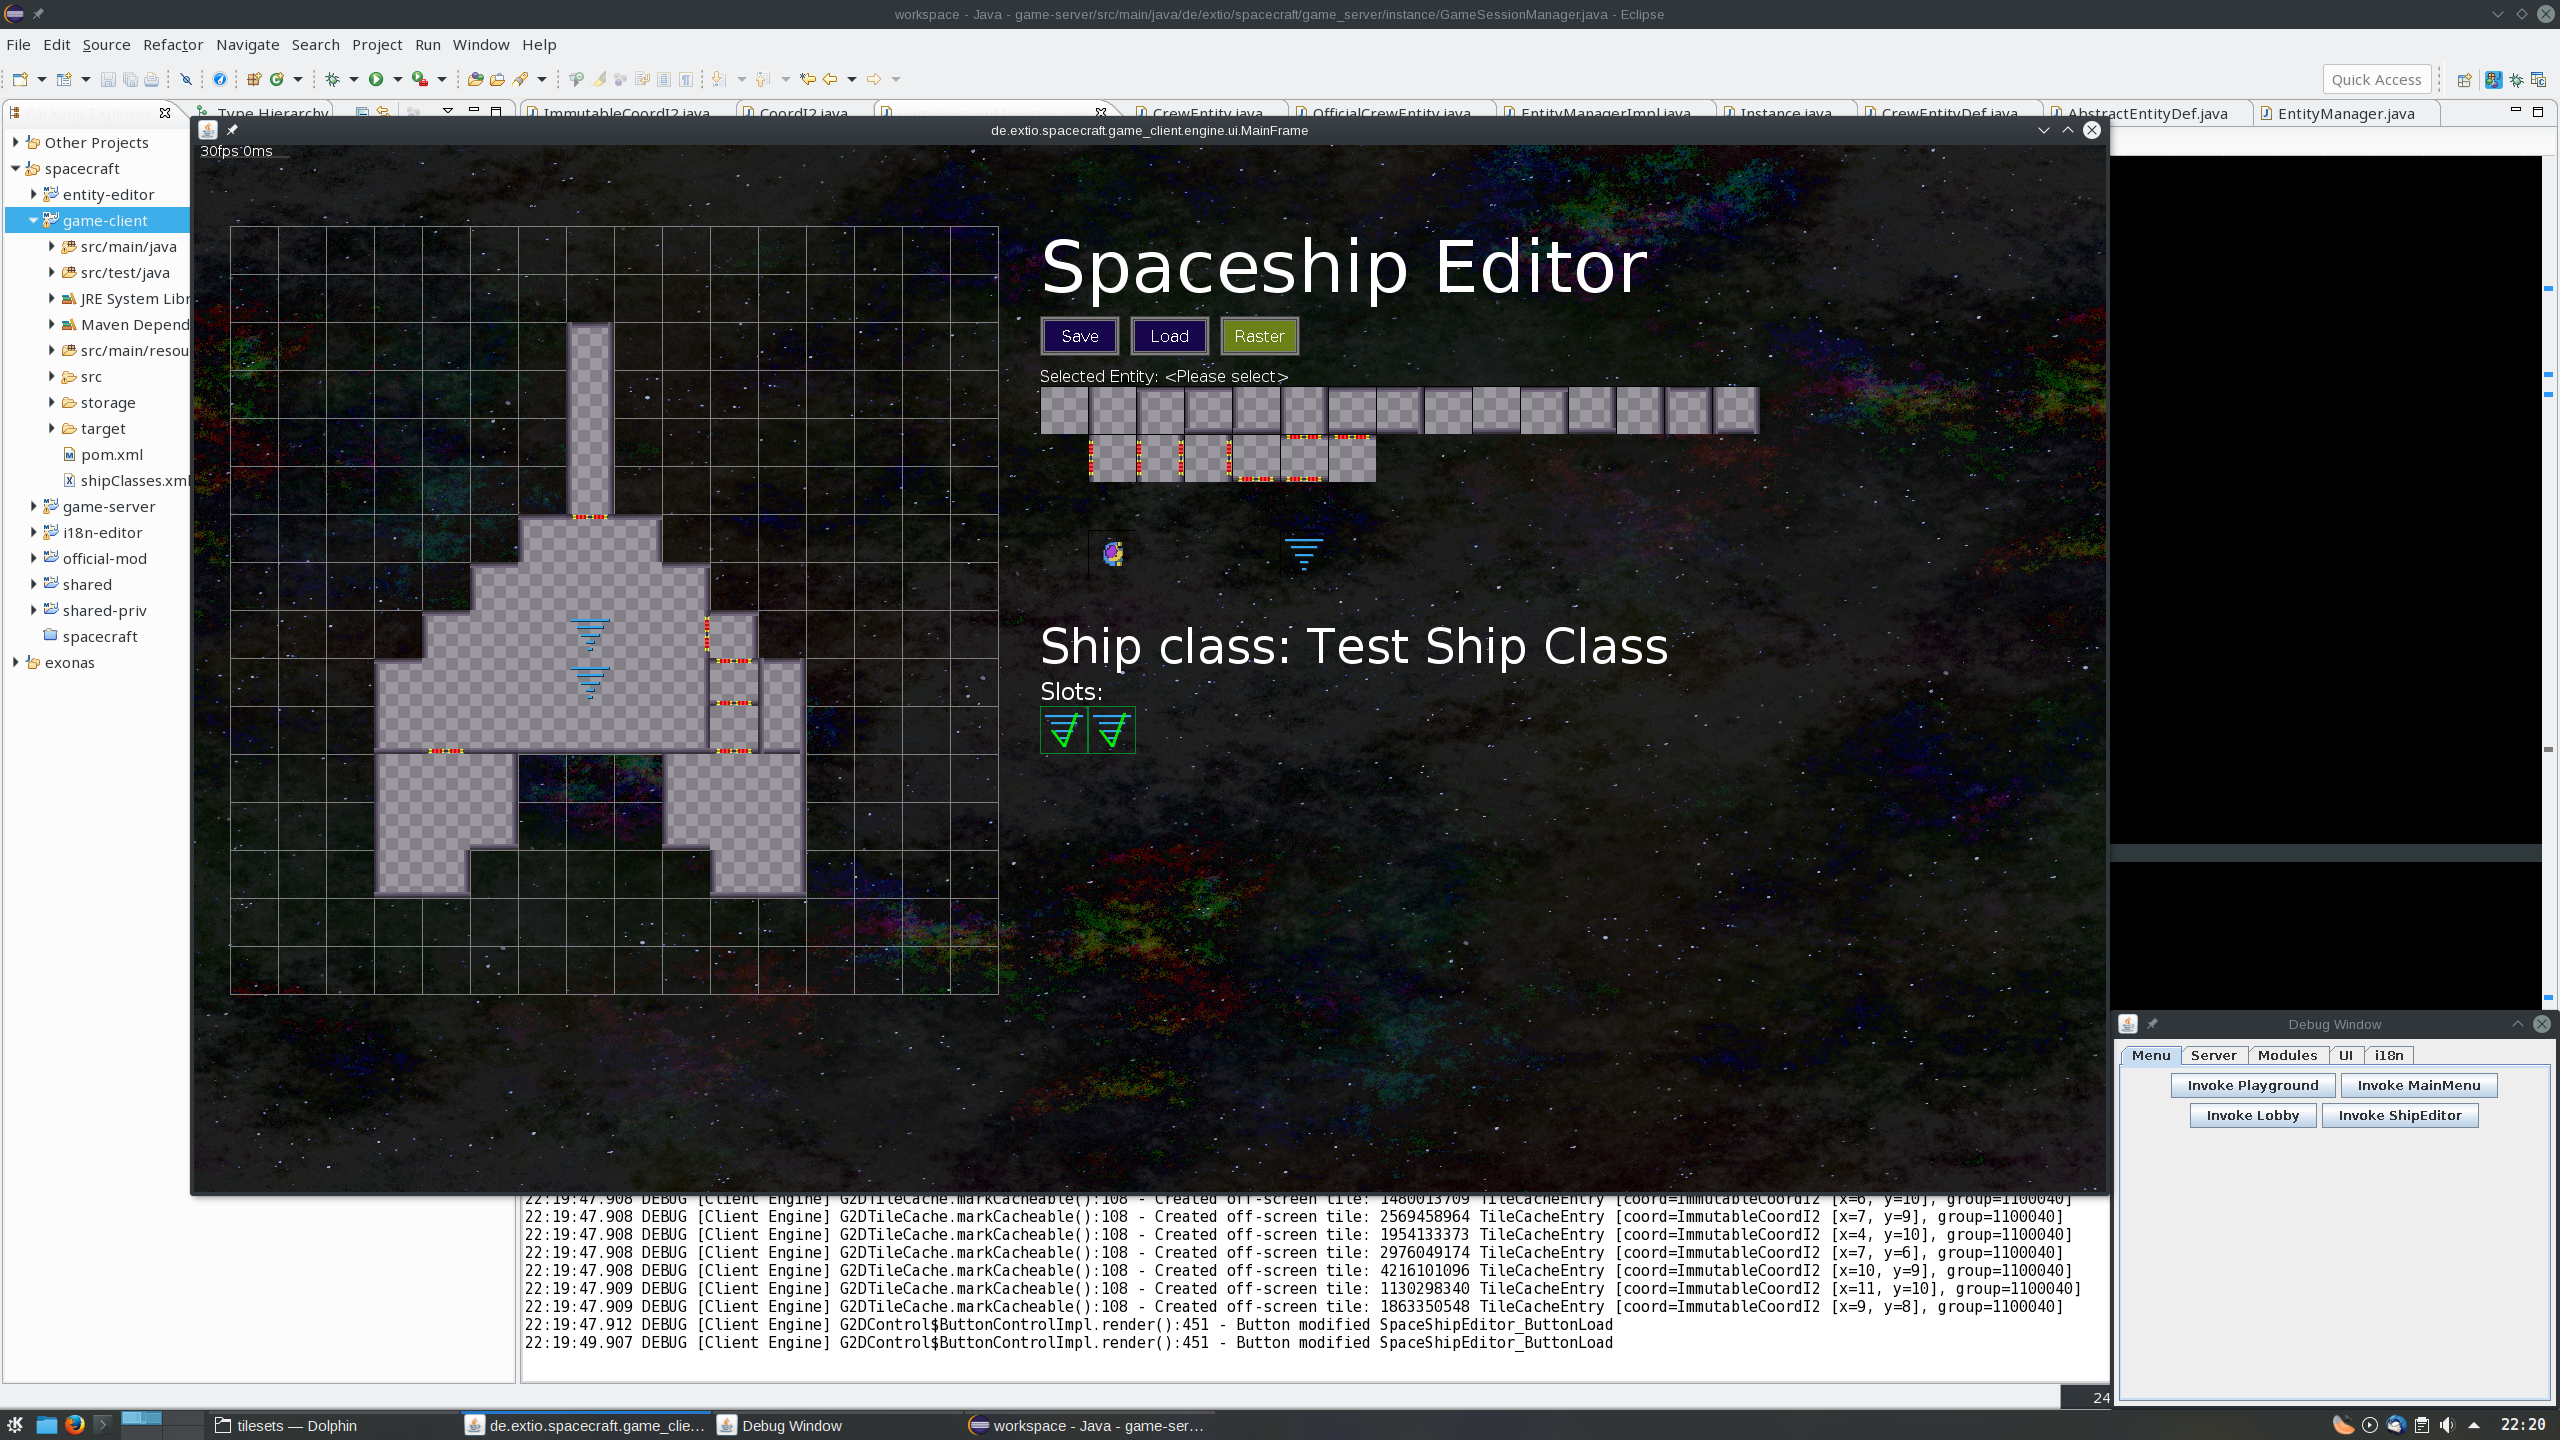
Start the ship editor from main menu "Editors" -> "Ship Editor"
Create your ship
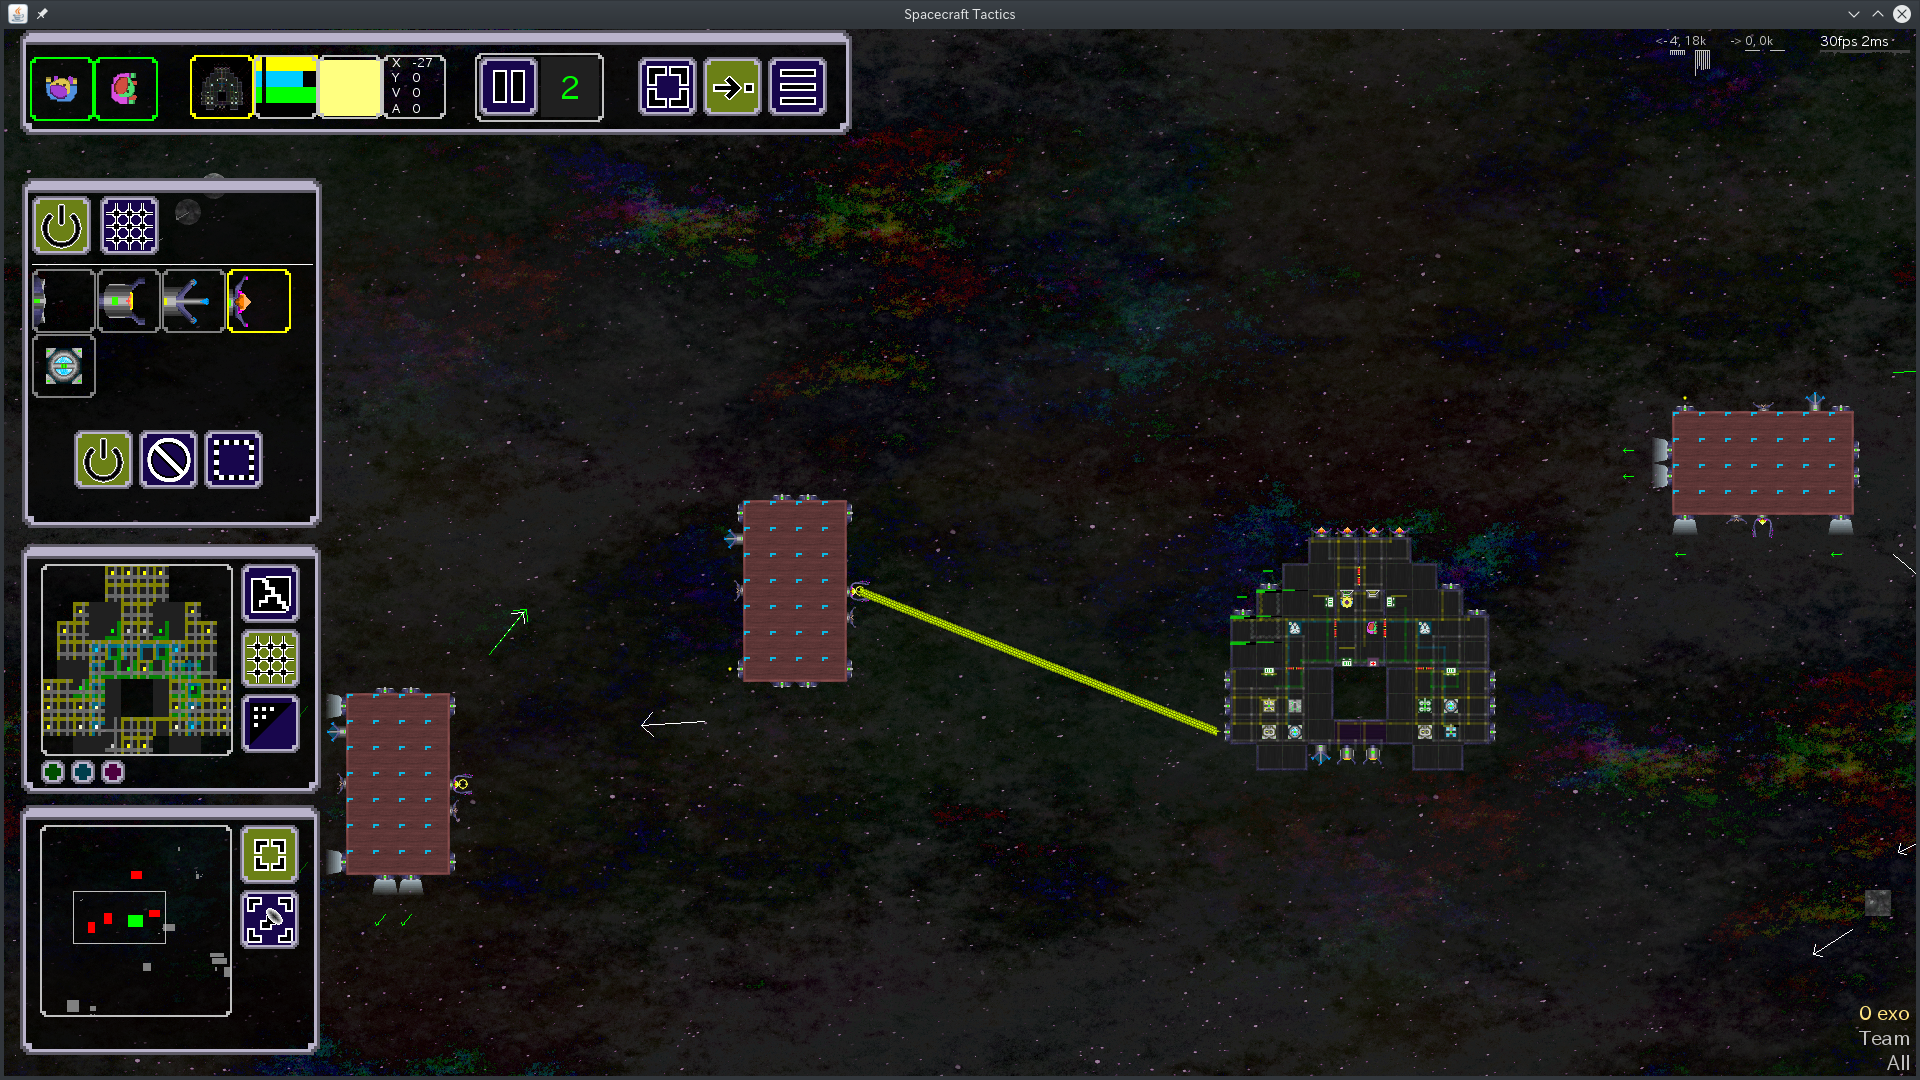
Entities
Your ship consists of several entities that you can place in the editor
Entities are layered, this means you can put several entities on top of each other. For example a typical tile may contain a floor, a wall, an energy conductor and a generator
Floor: Every tile that is part of your ship must have a floor
Wall: Your ship must be enclosed by walls. Otherwise it would decompress to space! It makes also sense to have several rooms in your ship, every room must be connected to other rooms with doors. Walls are quite heavy, so the more walls you have the less maneuverable will be your ship
Systems: There are different kinds of systems - generators, buffers / capacitors, active modules like weapons or sensors, propulsion, shield emitters, ... .
Many of them are also available in different sizes. Choose the size that is most appropiate for the selected ship class and your build.
Some systems must be placed inside of your ship (e.g. generators), others on the hull (e.g. weapons).
Grids: There are 4 grids in the game. All modules that are using a certain grid must be connected to each other with pipes / cables / conductors.
Energy: Power source for everything, needed by most active modules
Shield: Connects shild generators, -buffers and -emitters.
O2: O2 is needed by your crew to breath. Every room of your ship must have an air vent that is connected to a o2 generator.
Network: To be able to remote control any active module on a console (-> crew is logged in on a console) it must be connected to that console with a network cable (yes, spacecrafts still use wired ethernet! )
It is recommended to import and check some of the shipped ships to get an understanding how it is done
General options
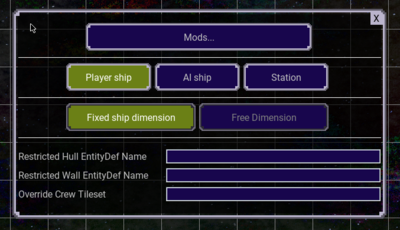
Open the settings menu
Select the mods you want to make use of in your ship. It may be required to select a custom mod first before you can see the entities.
You can choose from 3 types of ships:
Player ship: Players can use these ships
AI ship: These ships are meant for AI, so they are usually not assigned to a ship slot in lobby
Station: Derives from player ship, has no size limit and some other properties required for stationary space stations
Note, if a player selects a different ship type than player ship in lobby for a ship slot, the server tries to convert it to player ship first. This may fail with an error message in some cases, depending on the ship.
Import / Export ships from / to file system
Open the share dialog
Import: Load a ship from file system
Export: Save a ship to file system
Groovy scripting
Spacecraft Tactics has been designed from the ground up to be modular and support mods created by the community. Develop your own mods in groovy programming language, ranging from simple scripts for your scenes up to full conversions!
Most shipped game modes, including the campaign, are actually groovy mods!
The following chapters describe how to set up a project, where to find resources and documentation and will also go through code examples.
About Groovy
Spacecraft Tactics integrates Apache Groovy 3. Groovy is a programming language for the Java platform. It integrates seamless in the Spacecraft Tactics game engine and server core, which are developed in Java 11. You can implement groovy classes in 95% java syntax, at the same time groovy also allows you more flexibility by being an optionally typed and dynamic language and it also extends the java standard library.
In theory all you need is a text editor to implement your own scripts. Spacecraft Tactics loads and compiles your code when starting the game.
Of course using a proper IDE and making use of a maven project template will make your life much easier. This is described in the next chapters.
There is also a source jar of the shared library available that includes javadocs, see next chapter. This makes it possible that you see the documentation in your IDE while you are using the API.
Maven Repository
Apache Maven is a software project management and comprehension tool. It is best known as a widespread java build system.
There is a project template shipped with the game, containing a working pom.xml as well as all other mod files that are required. See also Copy files and Folder structure and explanations
Setup IDE
There are many popular choices out there how to develop java- and groovy code.
The following guide explains how to install + set up Eclipse IDE and import your project:
Go to the website of Eclipse Foundation and go to downloads. I recommend not to download the installer but go to "Download Packages" and get "Eclipse IDE for Java Developers". This contains the base setup you will need.
Go to the groovy-eclipse repository (groovy/groovy-eclipse) on github and follow the instructions there to download and install the groovy extension for Eclipse.
Select from the repository "Main Package -> Eclipse Groovy Development Tools" and "Maven Support -> Groovy Eclipse M2E integration"
Create your own project workspace in the file system by copying the mod template, see Copy files
Edit pom.xml in your project folder, change the artifactId and name
Import project in Eclipse
Go to File -> Import
Select Maven -> Existing maven projects
Choose as root directory your new mod folder where the pom.xml is
Finish
Debug and Test
You can use the following -D switch when starting the game to add your mod folder to the search path. This way you don't need to copy your mod every time to the game folder when you want to test it. It contains a comma separated (without space) list of mod base folders. In your case this is the folder where the pom.xml is. When using this property you have to also add the game core folder. Minimal example:
However, you need to start the client .jar with java directly instead of using the .exe or .sh launcher that is shipped with the game.
Change your current working directory (CWD) to the game folder and use the following command (change the paths):
If you want to debug your code using a debug socket, add these options before the -jar parameter: -agentlib:jdwp=transport=dt_socket,server=y,suspend=n,address=127.0.0.1:8000
Spacecraft Tactics has by default the Java Security Manager active. This is the most important line of defense against malicious mods code (a shame that it has been deprecated in later java versions, containers are not the answer for plugin interfaces!). In case you want to connect to the java process via JMX or use Java Flight Recorder, you can disable Security Manager by adding this parameter: -DsecurityManager=false
Attention! Don't load untrusted mods with security manager disabled, you will be fully exposed!
A good starting point to get an overview how Spacecraft Tactics internally works and therefore also to get an understanding where to find what in the API library is the technical presentation I've uploaded to youtube.
You can find it at External Links, search for Technical Presentation
Although the video is a bit lengthy (and I still had to cut a lot!), there are youtube timestamps available to skip directly to a chapter of interest
All of your classes must be in a groovy / java package below: de.extio.spacecraft.mod, for example de.extio.spacecraft.mod.my-mod-name.some-package. Classes not using that base package name will not be loaded!
If you are interested in developing a scripting entity that can be placed in scene editor, derive from this class: AbstractScriptingEntity
Shipped last-outpost and mp-official mods are also fully implemented in groovy and therefore the source code is available in the game folder under ./mods/ . You can check the implementations there
See also the code examples with explanations in the next section.
Code examples
Scripting entities
Scripting entities are an easy way to enrich your scenes with own logic. They can be placed in the scene editor to your scene and also receive some parameters entered in the scene editor.
Use cases are
Perform a certain action on client or server side when something entered a radius around the location where these entities have been placed
Implement general logic that is bound to that scene, for example a game logic controller for that scene
General declaration of scripting entities:
@ScriptingCompositeEntityFactorySelectable(custom0Label = "123", custom1Label = "234")
public class Xyz extends AbstractScriptingEntity {
If you add the @ScriptingCompositeEntityFactorySelectable annotation, your scripting entity will be shown in the scene editor when selecting the scripting entity. There are 5 custom fields a user in the scene editor can fill to provide parameters to your scripting entity. You can give these custom fields a label (i18n id) that the user understands what to enter.
Method onClientCompositeEntityRadiusEntered() is called on the client side on each turn when a new composite entity has entered the radius of the scripting entity. The radius can be entered when placing the scripting entity in scene editor.
In this example we are checking whether the composite entity that has entered the radius is the ship of the current player playering the game on the local game client. Never compare entities with == operator but always by equality of their UUID.
        ClientDialogMessage dialogMessage;
        if (StringUtils.isEmpty(this.custom0)) {
            dialogMessage = new ClientDialogMessage(ImmutableList.of("lo-7"), ImmutableList.<List<String>> of());
        }
        else {
            final List<String> displayIds = Arrays.asList(this.custom0.split(","));
            dialogMessage = new ClientDialogMessage(displayIds, ImmutableList.<List<String>> of());
        }

        EngineFacade.instance().dispatchMessage(dialogMessage);
This example then creates and sends a ClientDialogMessage, which can be used to display a certain message in the dialog window that appears on the upper part of the screen. In our example it accepts multiple lines of text comma separated and it display a fallback text "lo-7" (all are localization ids) if there were no texts entered in scene editor in the properties of the scripting entity.
Scripting entity: Server side action when ship entered radius
The full example can be found in the game folder under ./mods/last-outpost/storage/src/ , class de.extio.spacecraft.mod.last_outpost.stages.common.ActivateMission
Similar to the previous example. we are using onServerCompositeEntityRadiusEntered() this time which is the counterpart on server side. Note that any server method passes a GameSession, this is a very important context object. You can access all game session related data and also managers from there.
This time we are filtering for SpaceShips that are controlled by any player.
this.radius = 0;
We can set the radius of the scripting entity programmatically to 0. After that it will no longer receive any callbacks related to radius. This is useful if you want to execute an action only once.
The action in this entity is then sending a GameActionMessage to a module that is specific to last-outpost mod.
Scripting entity: Implement general logic for a scene
The full example can be found in the game folder under ./mods/mp-official/storage/src/ , class de.extio.spacecraft.mod.mp_official.arena.entity.ArenaBorder
onServerTurnPass2PostComposites() is executed on server side after all logic of all composites and entities has been executed at the end of a turn. It is a post-processing step in the pipeline. See also the javadoc.
The game logic in this script has 2 main functionalities:
Send a viewport effect from the server for displaying to the client
Implement a boundary of an arena that bounces back ships that cross it
    private sendViewportEffectEvent(GameSession gameSession, Area2 arena) {
        int i = 0;
        for (Area2 side : WorldUtils.getSides(arena)) {
            final ViewPortEffectEvent viewPortEffectEvent = new ViewPortEffectEvent(0, // 0 = infinite TTL, see comment about exclusiveId
                DrawEffectRenderingBoEffects.RECT_FILLED,
                COLOR,
                side.getPosition().add(1),
                null,
                null,
                null,
                ImmutableList.<CoordI2>of(side.getDimension().substract(2)),
                null,
                null,
                0,
                0.0d);

            final GameActionMessage gameActionMessage = new GameActionMessage("viewPortEffectEvent");
            gameActionMessage.setParameters(ImmutableMap.<String, Object> of(
                "viewPortEffectEvent", viewPortEffectEvent,
                "exclusiveId", "ArenaBorder_Border" + i++));// exclusiveId: ViewPortModule will replace the previous effect that is still active under that id. This approach is preferred over just providing an event TTL of the turn duration times framerate because remote servers will have fluctuating network latencies spanning multiple frames
            gameActionMessage.setArea(arena);
            ServerFacade.instance().publishMessageToAll(gameSession, gameActionMessage, true);
        }
    }
This method is executed on server side. At first glance it would be more natural to execute anything that renders something on the client side. This is definitely true in most cases, but I picked this example to point out a certain corner case: As you already noticed when playing the game, the client has a very limited viewport and everything is else is hidden by fog of war. In fact, everything outside of the viewport is not sent to the client at all. Therefore scripting entities are only active on client side when they are inside of the viewport of the player.
In our case we draw an effect that goes beyond of these viewports. Therefore we first create a ViewPortEffectEvent like on the client side and as a second step we send it to the client with a GameActionMessage. These messages are handled by the core viewport module.
On the client side, ViewPortEffectEvent usually have a time to live of 1 frame and are created again on every frame as long as it should be displayed.
On the server side, code is only executed with every turn. Therefore we set TTL 0 to have it displayed until it is explicitely invalidated and we also set an "exclusiveId" parameter on the game action message. The client viewport module will automatically invalidate previous events with the same exclusiveId.
The GameActionMessage also has an optional area set. This causes the server, although using publishMessageToAll(), to send it only to clients their viewport intersects with that area.
The exact properties of a ViewPortEffectEvent depend on the effect, best is to search in the shipped mods for certain effects and check their usage.
    private bounceShips(GameSession gameSession, Area2 arena) {
        for (SpaceShip ship : gameSession.getServerWorldManager().findBy(SpaceShip.class)) {
            if (! ship.isDead()) {
                Area2 checkArea;
                if (ship.getPrevPosition() != null) {
                    checkArea = WorldUtils.pointsToArea(
                            ship.getPosition(),
                            ship.getPosition().add(ship.getDimension()),
                            ship.getPrevPosition(),
                            ship.getPrevPosition().add(ship.getDimension()));
                }
                else {
                    checkArea = new Area2(ship.getPosition(), ship.getDimension());
                }

                for (Area2 side : WorldUtils.getSides(arena)) {
                    if (WorldUtils.intersects(checkArea, side)) {
                        CoordI2 arenaCenter = arena.getPosition().add(arena.getDimension().divide(2));
                        CoordI2 shipCenter = ship.getPosition().add(ship.getDimension().divide(2));
                        ship.setVelocityVector(arenaCenter.substract(shipCenter).toVNorm().multiply(5.0d));
                        break;
                    }
                }
            }
        }
    }
This method bounces back ships that crossed the boundary of the arena.
First it iterates over all SpaceShips, which can be queried from WorldManager. It also filters out ships with a dead crew.
After utilizing some utility functions from WorldUtils, which in general provides all kind of geometric helper functions, it checks whether a ship still intersects with the arena and if not it sets a new velocity vector that bounces it back into the arena toward the center.
Scripting entity: Stage controller
The full example can be found in the game folder under ./mods/last-outpost/storage/src/ , class de.extio.spacecraft.mod.last_outpost.stages.C3DepotCtrl
    private C3DepotServerState stageStatus;

    @Override
    public void create(UUID uuid, AbstractEntityDef entityDef, int entityDefIdx, UUID parentCompositeEntity) {
        super.create(uuid, entityDef, entityDefIdx, parentCompositeEntity);

        this.stageStatus = new C3DepotServerState(status: C3DepotState.START);
    }

    @Override
    public void update(AbstractEntity other) {
        super.update(other);

        if (other instanceof C3DepotCtrl) {
            if (other.stageStatus != null) {
                this.stageStatus = new C3DepotServerState();
                InvokerHelper.setProperties(this.stageStatus, other.stageStatus.properties);
            }
        }
    }

    @CompileStatic
    static class C3DepotServerState {

        C3DepotState status;

        UUID station;

    }

    @CompileStatic
    static enum C3DepotState {

        START,
        END

    }
This example shows how to implement a stateful scripting entity. If the state changes on server it is transferred to the client as well. The state is also persistent when a checkpoint has been saved and later loaded again.
C3DepotServerState is a data object containing the state. The server logic is also in state machine style -> C3DepotState
create() sets the initial state on server side when the entity has been created (That happens already in the scene editor!). update() is usually called when the game client receives an entity update from the server side to merge the new data to the existing fields. So the client does not just replace instances but there is merge logic in place - this is important because entities usually also have transient fields that would be lost when receiving new data from the server and just replacing instances.
    @Override
    public void onServerTurnPass1(GameSession gameSession) {
        super.onServerTurnPass1(gameSession);

        if (gameSession.isEditorMode()) {
            return;
        }

        switch (this.stageStatus.status) {
            case C3DepotState.START:
The actual scene controller logic implements a state machine. Note that onServerTurnPass1() is also called in scene editor when the scripting entity has been placed, but it would of course not make any sense to execute game logic in the editor. This can be checked with gameSession.isEditorMode().
Client Modules
The following examples show how to implement certain types of modules in the game client. Client modules contain game logic and can interact with the UI.
Client Module implementing a dialog
The full example can be found in the game folder under ./mods/last-outpost/storage/src/ , class de.extio.spacecraft.mod.last_outpost.module.client.GameOverModule
@CompileStatic
public class GameOverModule extends AbstractClientModule {
    private EnhancedWindow<Void> window;

    @Override
    public void onLoad() {
        final CoordI2 dimension = ImmutableCoordI2.create(800, 450);
        this.window = new EnhancedWindow<Void>("GameOverModuleWindow", true, false, null, {
            new Area2(EngineFacade.instance().getRendererControl().getEffectiveViewportDimension().divide(2).substract(dimension.divide(2)), dimension);
        });
        this.window.setDrawCloseButton(true);
        this.window.setRenderingBoLayer(RenderingBoLayer.UI1_BGR);
    }

    @Override
    public void onUnload() {
        this.window.close();
    }

    @Override
    public void onDeactivate() {
        this.window.releaseDragging();
    }

    @Override
    public void hide() {
        this.window.releaseDragging();
    }

    @Override
    public boolean onMouseDrag(final CoordI2 coord, final int button, final int modifiers) {
        return this.window.drag(coord);
    }

    @Override
    public boolean onMouseRelease(final CoordI2 coord, final int button, final int modifiers) {
        boolean handled = false;

        this.window.releaseDragging();
        if (this.window.intersects(coord)) {
            handled = true && !((ViewPortModuleSettings) EngineFacade.instance().getClientState().getState().get("ViewPortModuleSettings")).isViewportDragging();
        }

        return handled;
    }

    @Override
    public boolean onMouseMove(final CoordI2 coord, final int modifiers) {
        boolean handled = false;

        if (this.window.intersects(coord)) {
            handled = true;
        }

        return handled;
    }
This snippet shows how the EnhancedWindow utility is properly integrated in a client module. It helps to position, draw and manage virtual windows in the UI. Windows are not integrated natively into the game engine but are rather handled by that helper class and therefore must be connected to various module event handlers as shown above.
The draw method is called from runAfterEvents(), this ensures that any result of an event that has been handled (e.g. a mouse click) is already included when rendering the frame to keep the latency (UI lag) low.
this.window.render(renderingBo) adds RenderingBo for the window itself, below that follow the actual contents of the window.
DrawFontRenderingBo is a good example how to draw text on a window and ControlRenderingBo shows how to draw a button.
Check nested interfaces of ControlRenderingBo to see which other types of controls are available.
    private final static Map<Class<? extends Event>, Integer> RELEVANT_EVENT_TYPES = ImmutableMap.of(UiControlEvent.class, ClientModule.EVENT_PRIORITY_NORMAL);

    @Override
    public void onEvent(final Event event) {
        if (event instanceof UiControlEvent) {
            final UiControlEvent uiControlEvent = (UiControlEvent) event;

            switch (uiControlEvent.getId()) {
                case "GameOverModuleWindow_Close":
                    this.hideWindow();
                    break;

                case "GameOver_Load":
                    this.hideWindow();

                    CheckpointModuleSettings checkpointModuleSettings = (CheckpointModuleSettings) EngineFacade.instance().getClientState().getState().get("CheckpointModuleSettings");
                    checkpointModuleSettings.reset(false);
                    checkpointModuleSettings.setStatePrefixes(ImmutableList.of("lo-"));
                    checkpointModuleSettings.setShowLoadDialogImmediately(true);
                    checkpointModuleSettings.setAddSessionGameTime(true);
                    checkpointModuleSettings.setShowMainMenuLoadEntry(true);

                    EngineFacade.instance().getMenuLauncher().launch("checkpointClientModuleEmbedded");
                    break;

                case "GameOver_Quit":
                    EngineFacade.instance().getMenuLauncher().boot();
                    break;
            }
        }
    }
This is how events are handled. UiControlEvent is the way how events from controls (e.g. a click on a button) can be handled in modules.
The code shown above handles clicks on buttons like "GameOver_Load", which corresponds to .setId("GameOver_Load") you set on the control.
Controls are stateful in the renderer as long as the control (by id) is rendered with the next frame.
Client Module implementing a game mode
The full example can be found in the game folder under ./mods/mp-official/storage/src/ , class de.extio.spacecraft.mod.mp_official.arena.ArenaModule
@CompileStatic
class ArenaModule extends AbstractClientModule implements LobbyModuleGameModeSettingsView {
Client modules implementing game modes usually also implement interface LobbyModuleGameModeSettingsView to render game mode options to the player.
offset is a mutable coordinate that can be used to determine the current position where to render controls.
enable_ indicates whether controls should be enabled.
    private final static Map<Class<? extends Event>, Integer> RELEVANT_EVENT_TYPES = ImmutableMap.of(
        (Class<Event>) UiControlEvent.class, ClientModule.EVENT_PRIORITY_NORMAL,
        ...);

    @Override
    public Map<Class<? extends Event>, Integer> getEventSubscriptions() {
        return RELEVANT_EVENT_TYPES;
    }

    @Override
    public void onEvent(Event event) {
        if (event instanceof UiControlEvent) {
            if ("ArenaModule_Quit".equals(event.getId())) {
                EngineFacade.instance().getMenuLauncher().boot();
            }
            else if ("ArenaModule_Teams_FFA".equals(event.getId())) {
                final GameActionMessage gameActionMessage = new GameActionMessage("ArenaModule_Teams");
                gameActionMessage.setParameters(ImmutableMap.<String, Object>of("teams", ArenaConstants.TEAMS_FFA));
                EngineFacade.instance().dispatchMessage(gameActionMessage);
            }
Like already shown in the previous example, events from interactions with controls are handled by the module.
    private final static List<Class<? extends AbstractMessage>> RELEVANT_MESSAGE_TYPES = [GameActionMessage.class, ArenaInfoMessage.class];

    @Override
    public void onMessage(AbstractMessage message) {
        if (message instanceof GameActionMessage) {
            final GameActionMessage gameActionMessage = (GameActionMessage) message;

            if ("scene_transfer_complete".equals(gameActionMessage.getAction())) {
                this.sceneUploading = false;
            }
            else if ("scene_transfer_progress".equals(gameActionMessage.getAction())) {
                this.sceneProgress = ClientEntityDetailsSupport.decimalFormat.format(((Double) gameActionMessage.getParameters().get("p")).doubleValue() ** 100.0) + " %";
            }
        }
        else if (message instanceof ArenaInfoMessage) {
            this.arenaInfo.warmup = message.warmup;
            this.arenaInfo.finished = message.closed;
            if (message.endsAt != null) {
This module also handles messages, which are in this case coming from the game server.
GameActionMessage is the preferred way to exchange any kind of information between client and server (and vice versa) that is related to game logic.
ArenaInfoMessage is a game mode specific message sent by the related game server module to update the arena state on the client side.
    @Override
    public void runAfterEvents(List<RenderingBo> renderingBo) {

        if (EngineFacade.instance().getGame().getLocalPlayer() == null || ! EngineFacade.instance().getGame().getLocalPlayer().isInGame()) {
            return;
        }

        if (this.arenaInfo.warmup > 0) {
            this.renderWarmup(renderingBo);
            return;
        }
This is where the client side game mode logic is implemented. Please note that the run* methods are called at any state of the game, also in lobby. Therefore there is also a check implemented whether the local player is already in game.
This is an example how the client modules gets a countdown rendered before the battle starts. Absolute rendering positions are always in reference resolution 1080p (1920x1080), so you don't need to take the actual screen / viewport size into consideration. This is then scaled transparently by the renderer.
Server Modules
Server Module implementing a game mode
The full example can be found in the game folder under ./mods/mp-official/storage/src/ , class de.extio.spacecraft.mod.mp_official.arena.ArenaServerModule
@CompileStatic
class ArenaServerModule extends AbstractServerModule {
    @Override
    public ServerModuleType getServerModuleType() {
        return ServerModuleType.GAME_MODE;
    }
Server modules implementing game mode specific logic should return the correct type. These modules will then be activated and disabled together with the game mode.
It must also be defined in the game mode section of mod.xml, see mod.xml setup
    @Override
    public void onActivate() {
        final GameSession gameSession = ServerFacade.instance().getCurrentGameSession();
        gameSession.getGameModeOptions().put("teams", ArenaConstants.TEAMS_FFA);
        gameSession.getGameModeOptions().put("victory", ArenaConstants.VICTORY_TIME_LIMIT);
        gameSession.getGameModeOptions().put("limit", "10");
        // ...
There are usually certain initializations necessary when the module is activated. See also getGameModeOptions()
   private void setupShipSlots(GameSession gameSession) {
        int slots = gameSession.getShipSlots().size();
        int div;
        switch (gameSession.getGameModeOptions().get("teams")) {
            case ArenaConstants.TEAMS_2:
                div = (int)(slots / 2);
                break;
            case ArenaConstants.TEAMS_4:
                div = (int)(slots / 4);
                break;
            case ArenaConstants.TEAMS_FFA:
            default:
                div = 1;
                break;
        }

        for (int i = 0; i < slots; i++) {
            GameSessionUnprivilegedControlMessage gameSessionUnprivilegedControlMessage = new GameSessionUnprivilegedControlMessage();
            gameSessionUnprivilegedControlMessage.setShipSlotTeam(Integer.valueOf((int)(i / div) + (i << 16)));
            ServerFacade.instance().publishInternalMessage(gameSession, gameSessionUnprivilegedControlMessage, false);
        }
    }
This example shows how to manipulate ship slot properties with GameSessionUnprivilegedControlMessage.
Setting the team is special because it contains the ship slot index as well as the team number in one word - the first 16 bits contain the team number and the remaining ones the ship slot index.
This snippet is a condensed version of how to load ships to a ship slot that players can join programmatically.
   @Override
    public void onGameSessionUpdatePlayers(GameSession gameSession) {
        if (this.arenaState != null) {
            this.updateTeams(gameSession);
            this.publishArenaState(gameSession);
        }
    }
This method is called when a player joins or leaves the game session.
    private void loadScene(GameSession gameSession) {
        Scene scene = null;
        String arena = (String) gameSession.getGameModeOptions().get("arena");
        if (ArenaConstants.ARENA_CUSTOM.equals(arena)) {
            scene = this.scene;
        }
        if (scene == null) {
            String sceneFullName = StorageDefaultLocations.PLAYER_SCENES + "/arena/arena_" + arena + ".xml";
            String scenePath = StringUtils.substringBeforeLast(sceneFullName, "/");
            String sceneName = StringUtils.substring(sceneFullName, scenePath.length() + 1);

            scene = SCENE_CACHE.computeIfAbsent(sceneName, {
                List<StorageItemDescriptor> descriptors = ServerFacade.instance().getStorageManager().query(null, sceneName, null, null, scenePath, false);
                if (CollectionUtils.isEmpty(descriptors)) {
                    throw new RuntimeException("Scene not found: " + sceneFullName);
                }
                Scene loaded = ServerFacade.instance().getStorageManager().loadObject(descriptors.get(0), false, Scene.class);
                loaded.setLabel(sceneName);
                return loaded;
            });
        }

        SceneLoader sceneLoader = ServerFacade.instance().getBusinessObject(SceneLoader.class);
        sceneLoader.load(scene, ImmutableCoordI2.zero(), ClearMode.ALL);
    }
This is a good example how to load a scene.
Entities
First we need to create an entity definition for our entity.
@CompileStatic
public class StorageDisplayEntityDef extends StructureEntityDef {

    @FieldDescription("Tileset position half full")
    private CoordI2 tilesetHalf;

    @FieldDescription("Tileset position full")
    private CoordI2 tilesetFull;
Entity definitions define static properties of an entity (in the entity editor) and are independent of the entity implementation. For example all different kinds of laser weapons are just different definitions in the editor of the same implementation.
@CompileStatic
public class StorageDisplayEntity extends StructureEntity {
Our example extends StructureEntity, which is in most cases a good choice. Please check the class tree of entities to decide which base class suits best for your use case. Please note that although it's only weakly bound, the entity definition must also extend the counterpart StructureEntityDef. Mixing incompatible definitions and entity types has undefined effects.
This snippet shows how a field is initialized (create()) and updated.
It is required to initialize fields in create() instead of using just a field declaration because it is also called for certain special operations on an entity like copies or resets.
update() is an incremental update, usually when receiving data from the server to the client. Entities are updated incremental and can also have a transient state, therefore the client cannot just replace an existing entity with a new instance from the server but has to merge it. In particular the merge logic is implemented by the entity itself in update().
It is also advisable to do an instanceof check, because update() is also called when converting an entity from one type to another. With these instanceof checks this mechanism can then keep fields that are compatible to both types (e.g. common parent classes).
    private transient int clientDrawActiveFrames;

    @Override
    public void localInit(AbstractEntityDef entityDef) {
        super.localInit(entityDef);

        this.clientDrawActiveFrames = 0;
    }
This is an example of transient fields. Transient fields are not transferred between server and client.
localinit() is called on client and server side when the entity is added initially to EntityManager
It is required to initialize transient fields in localInit() instead of using just a field declaration because it is also called for certain special operations on an entity like copies or resets.
Check the API reference for AbstractEntity and it's sub-classes to learn more about possible overrides, event handlers and run methods.
To use your entity in the game, usually you also need to define it in the entity editor. The entity editor loads like the game client all mods at startup, so it should display your new entity after it has been deployed with the mod to the game folder.
I have successfully founded my sole proprietorship (yes, this takes 3 months in Germany and no, I don't need a dumpster for my business!) and am now registered in the Steamworks Developer Program.
The game is now in release candidate state and will probably release end of November!
By clicking on one of these links, you are leaving this web site!
Responsibility for the content of external links (to web pages of third parties) lies solely with the operators of the linked pages. No violations were evident to us at the time of linking. Should any legal infringement become known to us, we will remove the respective link immediately.
Technical Presentation about the game.
It explains a lot of the internals and is recommended to watch if you want to develop your own mods in groovy code
In the past months I did a lot of playthroughs of the compaign, taking care that the game feels like I intend. This of course includes balancing and bug fixes, but also testing the game on different PC platforms (from recent high-end AMD and Intel PCs to a 15 years old Windows 7 PC) and doing game optimizations to make sure that the game will run on all of these platforms well. Of course also tested it on different operating systems, including all Windows versions from 7 to 11 and various Linux Distributions of similar ages.
Additional game modes have also been implemented:
Arena: Multiplayer PvP and PvE arena, free for all or in teams
Battles: Multiplayer PvE battles against ai enemies. Features ship progression between the fights
Race: Race mode to chase for highscores or to test your ship controlling skills against your friends
I also finished other items on my list like global highscores and finishing the Mod SDK that will be shipped with the game.
I still have to do more testing and I also need to take care of legal aspects and prepare everything that is needed for publishing.
It will still take some time until the game can finally be released, but it will be definitely this year!
the creation of game content reached an important milestone:
The campaign can now be played from the beginning to the end!
There is still a lot more to do, especially side quests need more content. Other than that, my focus will shift from creating content to a lot of play testing to fix any glitch I can find and also to polish game balancing.
I still can't tell when the game will be released, but it's getting closer!


 See screenshot
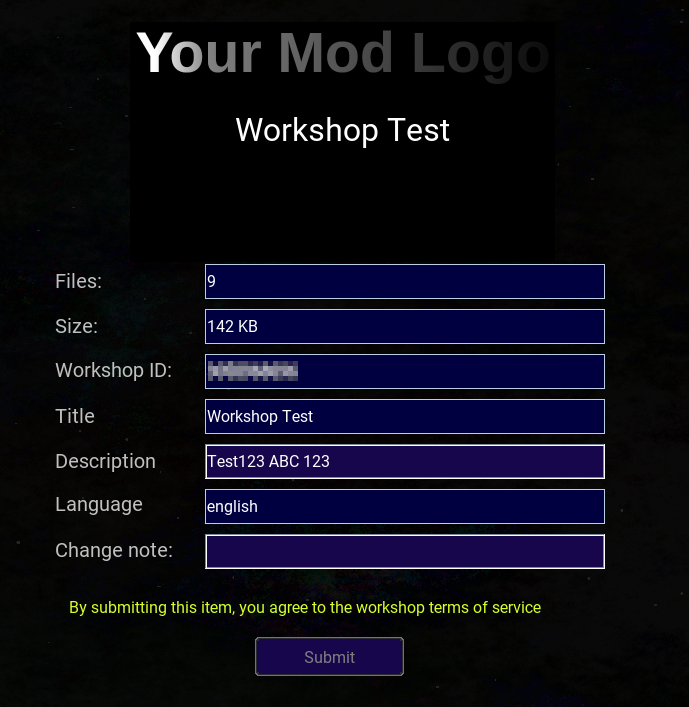 You can do initial uploads as well as updates. In case of an update there is already a Workshop ID displayed.
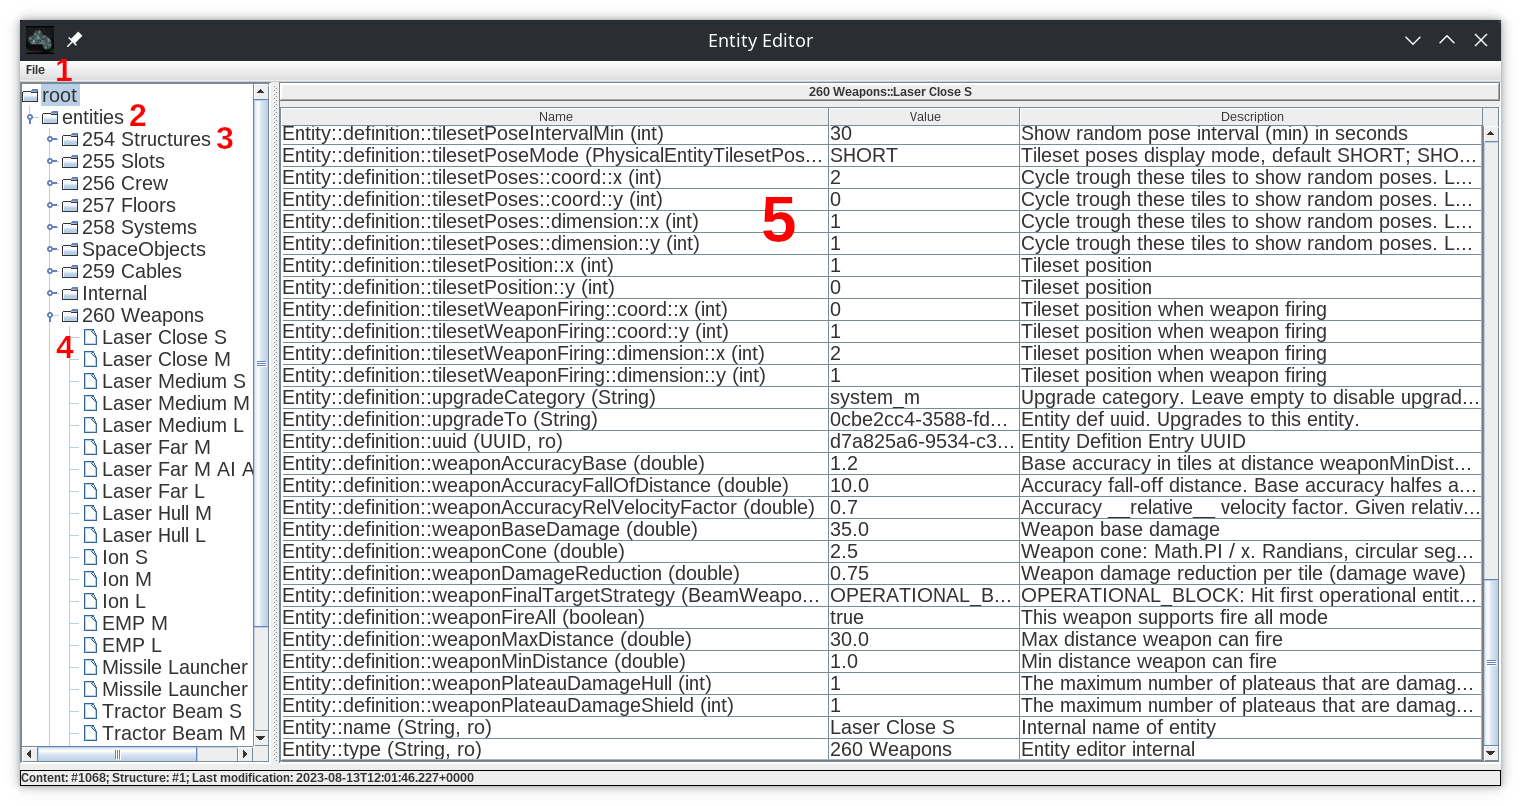
 First you need to enter the name of your new entity. This is only a technical name that is not shown to the user.
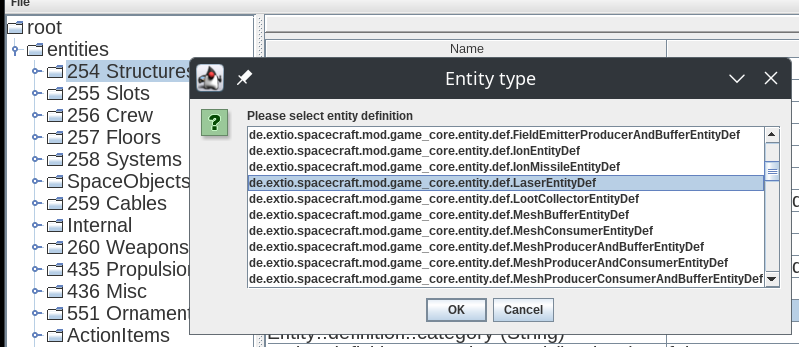 Last you need to select the corresponding live entity type. It is important that the types of entity definition and live entity (the actual implementation) fit. If in doubt, select the entry with similar name.
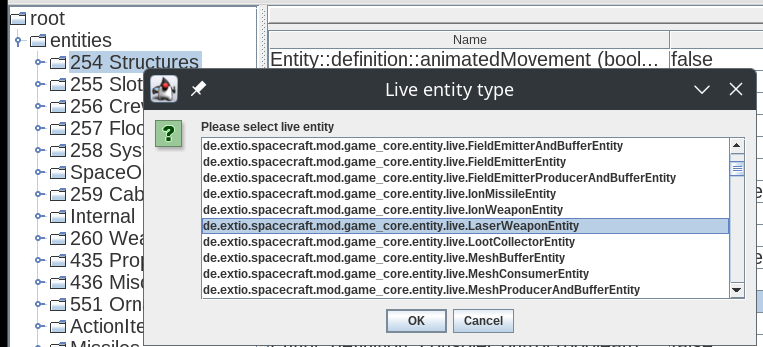
 Select the entity you want to override
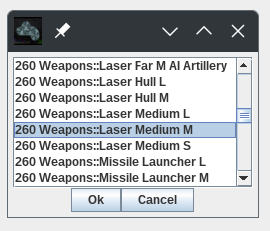
 )
)
 Import: Load a ship from file system